How Teams Use Jira Integration in Robonito to Streamline QA Communication
In software testing, having all team members working on the same page is quite important, as it helps them stay updated on any bugs or feature updates to the a...

Introduction
In software testing, having all team members working on the same page is quite important, as it helps them stay updated on any bugs or feature updates to the application. Having clear communication within the team is the key to having quality development of the software application. However, one of the major challenges that teams face is the loss or delay in getting crucial information. This issue is solved by Jira integration, which allows the team to align the workflow across diverse roles and keep everything in sync.
Jira is more of an agile project management tool that promotes communication within a team to execute detailed testing, bug fixing, help in the release schedule, track results, and test different product lines. This is enhanced with a powerful feature with Robonito integration for Jira.
Robonito is a no-code test automation platform. When you connect Jira with Robonito, both tools work together to make your testing workflow smoother and more connected. It will allow you to share test results, report bugs, and connect directly through Robonito without switching between platforms.
In this tutorial, we will discuss the key steps that you have to follow to integrate Jira in Robonito and how you can make its best use.
How to Integrate Jira in Robonito
Before you start connecting Jira with Robonito, there is one important thing to set up first — connecting Robonito with either Google Gemini or OpenAI. This step is necessary because it allows Robonito to use AI-powered features while integrating Jira.
Let us go through each step carefully so you can set everything up without confusion.
Prerequisite: Connect Robonito with Google Gemini or OpenAI
Step 1: Connect Robonito with Google Gemini or OpenAI
If you are using Google Gemini
Follow these steps to get your Google API key:
- Open Google AI Studio in your Chrome browser.
- On the left sidebar, scroll down and click “Get API key.”
- In the console that opens, click “Create API key.”
- You can either choose “Create API key in existing project” or make a new project.
- Once the key is generated, copy it — this key will be used to connect Robonito with Gemini.
If you are using OpenAI
Here is how you can get your OpenAI API key:
- Search for “OpenAI API key” on Google and open the official OpenAI link.
- Log in to your OpenAI account.
- Click on “Create new secret key.”
- Give your key a name (for example, Robonito Key).
- Copy and save the generated key — you will need it soon to connect Robonito.
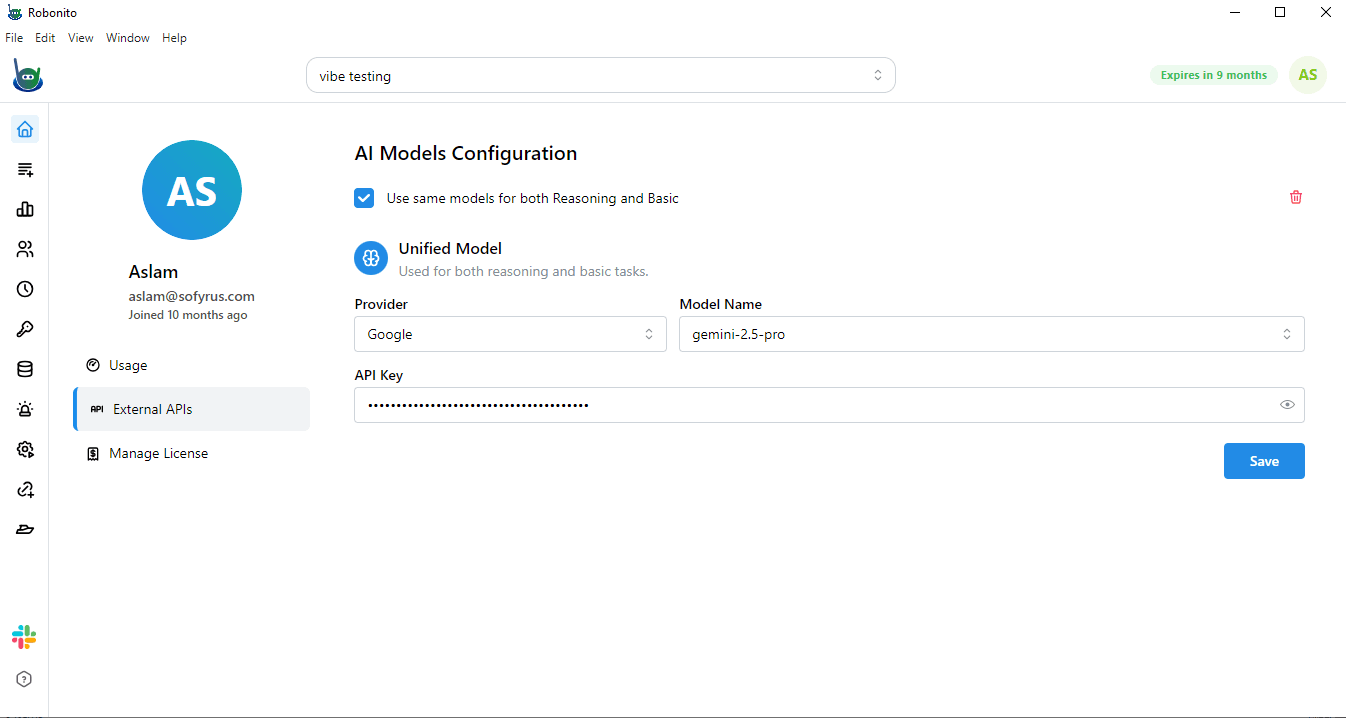
Step 2: Add Your API Key in Robonito
- Log in to your Robonito dashboard.
- In the top-right corner, click your profile picture.
- A small menu will appear — from there, click Settings.
- On the Settings page, look at the left sidebar and select External API.
- This is where Robonito lets you connect with outside services like Gemini or OpenAI.
- You will see a field labeled Google API key and a section called AI Model Configuration.
Once this prerequisite setup is complete, you can move on to connecting Jira.
Steps to Integrate Jira in Robonito
Now that your AI configuration is done, let us integrate Jira with Robonito. This process allows Robonito to send test results and issue details directly to Jira.
Step 1: Open the Integrations Section
- Go to your Robonito dashboard.
- On the left-hand panel, scroll down until you see the Integrations option (it is usually located at the bottom).
- Click on Integrations to open the integrations page.
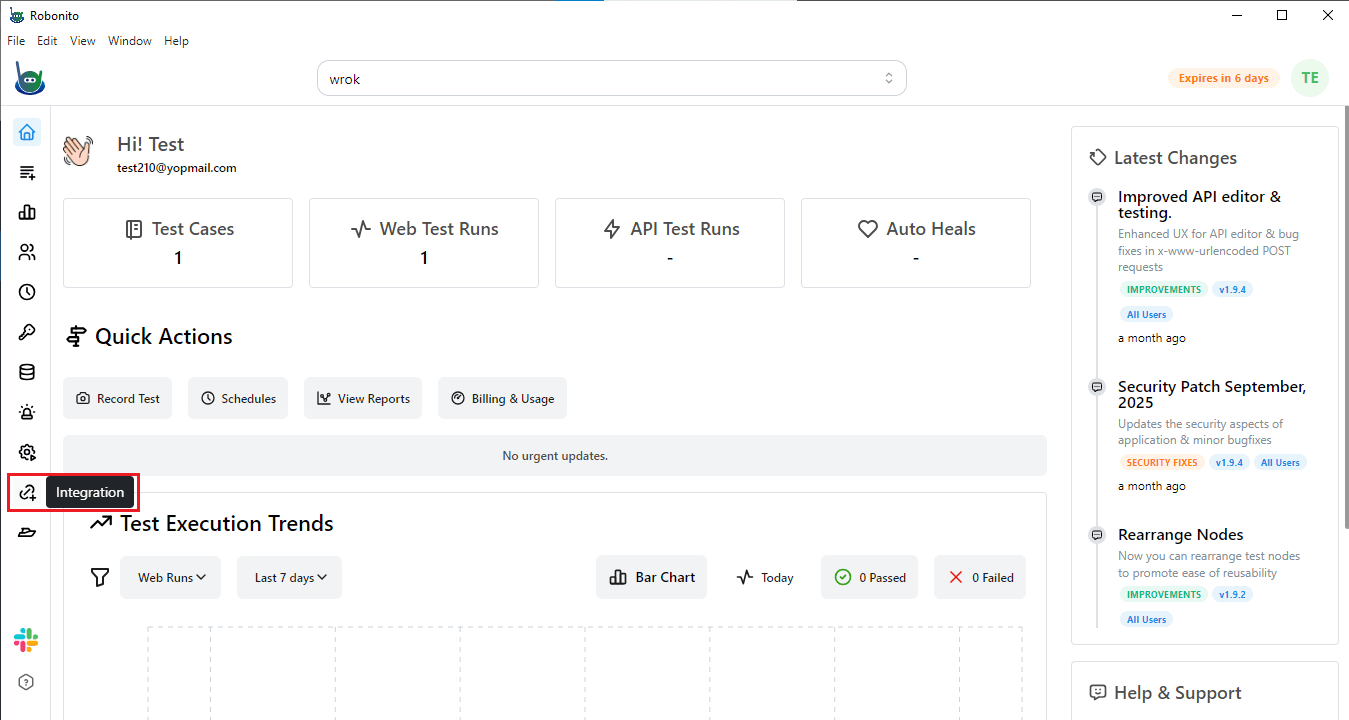
- You will now see a list of available tools that Robonito can connect with — such as Asana, Authenticator App, Email, GitHub, Jira, and Linear.
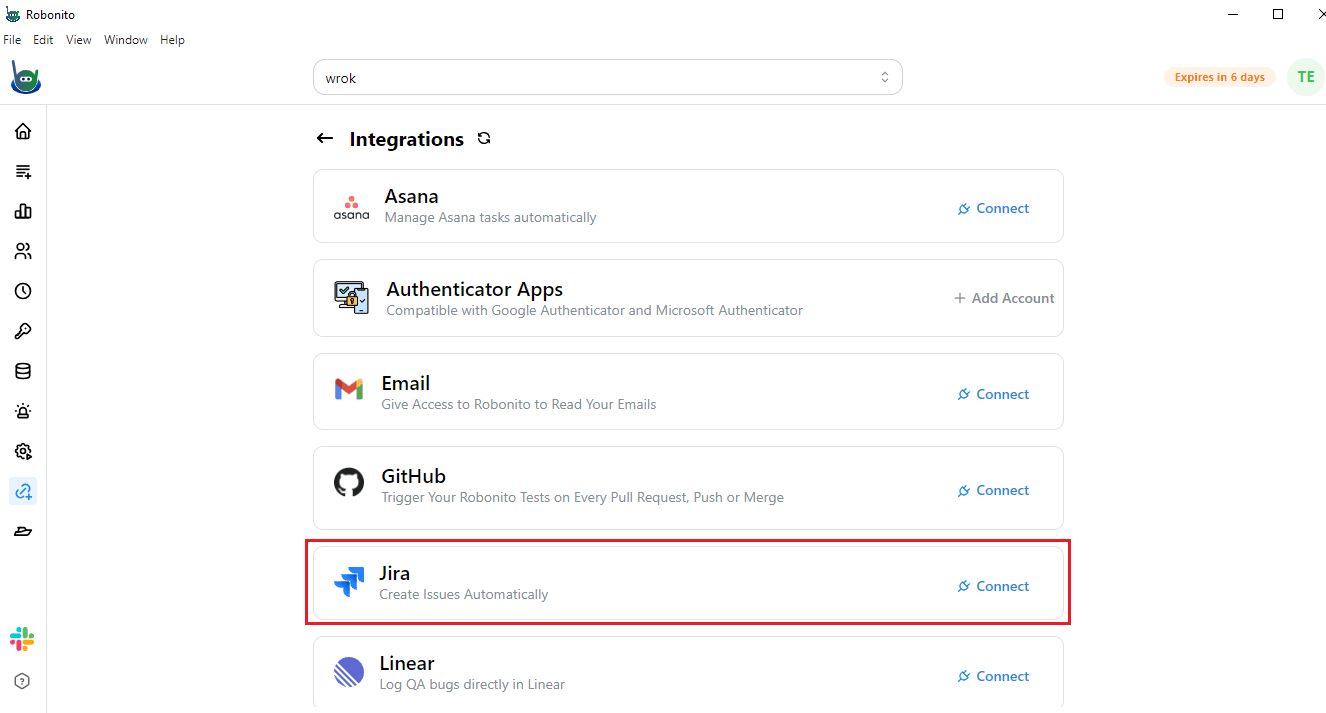
- From this list, find and select Jira.
- Click the Connect button next to Jira.
Step 2: Grant Access to Your Atlassian Account
- As soon as you click Connect, a new browser window will open.
- This window will ask you to grant Robonito permission to access your Atlassian account (the platform that hosts Jira).
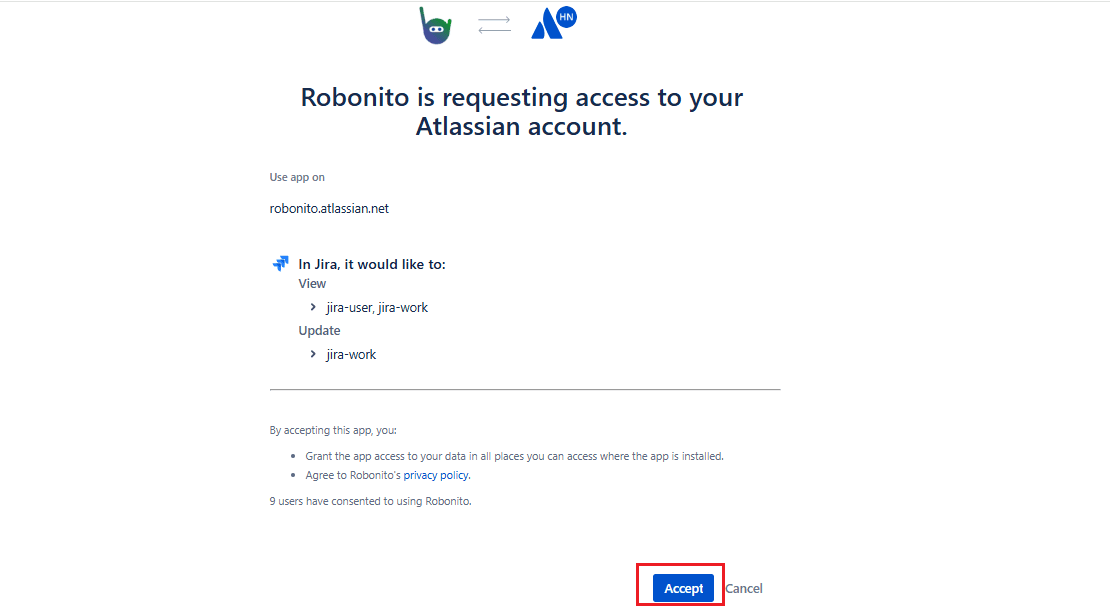
- Review the permission request and click on the Accept button.
- Once you accept, Robonito will link to your Atlassian account.
- Go back to Robonito and refresh your dashboard.
- You will now see that Jira is successfully connected — it usually shows a confirmation or a connected status icon.
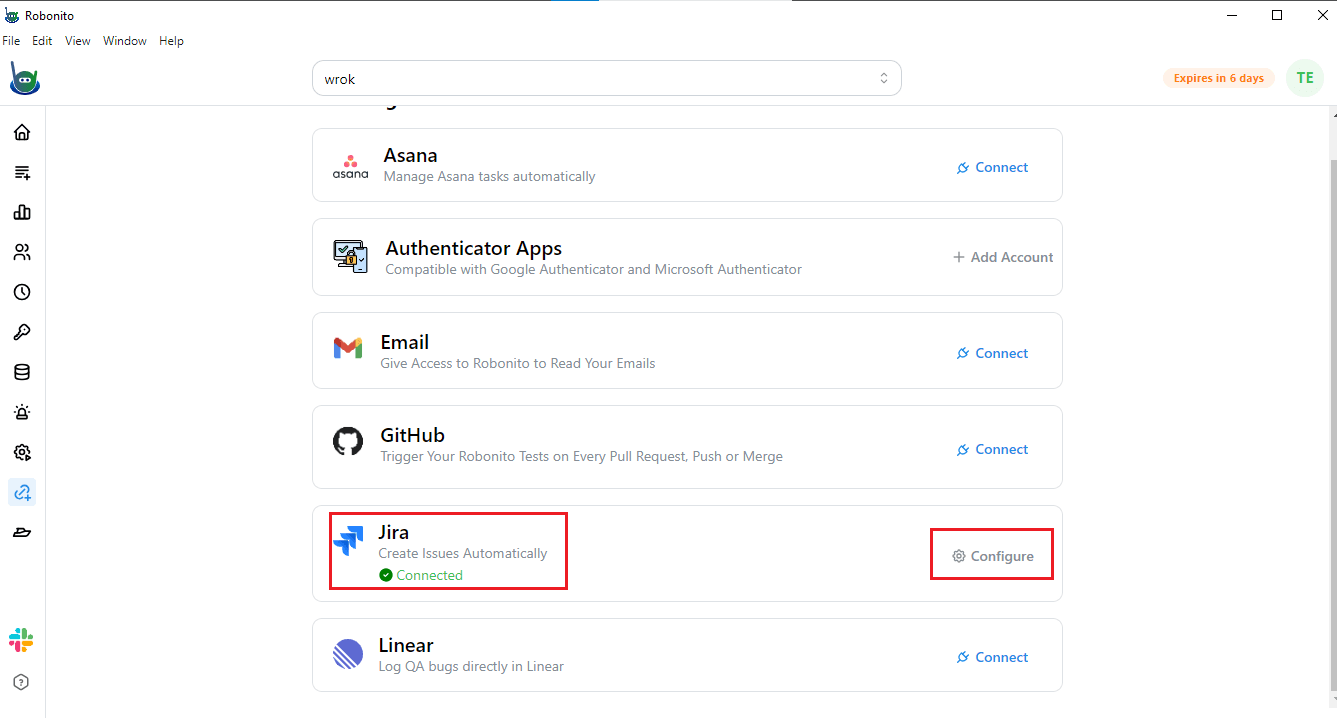
Step 3: Configure Jira Integration in Robonito
Connecting Jira is only the first step. The next part is configuring it properly so Robonito knows which Jira project to use, who to assign issues to, and what issue types to create.
- After Jira is connected, click on the Configure option.
- A configuration console will open. Here, you need to fill in details about the project you want to link with Jira.
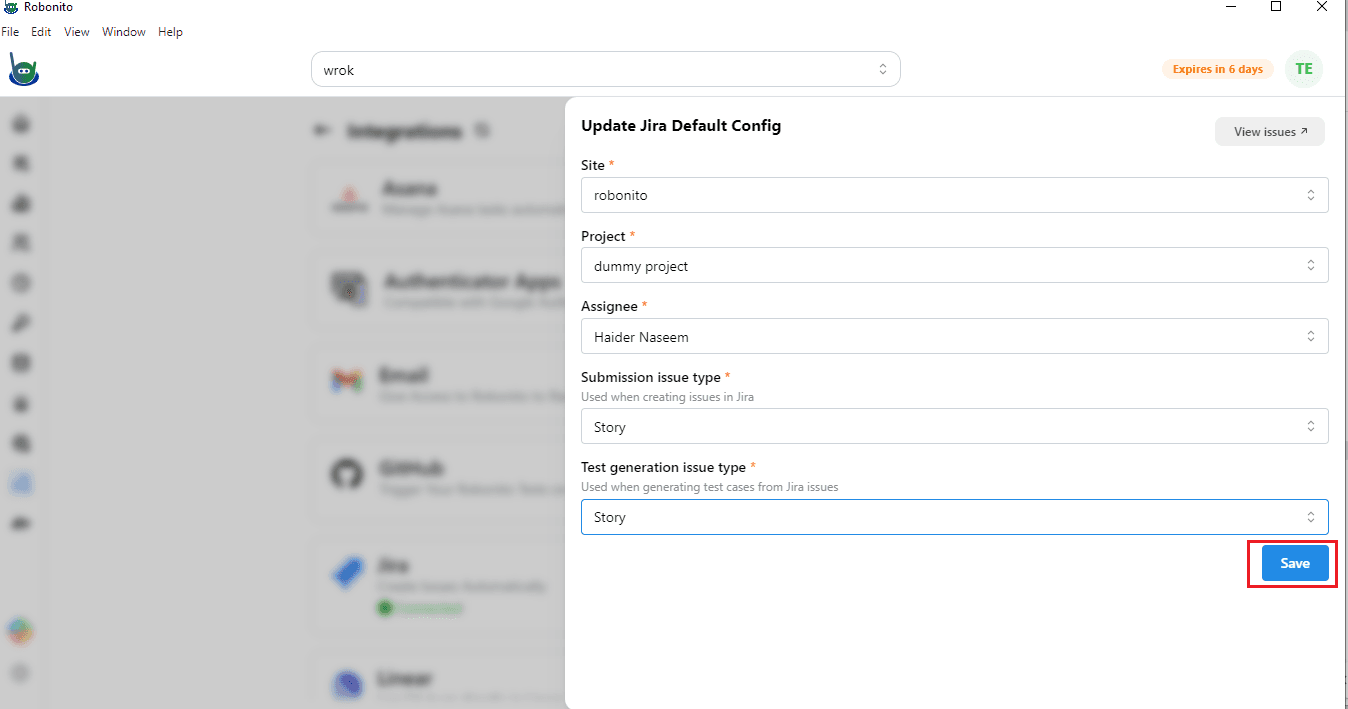
- You will be asked to add:
- Site (your Jira site name)
- Project (the name of your Jira project)
- Assignee name (the person who will handle the issues)
- Submission issue type (for reporting test issues)
- Test generation issue type (for tracking automated tests)
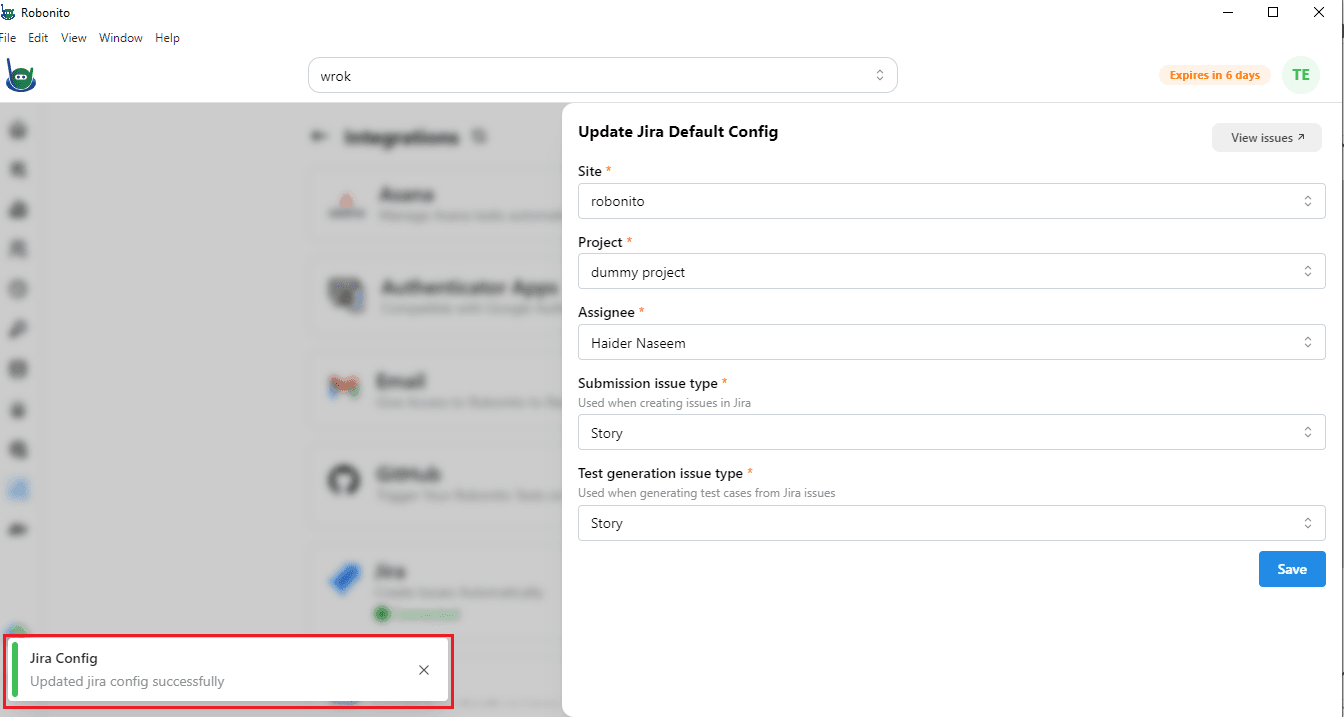
- Once you fill in all the details, click Save.
- Your Jira configuration will now be updated successfully.
Your Jira Integration is Now Ready
After saving, Robonito and Jira will be fully linked. You can now:
- Send failed test reports directly to Jira with one click.
- Automatically attach logs, screenshots, and failure reasons to Jira tickets.
- Assign issues to the right team member instantly.
- Keep your QA and development teams connected without switching between tools.
This setup makes bug reporting faster, reduces manual work, and helps maintain clear communication throughout your testing cycle.
Checking Jira Integration in Robonito
Once you have completed the Jira and Robonito integration setup, the next step is to verify whether both tools are working together properly. The process is simple, but every step matters. Follow the instructions carefully to make sure your integration is successful and functional.
Step 1: Open the Test Generation Section in Robonito
- Log in to your Robonito account.
- On the right-hand sidebar, click on Test Generation.
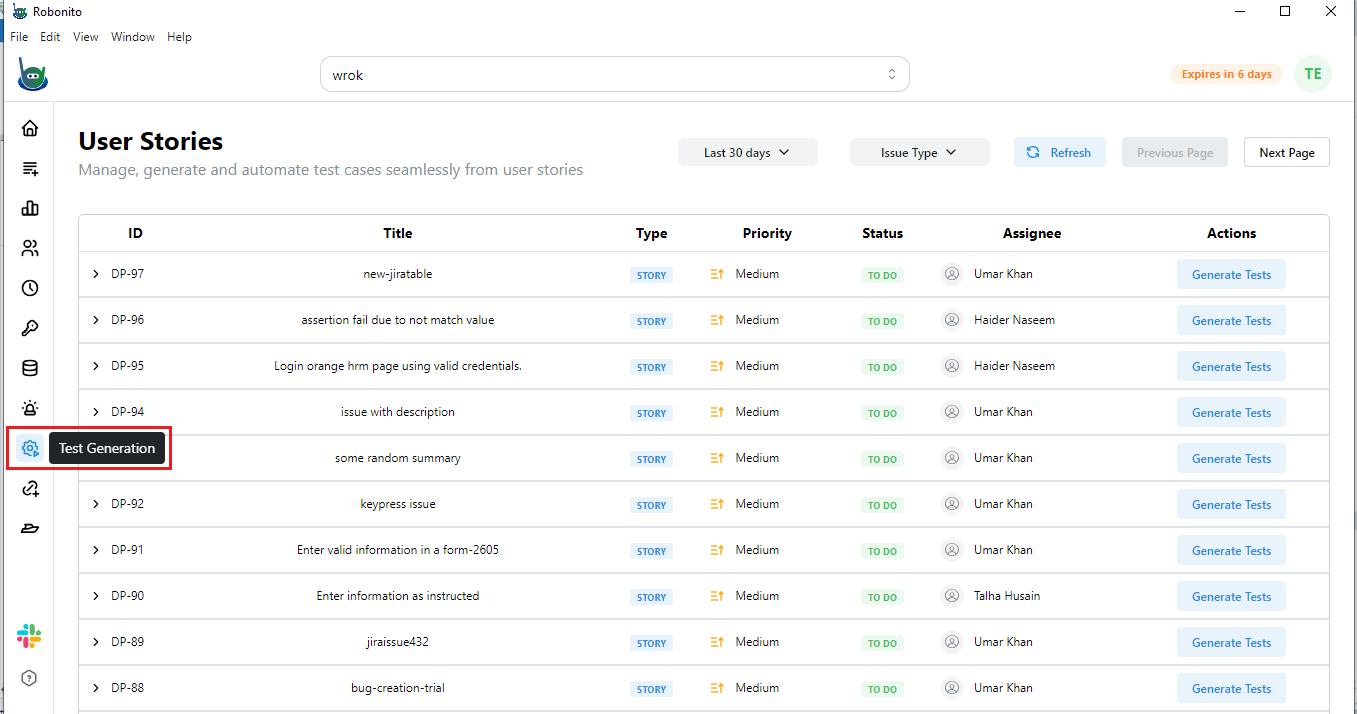
- This section displays all the user stories you have created in Robonito.
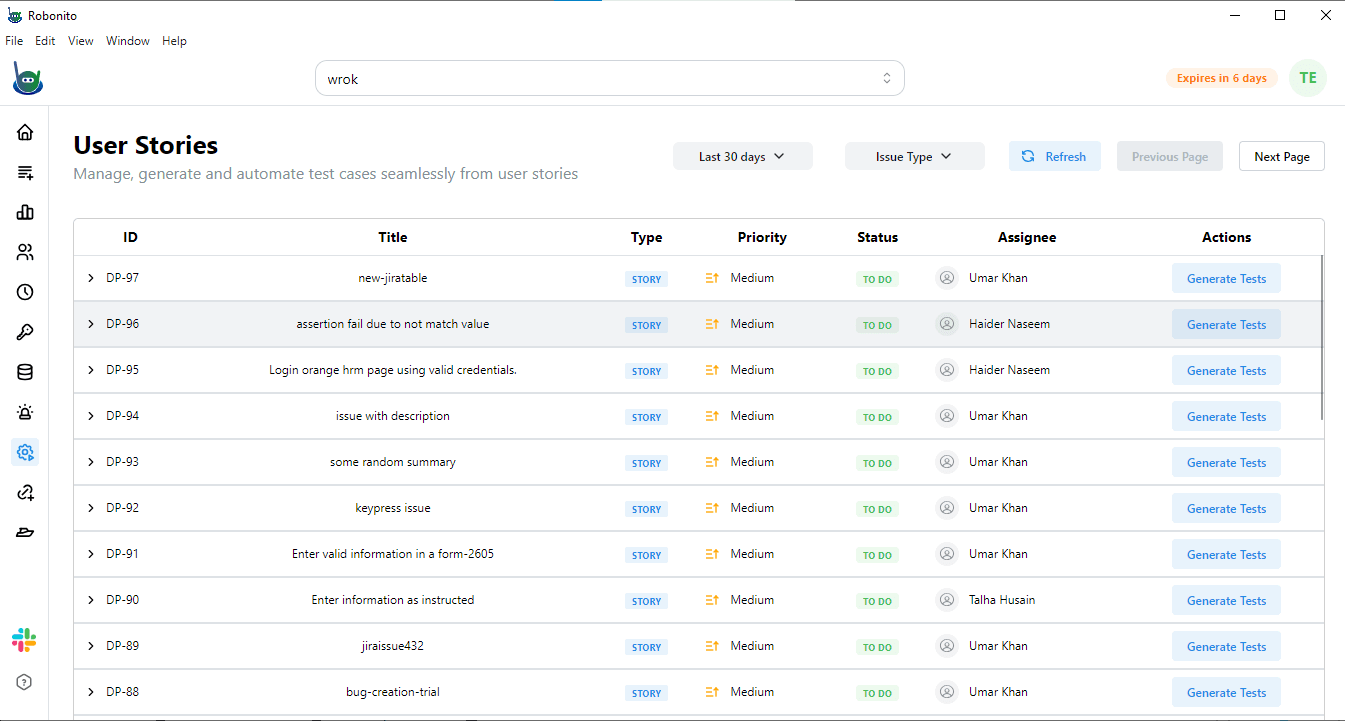
Each user story represents a functionality or feature that you plan to test.
From this page, you can manage user stories, generate test cases automatically, and even automate them — all without writing any code.
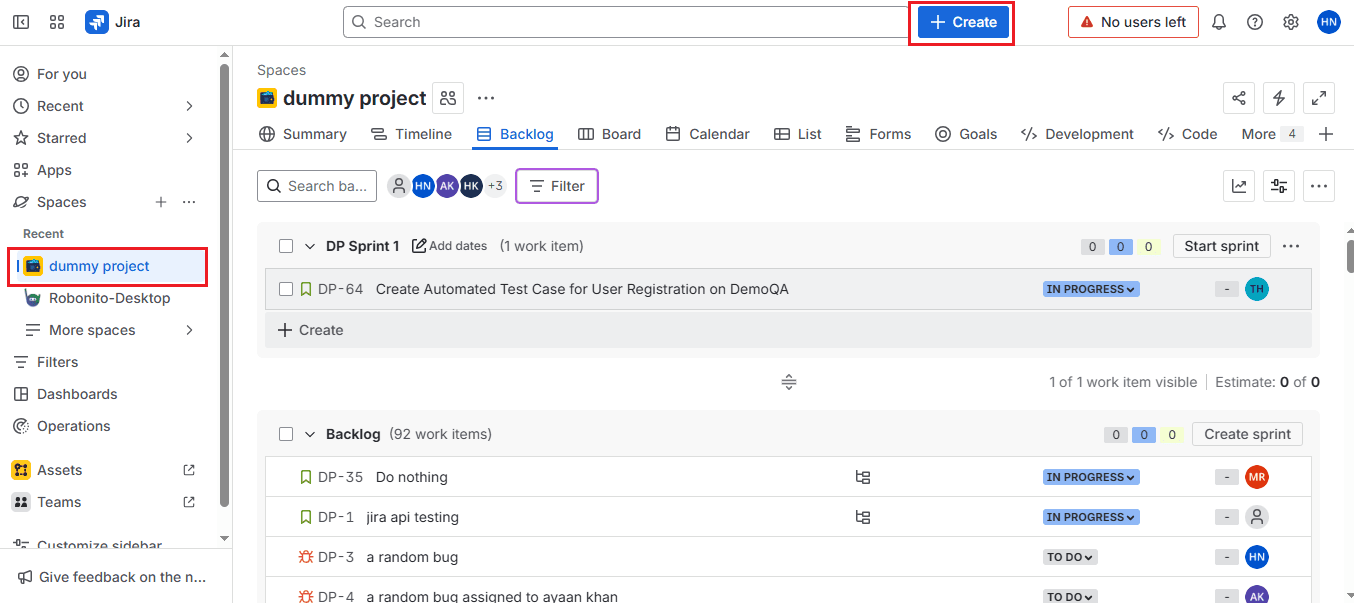
Step 2: Open Jira and Create a Story
- Go to your Jira account that is already connected with Robonito.
- You will see a project created earlier, often used for testing or setup purposes.
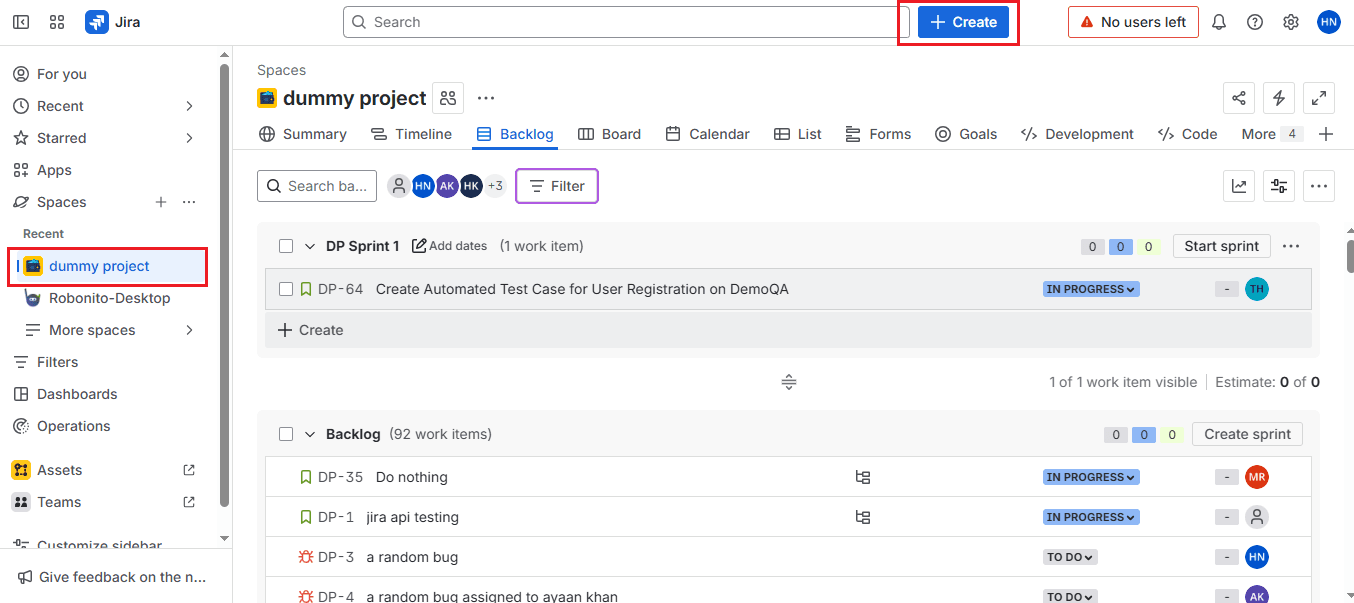
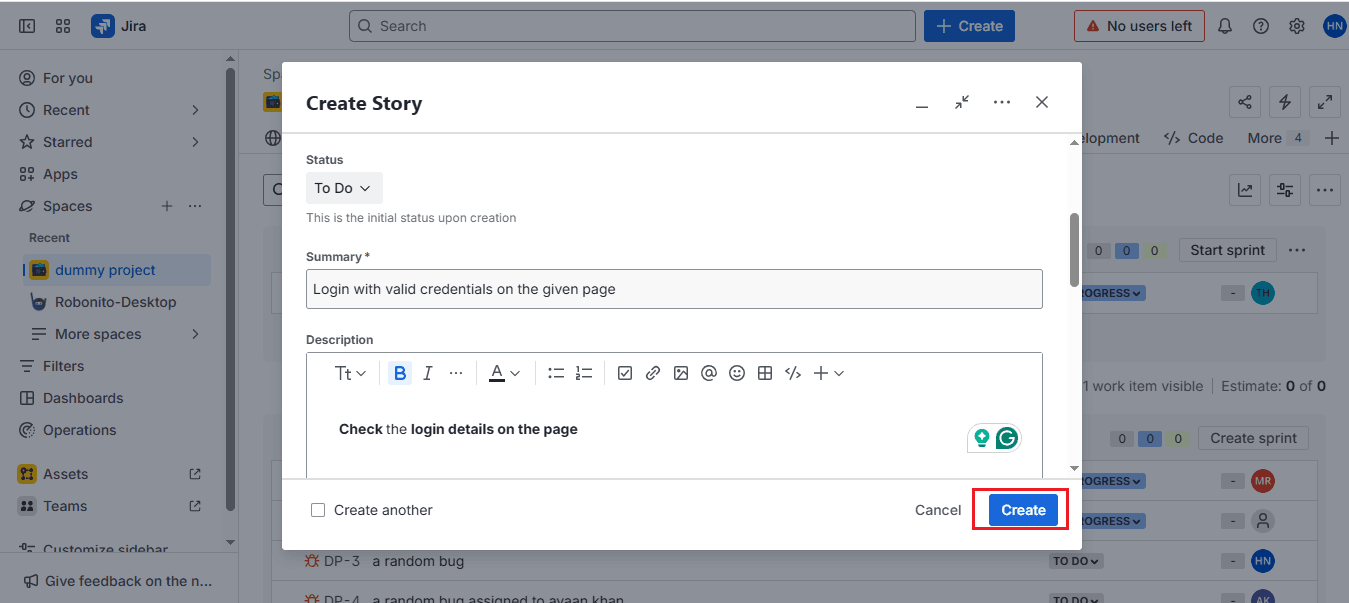
- Within that project, you can create a workspace and choose the type of work item you want to create — such as a story, task, or bug. You have to click on the Create option in the top left side of the page. It will open a console that will ask for details of the project.
- In the Summary field, you can add your test scenario. For example, let us create a test titled “Login with valid credentials on the given page.”
- Next, assign this test case to a team member by selecting their name under the Assignee field.
- Here, add a short description of the test case.
For the example we created above, you can write:
“Check login details on the page.”
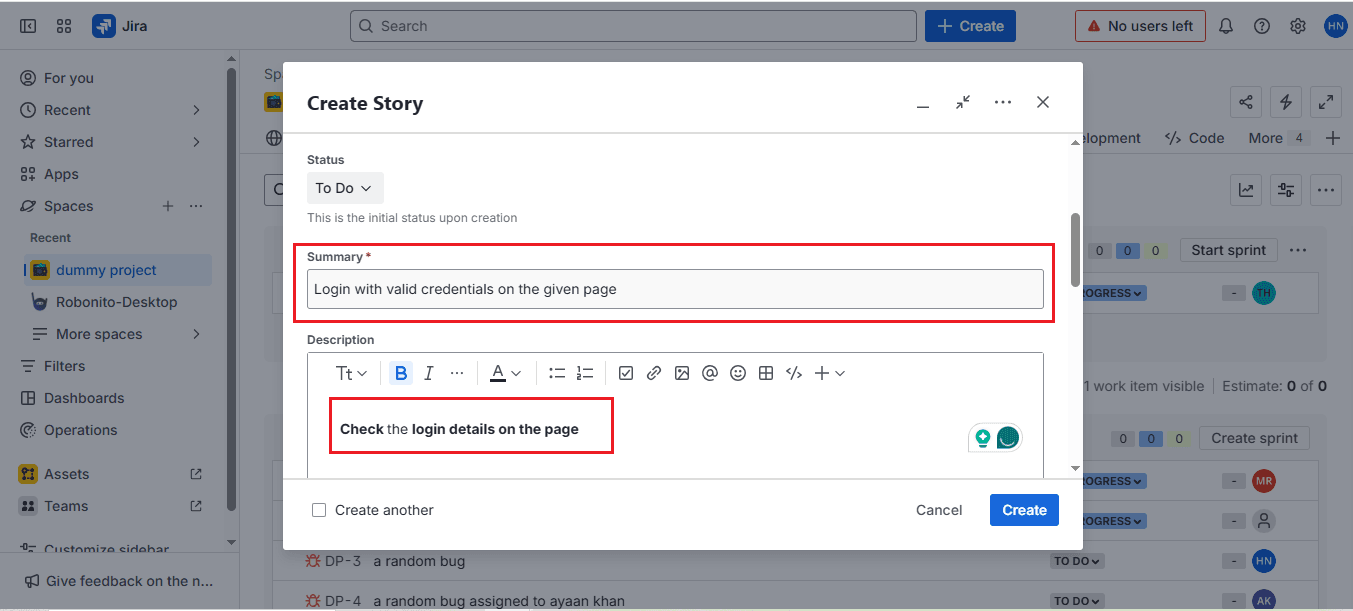
- Once the details are added, click Create to save your test case in Jira.
This step ensures that the purpose of the test case is clearly communicated. After saving, Jira will generate a work item number (for example, DP-98). You might also see a pop-up notification in Jira confirming that the item has been created and assigned to the board.
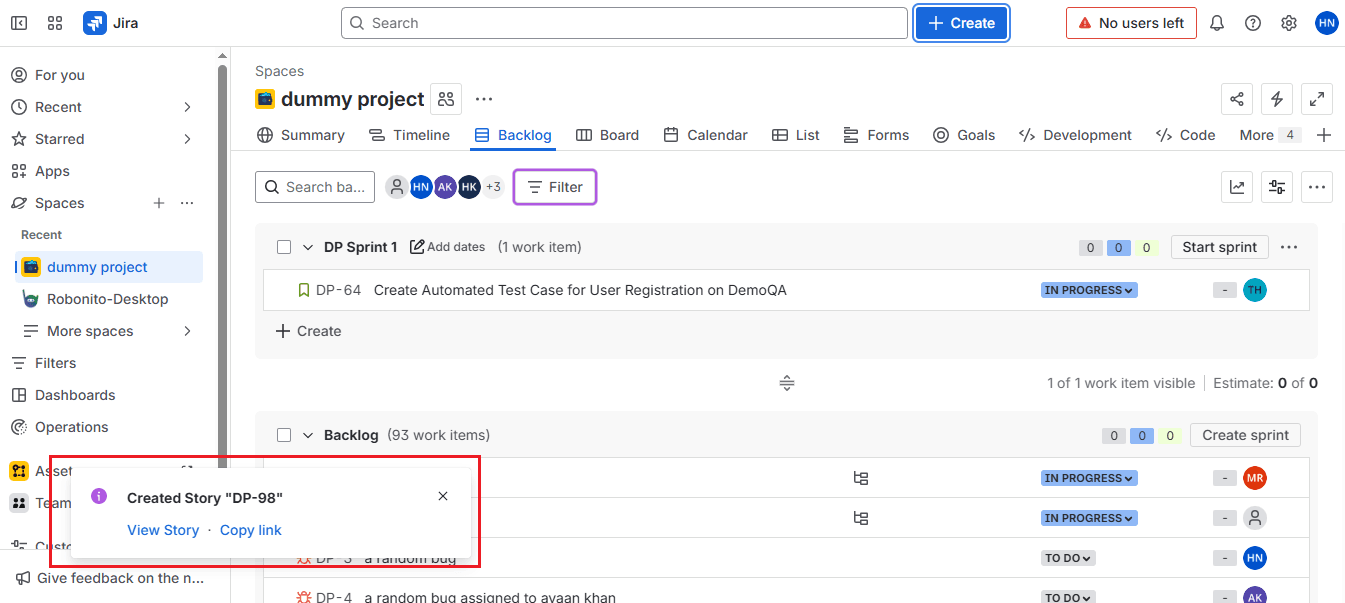
To double-check:
- Go to the Backlog section in Jira.
- Search for your work item number (like DP-98) — you will see all the project details you added.
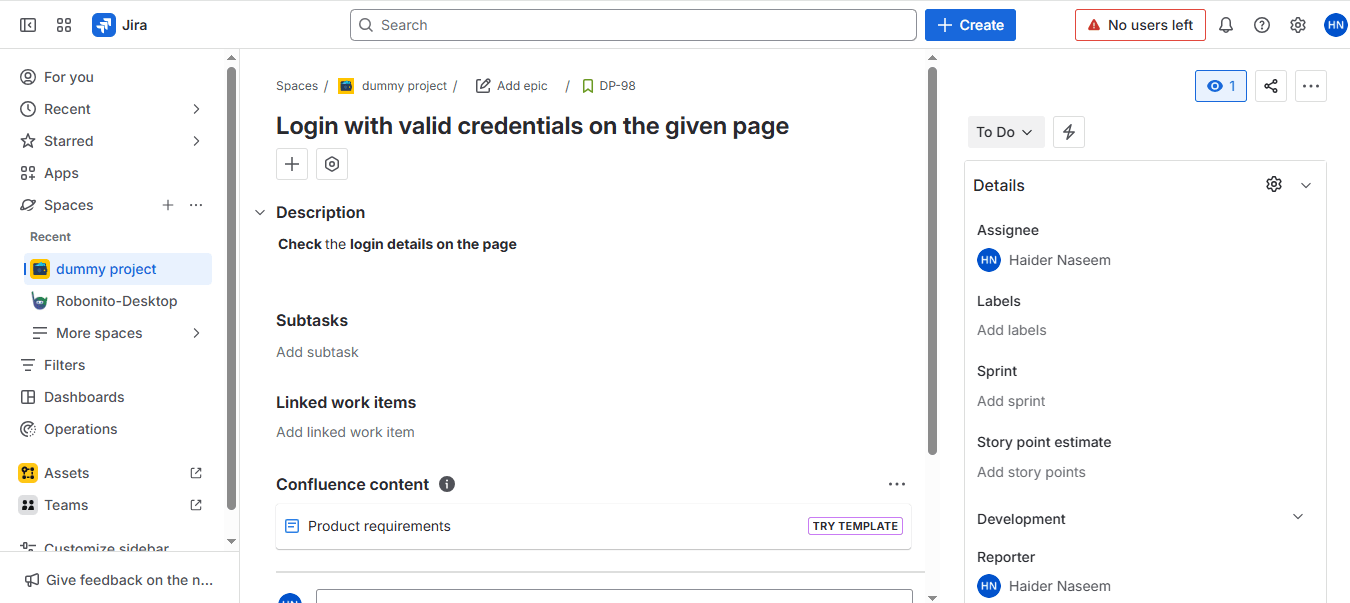
This confirms that the test case has been successfully created and is available in Jira.
Step 3: Check for Synchronization in Robonito
- Now, go back to your Robonito dashboard and open the Test Generation section again.
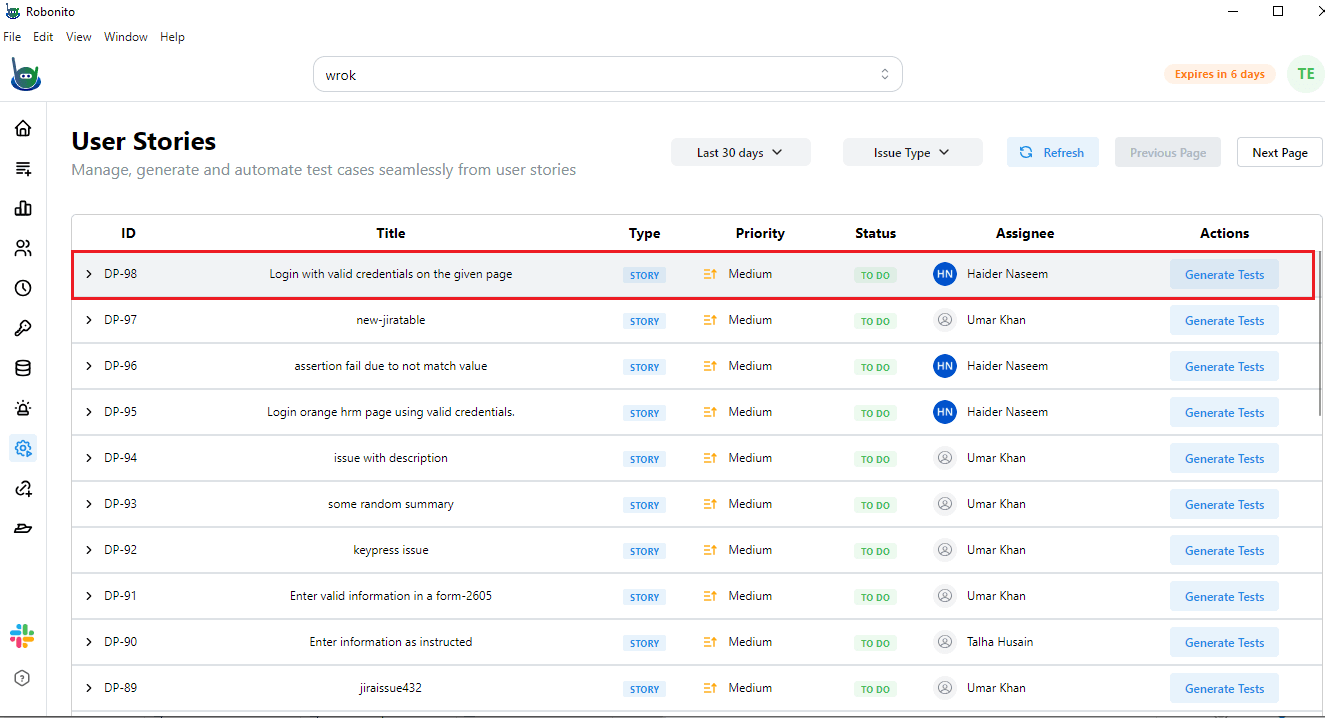
- You will notice that the user story you just created in Jira is now visible here as well.
- This shows that Robonito and Jira are successfully connected. Any updates or new stories you add in Jira will automatically appear in Robonito.
The team member you assigned in Jira will also receive a notification in Robonito, keeping everyone aligned on upcoming tasks and priorities.
Step 4: Generate Tests in Robonito
- From the list of user stories in Robonito, click on the one you want to work with.
- You will see details such as the title, type, priority, status, assignee, and an action column.
- In the Action column, click Generate Test.
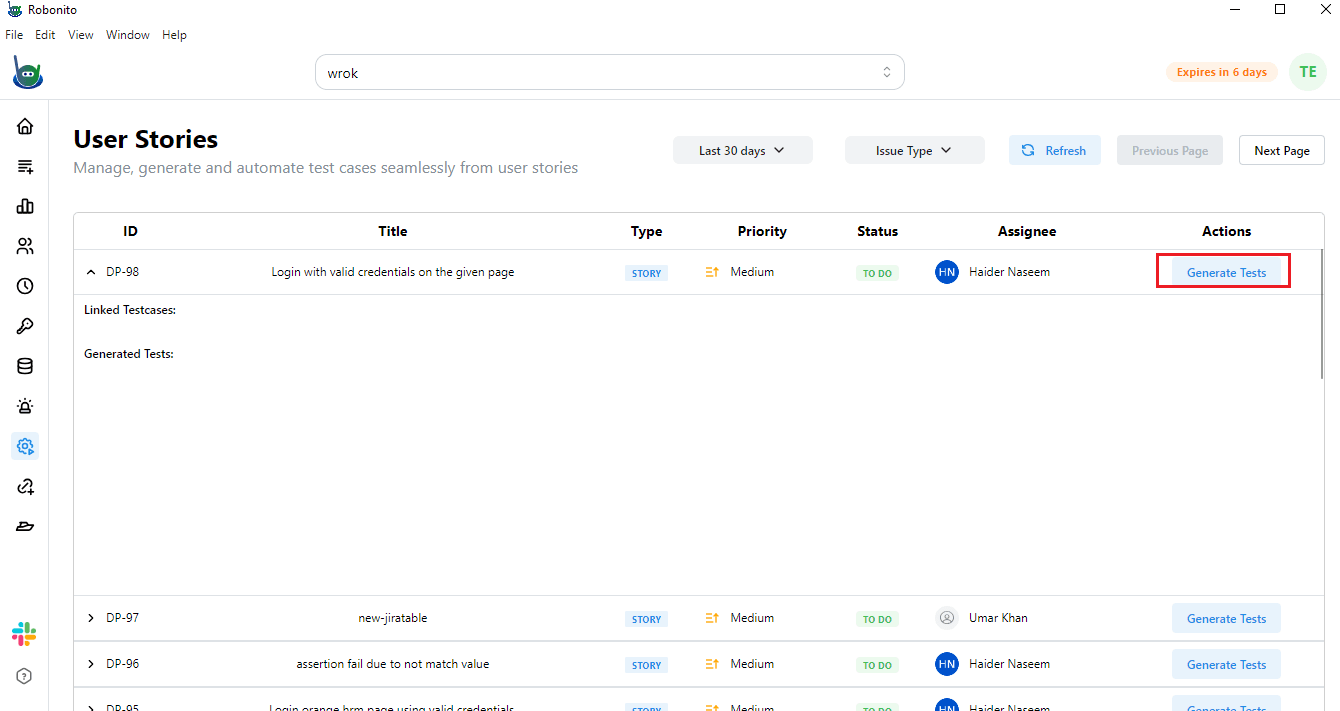
Robonito will automatically create test steps for this user story using AI.
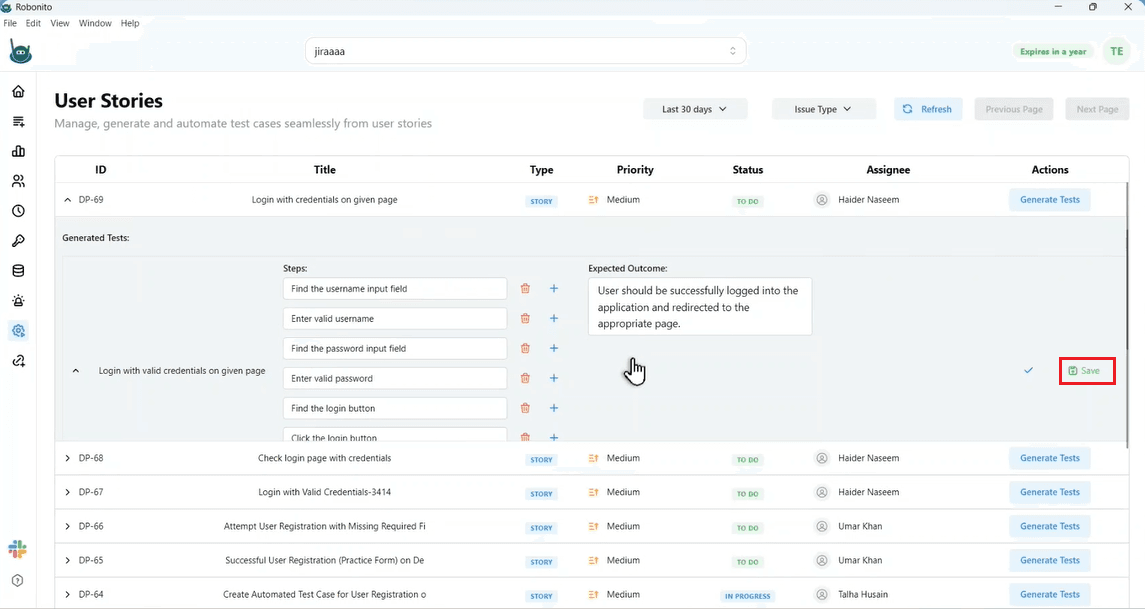
Step 5: Review and Edit the Generated Test
Once the test is generated, Robonito will show a list of steps along with expected outcomes.
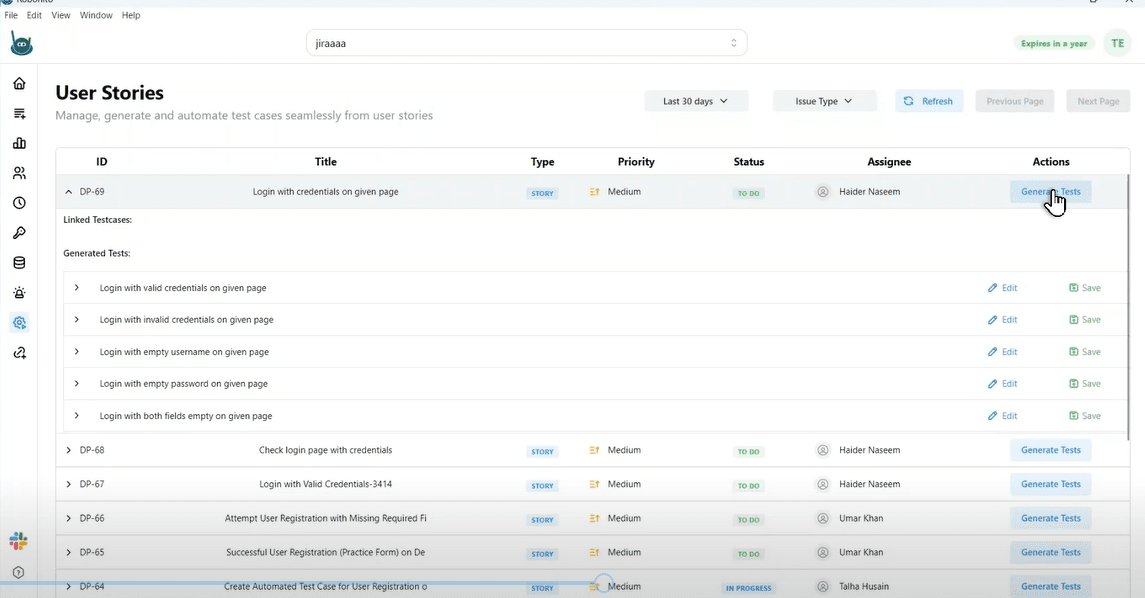
Before saving, carefully review the test to ensure it aligns with your requirements.
You can:
- Edit any step if you want to make changes.
- Delete unnecessary steps.
- Add new steps if something is missing.
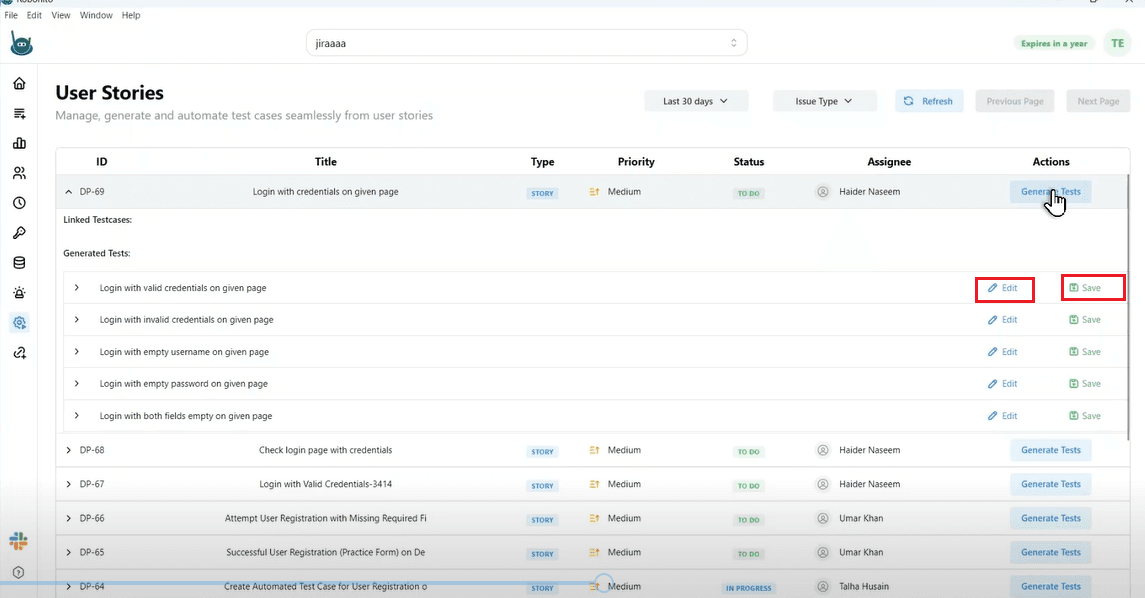
After reviewing, click Save to continue.
Step 6: Configure and Save Test Details
When you click Save, a configuration console will open.
This is where you provide key details about how the test should be executed.
You will see fields such as:
- Browser – Select the browser where you want the test to run (for example, Chrome or Edge)
- Target URL – Enter the web page you want to test
- Device – Choose the device type (desktop or mobile)
- Auth Test Case – Enter any step you want to skip during authentication, if required
- Suite – Select the test suite where you want this case to be stored
After filling in these details, click Submit to Jira and then click Save.
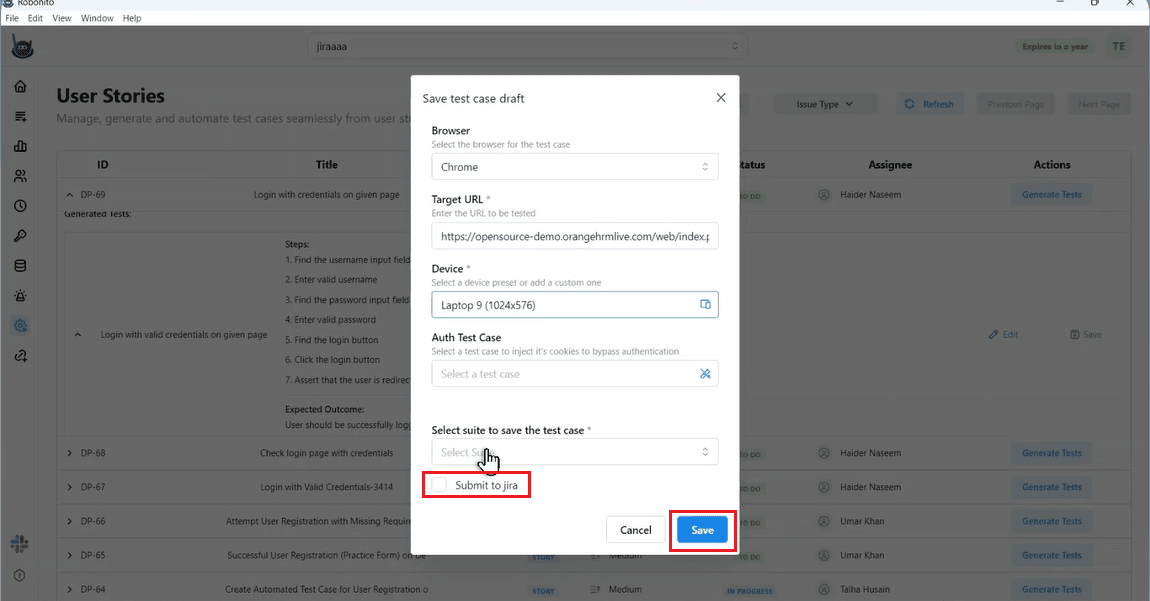
This step links your Robonito test with the Jira issue, allowing Jira to track it automatically.
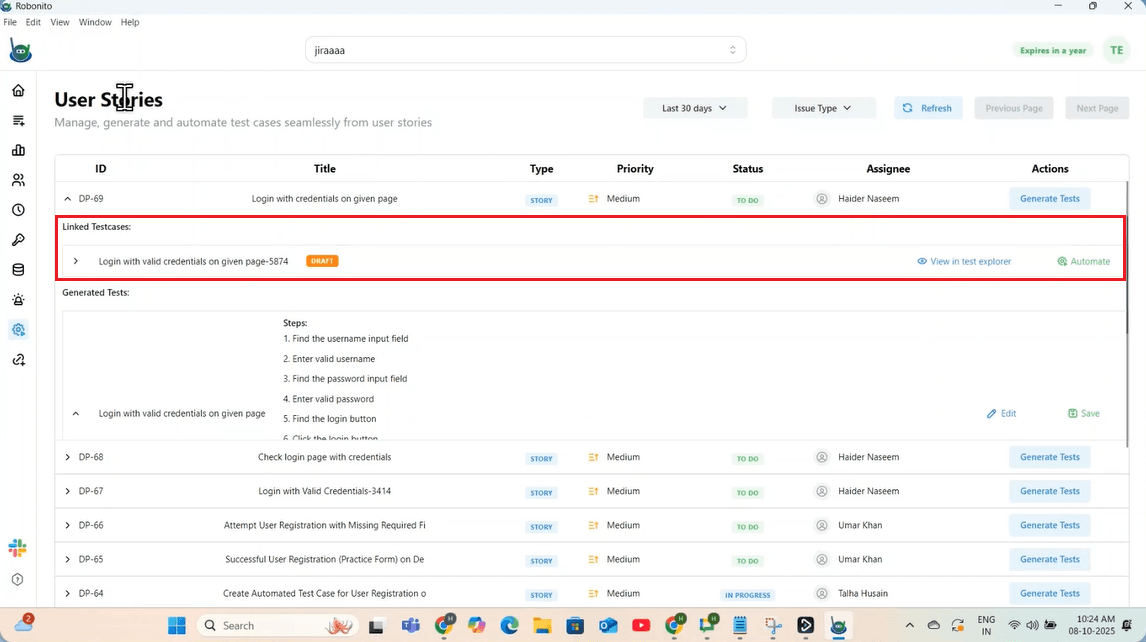
Step 7: Automate the Test Case
Once your test case is saved, return to the User Stories section in Robonito. You will now see a new option — Automate — next to your test case.
You can also view this test case in the Test Explorer section of Robonito. This section lists all the test suites and cases that you have created manually or through automation.
Now you have two ways to continue:
- View in Test Explorer: Click this option to open the page where you can manually record or execute your test.
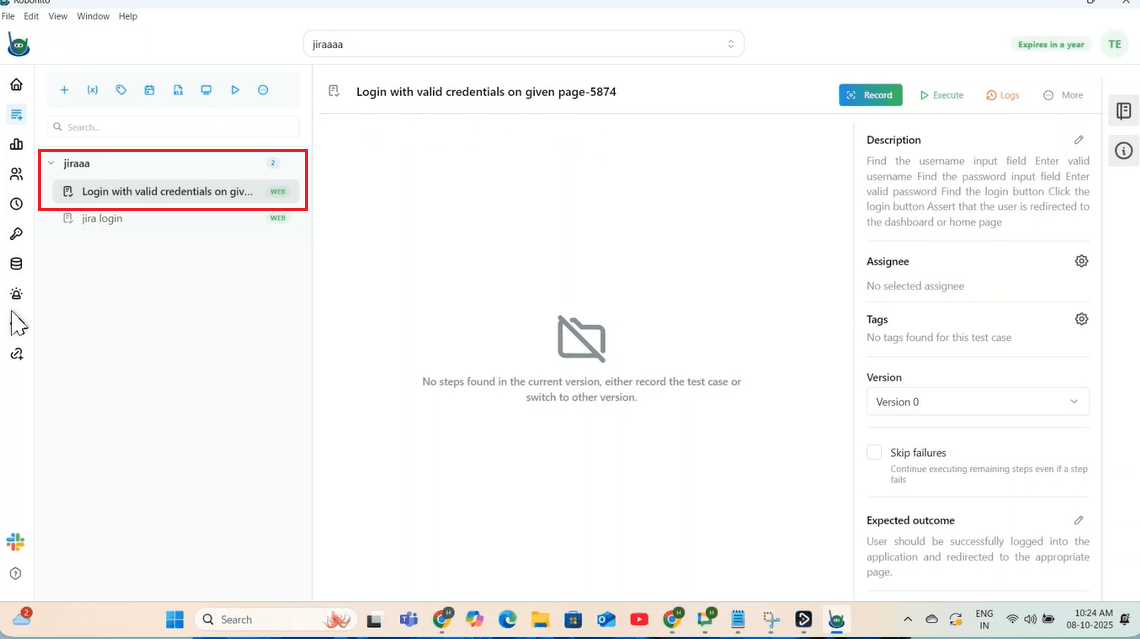
- Automate: Click this option to automatically execute the test case using Robonito’s automation engine.
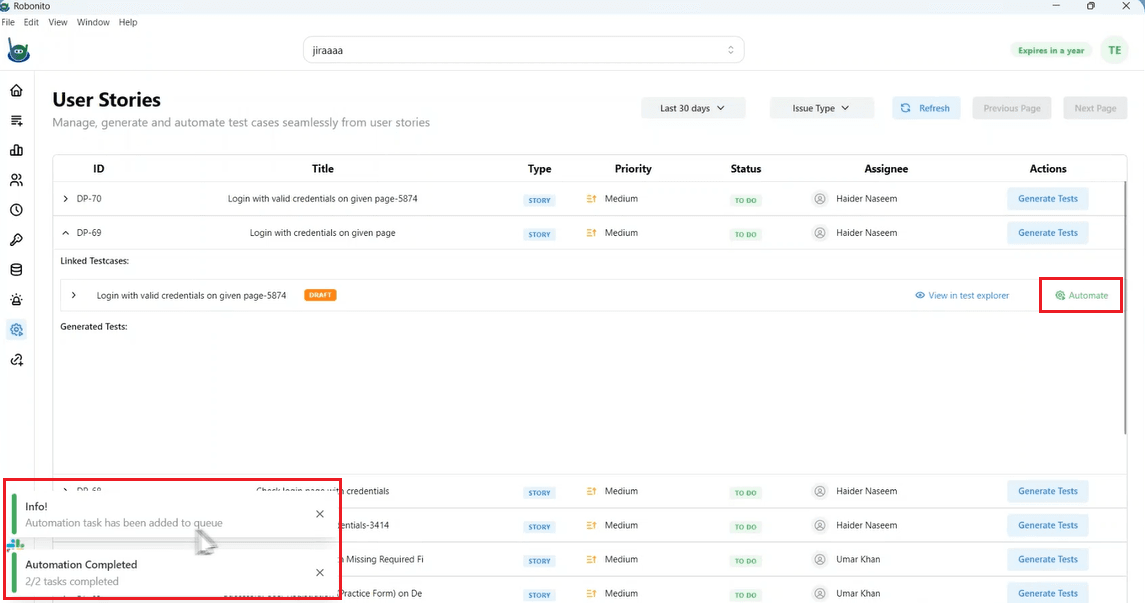
If any bug or issue appears during test execution, Robonito will immediately send the details to Jira. The assigned person in Jira will receive a notification with complete information about the issue and test steps.
Step 8: Verify Everything is Working
Once the test is executed, both platforms — Jira and Robonito — will remain updated.
- Robonito will display the test execution results.
- Jira will automatically receive related bug reports or updates linked to the same issue number.
This confirms that your integration setup is successful and both tools are communicating seamlessly.
This step-by-step process allows you to connect your testing and issue tracking in one continuous flow. Once set up, your QA and development teams can easily collaborate without switching between multiple tools.
Ready to Try Robonito?
Robonito makes your testing process easier and more connected. When you integrate it with Jira, your QA and development teams stay on the same page without wasting time switching between tools. You can create, manage, and automate your tests without writing any code, and any issue found during testing is instantly shared with your team. If you want to save time and simplify your workflow, sign up for Robonito today and see how easy testing can be.