How to Use Smart Assertions in Robonito to Validate UI Changes Automatically
When you test a web app, even a small change on the screen can fail a test. It can take time to fix and feels frustrating. Smart Assertions in Robonito help yo...

Introduction
When you test a web app, even a small change on the screen can fail a test. It can take time to fix and feels frustrating. Smart Assertions in Robonito help you handle this better. They make your checks smarter and more flexible.
Smart Assertions find what needs to be verified on the screen and compare it during every test run. They look for real changes and skip the ones that do not matter. This keeps your test results stable without the need to add fixed or hardcoded checks.
With Smart Assertions, you spend less time fixing broken tests. Your test suite stays steady as your app changes over time. In this tutorial, you will learn how to use Smart Assertions in Robonito, why they are useful, and how they make your testing easy.
What is Smart Assertion in Robonito?
Smart Assertion in Robonito helps you check your UI in a smarter way. You do not need to verify every element or value manually. It learns what to expect and pays attention only to the changes that matter.
When you run a test Robonito captures the screen and keeps it as a reference. In the next run, it compares the new screen with the saved one. If it finds something important that has changed, it highlights it. Small or expected changes are ignored.
You do not have to write strict checks for every step. This saves time and avoids false failures caused by small updates or dynamic data. Smart Assertions make your tests more stable and easier to maintain, even when your app keeps changing.
How to Use Smart Assertion in Robonito
Follow these steps to understand how you can use the Smart Assertion feature in Robonito to verify visual elements or image results without manually checking each one.
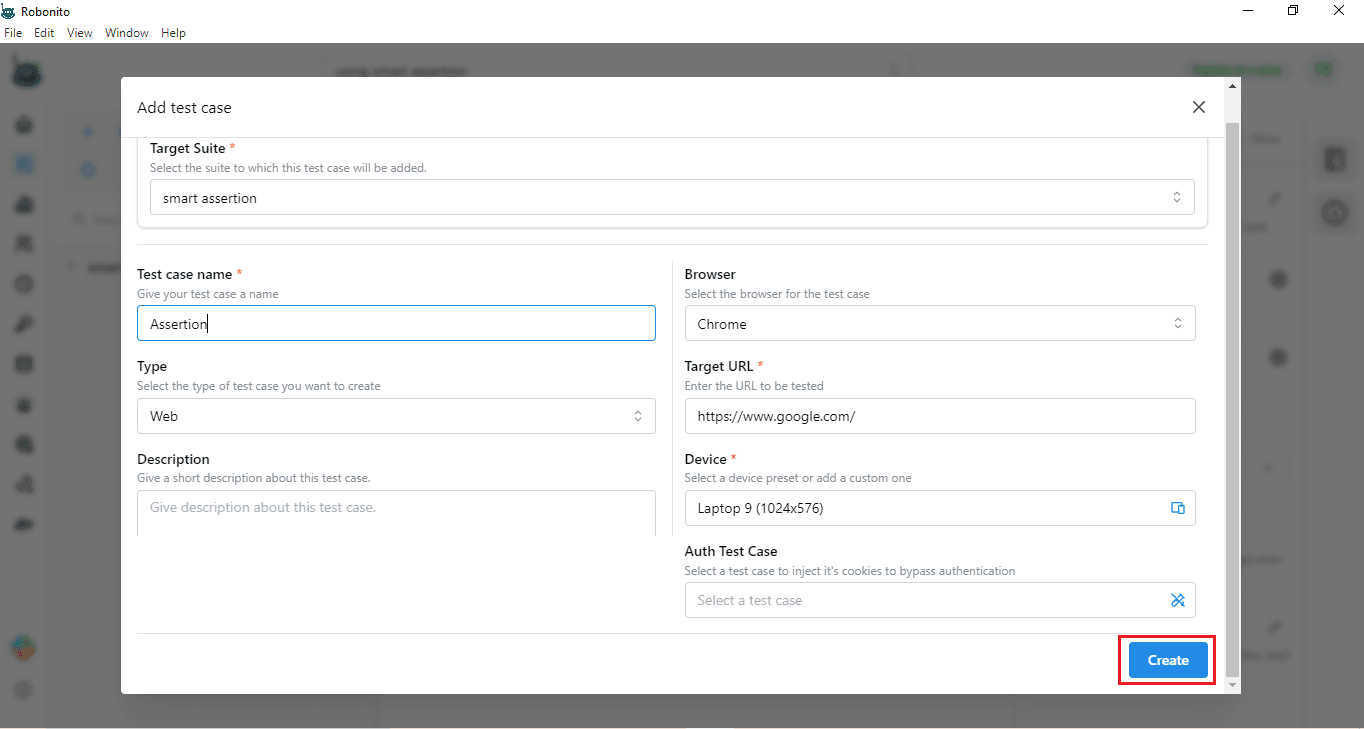
Step 1: Create a Test Case
- Go to the Test Explorer on the left sidebar of Robonito.
- Create a new Test Suite and then add a Test Case inside it.
- Enter the Test Case name and add the URL of the website that you want to test.
- Here, for demonstration purposes, we have taken www.google.com as the sample URL.
- Next, select the device on which you want to run the test.
- Once all details are filled, click on Create.
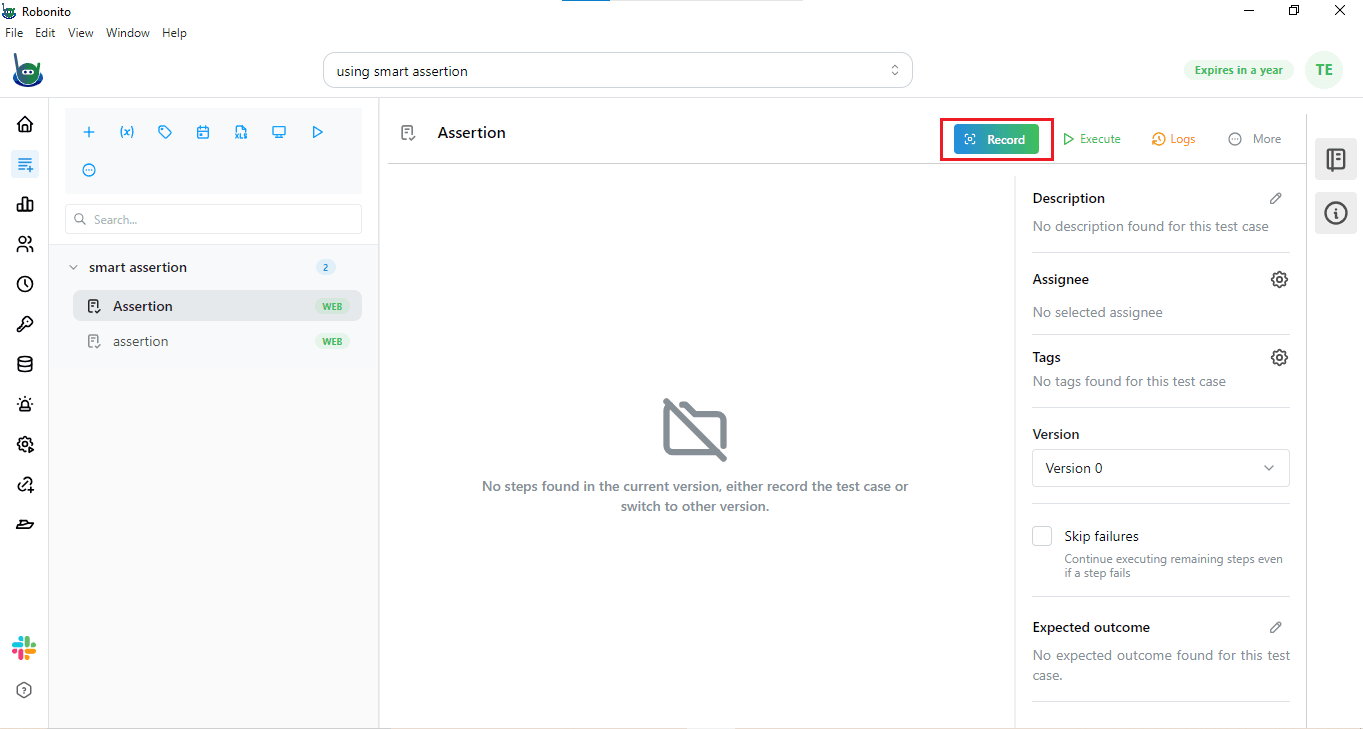
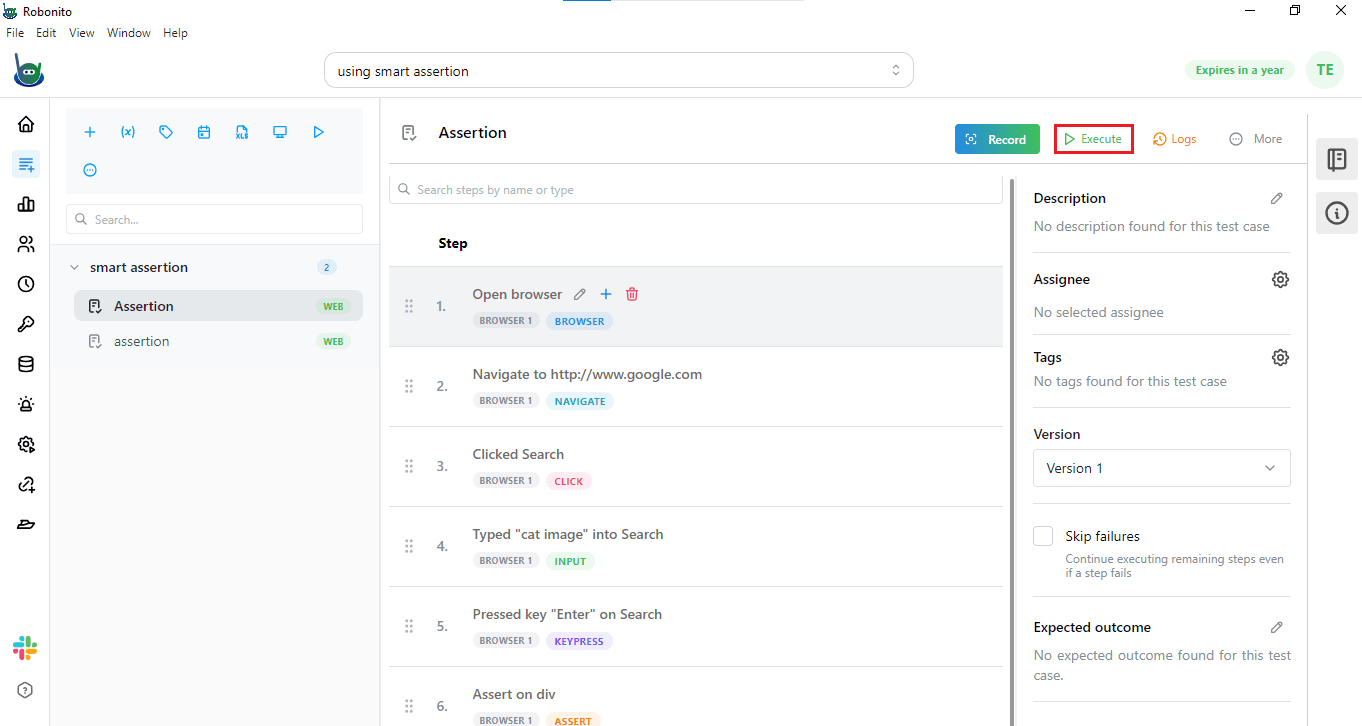
Step 2: Record the Test
- After creating the test case, click on the Record option.
- Then you have to click on “Start Recording”.
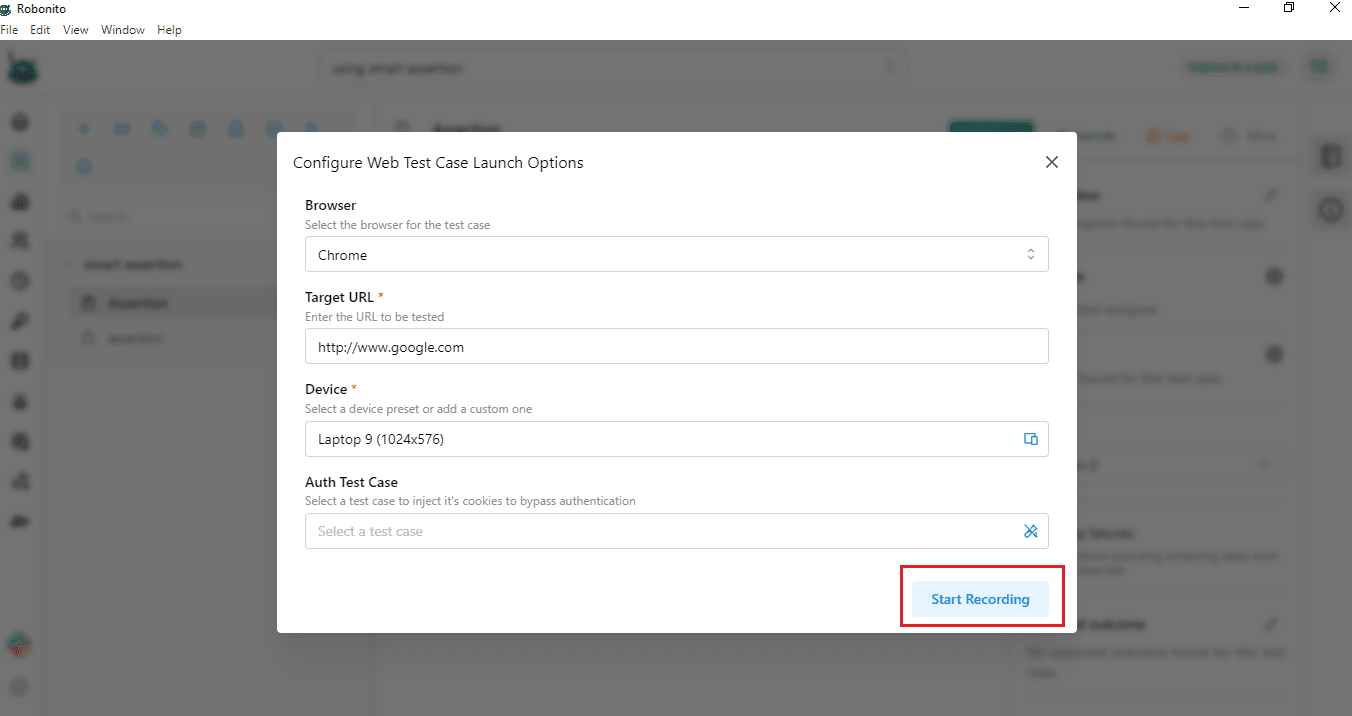
- Robonito will automatically open the URL that you entered during the test case setup.
- You can now start interacting with the website. For demonstration, let us take the example of Google Images.
- On the Google page, search for “cat images.”
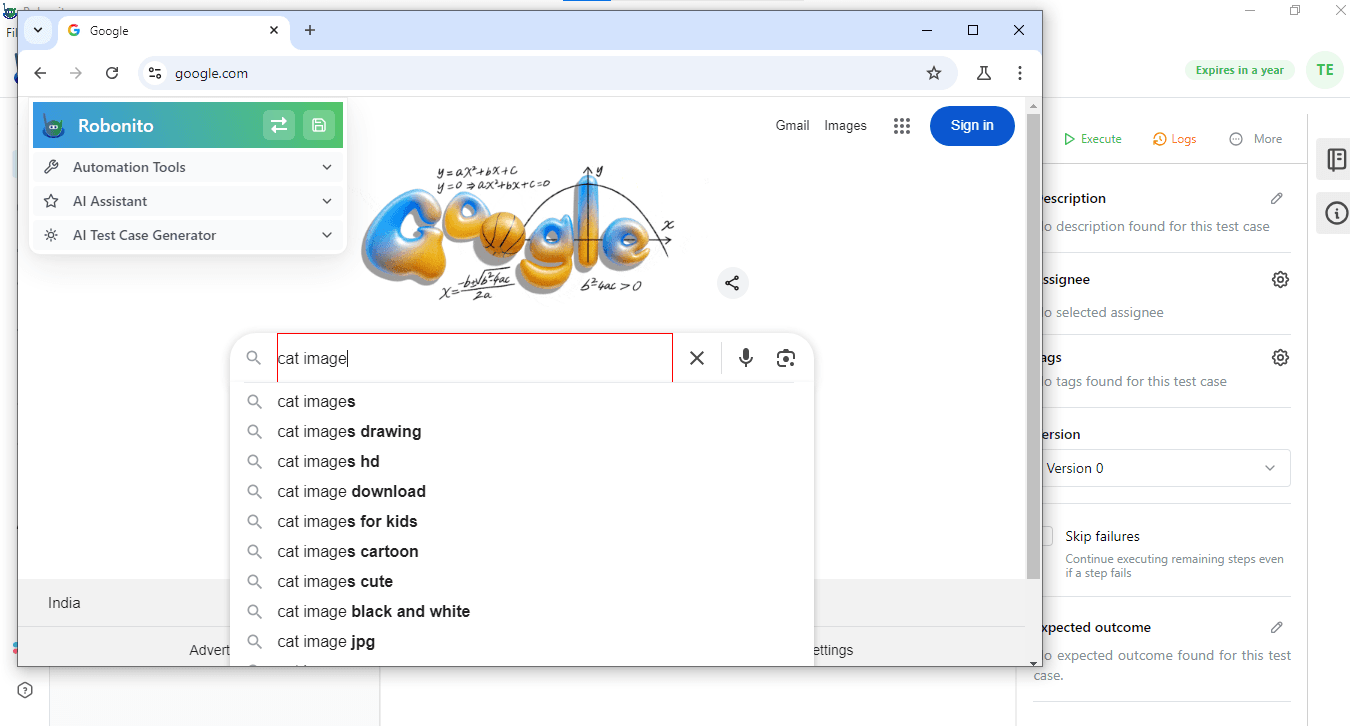
- The page will display several images of cats.
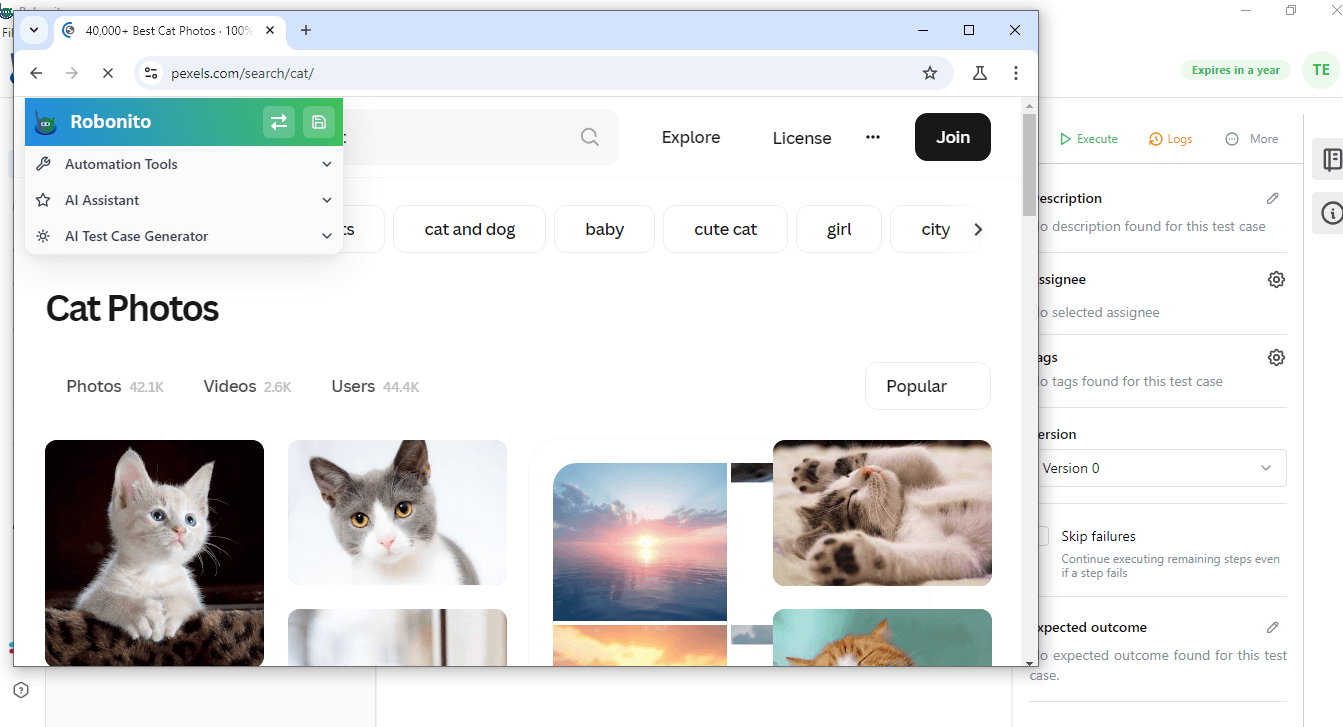
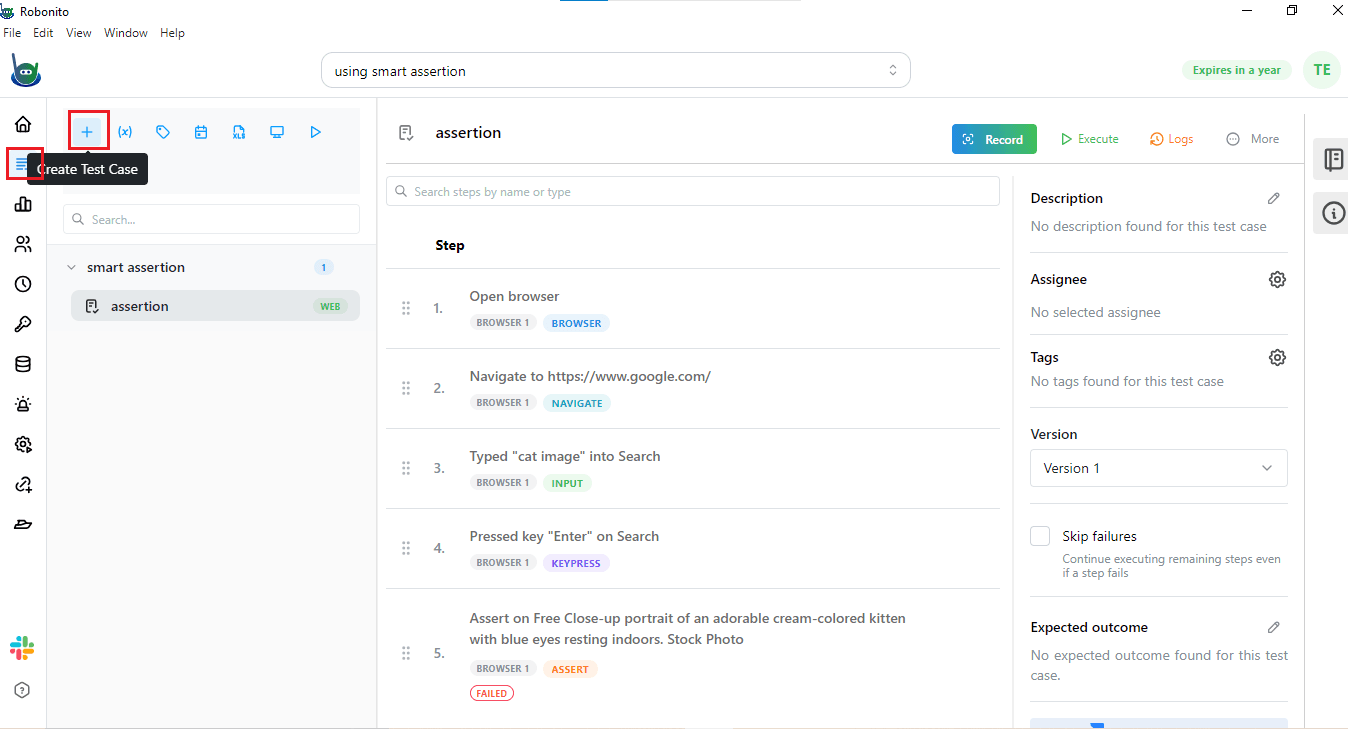
At this point, instead of manually verifying whether every image on the page actually shows a cat, you can use the Smart Assertion feature to automate this visual validation.
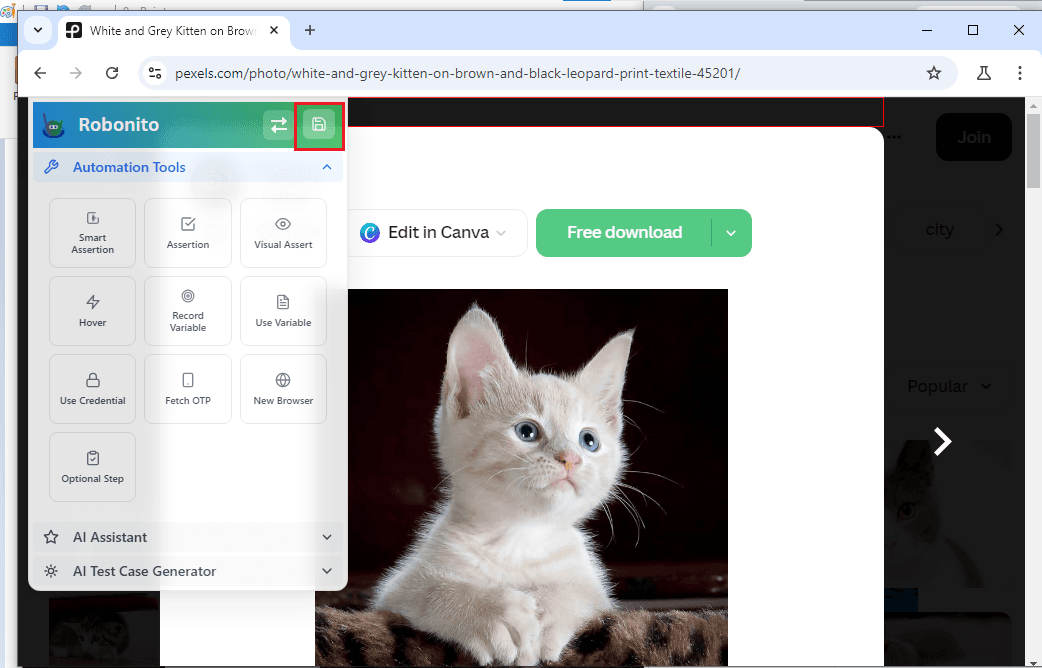
Step 3: Use the Smart Assertion Tool
- Once the page opens, look for the Automation Tools option inside the recorder.
- Click on it, and then select Smart Assertion.
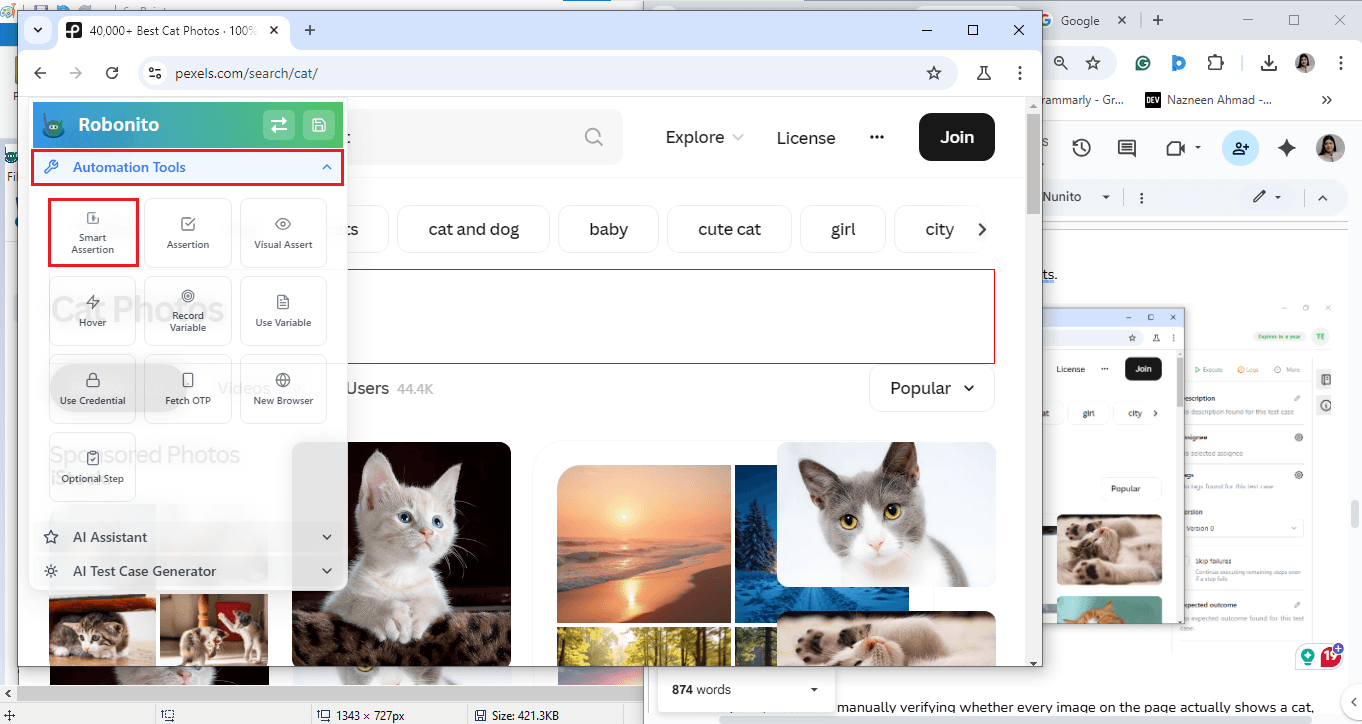
- Now, on the open Google window, select any cat image that you want to test.
- A dialog box will appear asking you to describe your assertion.
-
Here, type a meaningful description that defines what you want to verify.
-
For example, you can write:
“Are we talking about cat images?”
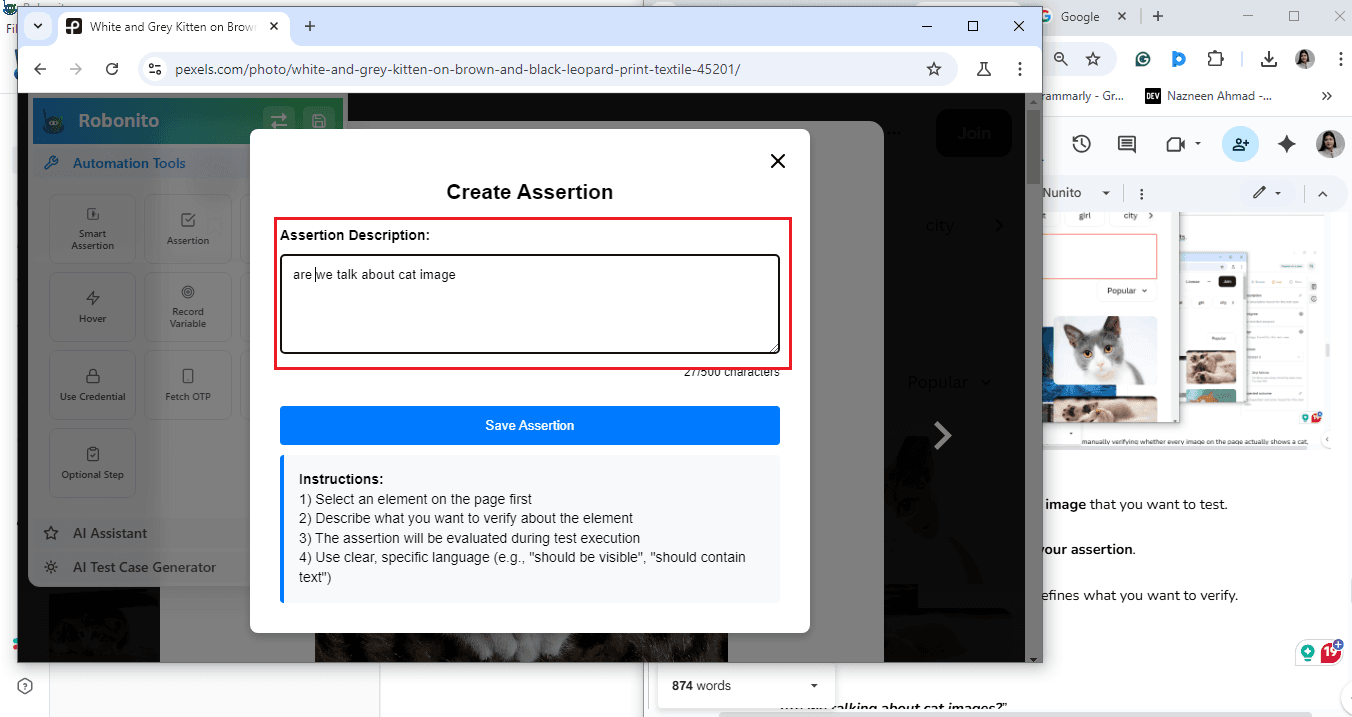
This description helps Robonito understand the context of what it needs to validate.

- After adding the description, click on Save Assertion.
- This step is important because it stores your validation logic for that visual element.
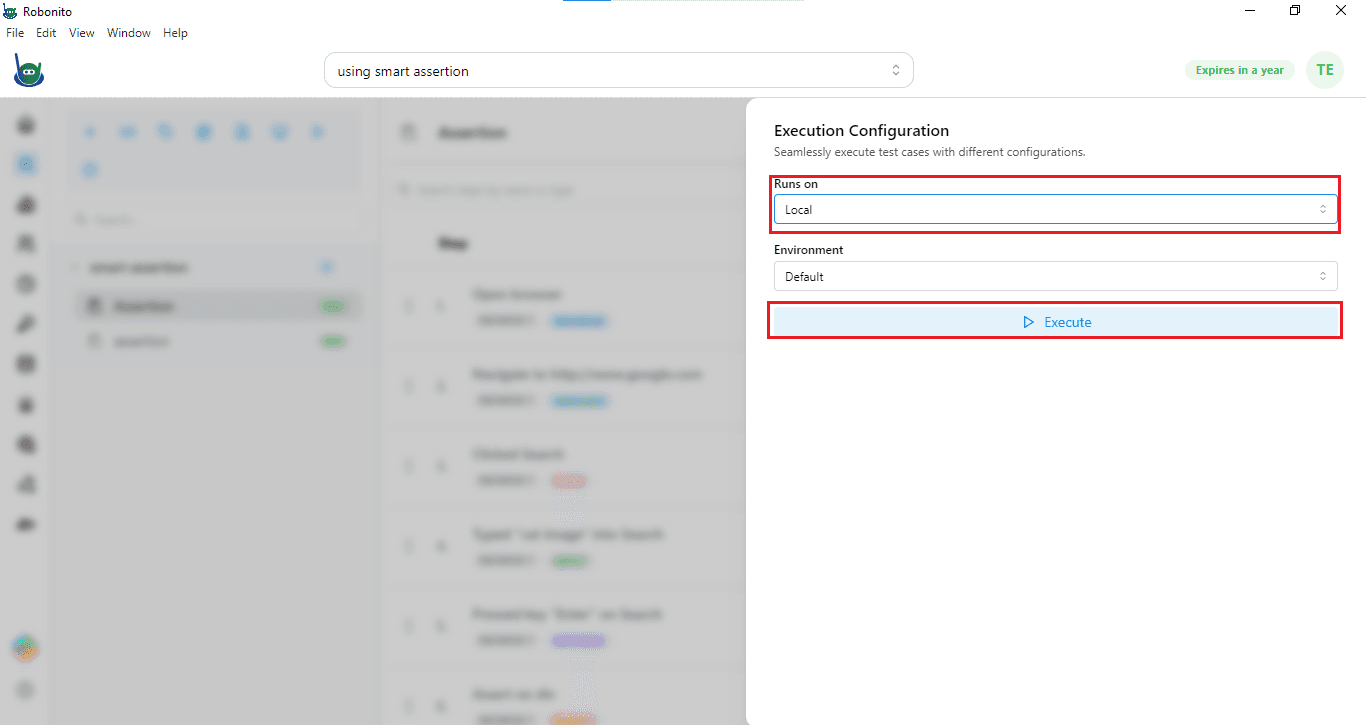
Step 4: Save and Execute the Test
- Once you have added your Smart Assertion, click on Save Test Case.
- To run the test, go to the Execute option available at the top-right corner of the Robonito window.
You will see two options:
- Run in Local
- Run in Cloud
Choose the one that suits your requirement. For this example, let us select Local Execution and click Execute. Robonito will now run the test in the background.
Step 5: View the Test Results
- After execution, you can check the Logs from the top-right menu.
- Here, you can see the detailed report of your test execution.
- The log will show:
- Whether the test passed or failed.
- Screenshots of the tested elements.
- The comparison of what was expected versus what was found.
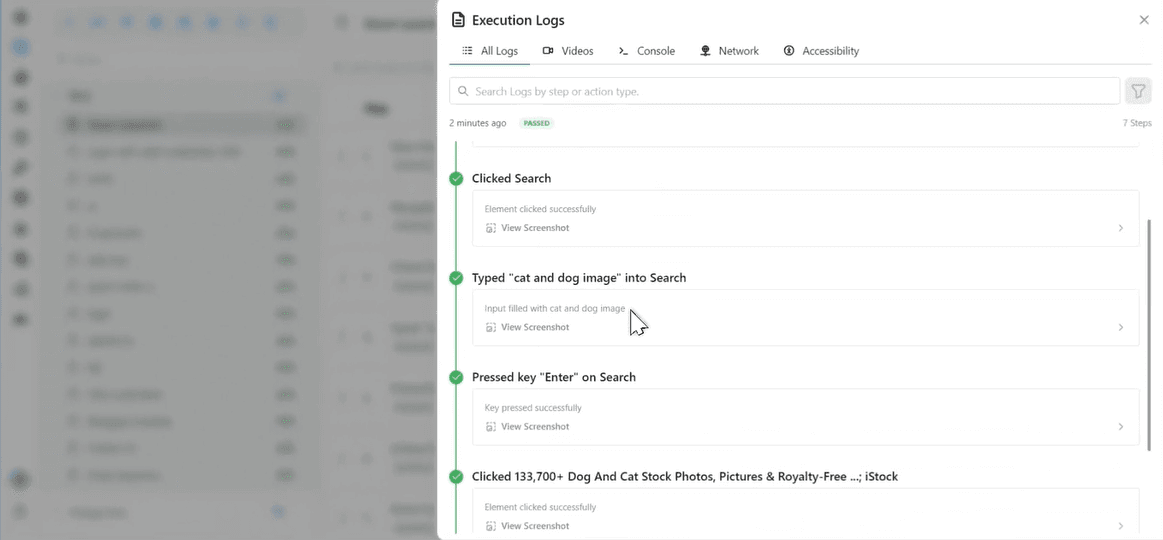
- You can also click on individual steps to see the screenshots and verification results.
- If everything is correct, your Smart Assertion will pass and show a green checkmark.
- If there is a mismatch, the result will highlight the differences found on the screen.
Understand the Outcome
- Smart Assertions save you time by automatically checking what matters on the page.
- You do not need to manually review every image or text.
- Robonito compares visuals quickly and gives you an accurate result in just a few minutes.
- This helps you validate the look and behavior of your web pages without extra effort.
Try Smart Assertions in Robonito Today
Make your UI testing easier with Smart Assertions. Sign up for Robonito today and start validating images, visuals, and web elements automatically. Save time, reduce errors, and keep your tests consistent as your application changes.