How to Record and Use Variables in Robonito
Learn how to record and use variables in Robonito to capture dynamic data and reuse it in your test cases with ease.

This tutorial will help you understand one of the most useful features in Robonito: how to record and use variables in Robonito test cases.
A variable is like a small container where you can store information while your test is running. This means you don’t need to type the same value again and again. For example, you can store a username, password, OTP, or any dynamically generated data.
During the test run, Robonito captures the value and reuses it later in the same test or in future steps. This makes your testing simpler, faster, and more organized.
Why Use a Variable in Robonito?
- Capture dynamic data like OTPs, reference numbers, or order IDs
- Reuse stored values across multiple test steps
- Enable data-driven testing without hardcoding values
- Connect actions across steps by passing values between them
Prerequisites – Let’s Get Ready
Before you start using Robonito, make sure everything is set up correctly. Completing these steps first will ensure a smooth testing experience.
Install Robonito
- Open your browser and go to https://robonito.com/
- Choose the download option for Windows or Mac
- Click Download and complete the installation
Robonito is now installed and ready to use.
Open Robonito and Log In
- Open Robonito from your system
- If you already have an account, enter your email and password
- If you are new:
- Click Sign Up
- Enter your email
- Create a password
- Follow the instructions to complete registration
Once logged in, you will see the Robonito Dashboard.
Create Your Workspace
- Click Create New from the top search bar
- Enter a workspace name (for example, HRM Employee Tests)
- Click Create
Your workspace is now ready. All test suites and test cases will be managed here.
Note: Before starting, review the Robonito getting-started documentation for a complete overview of the testing process.
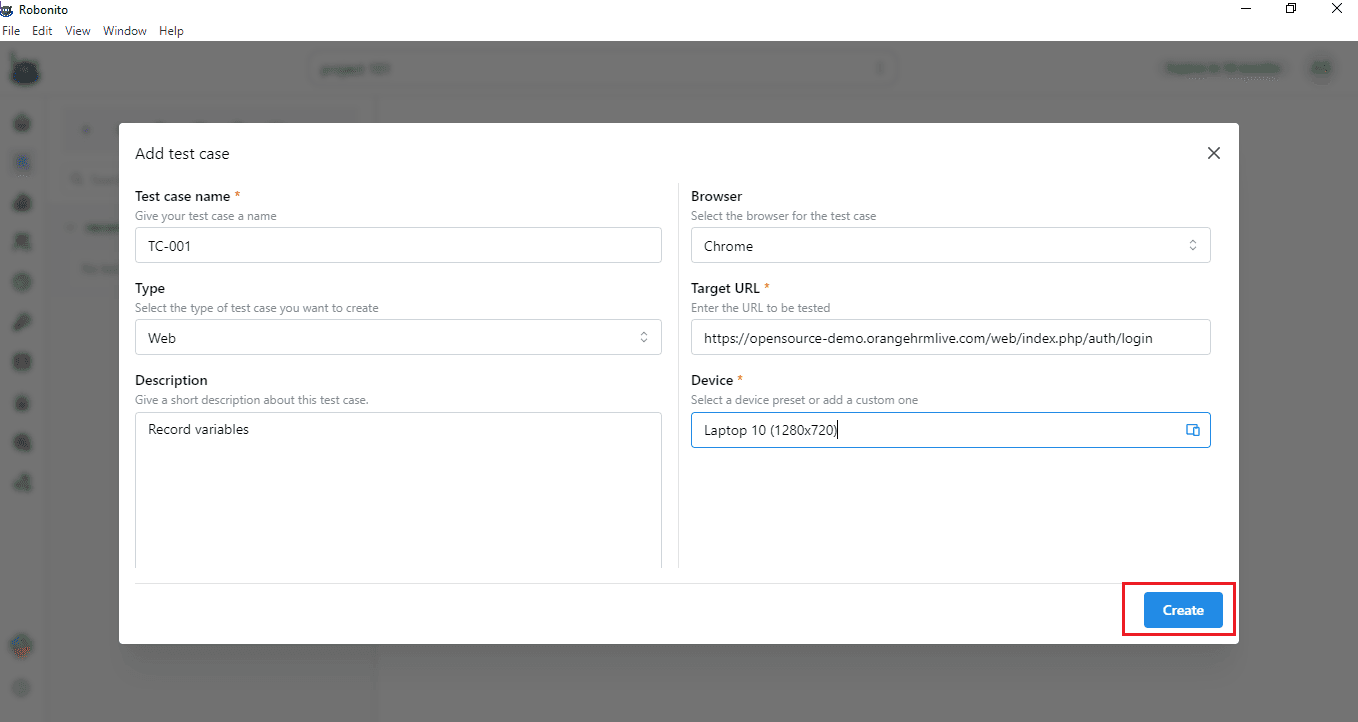
Step 1: Creating a Test Case
A test case is a set of steps that Robonito follows during execution.
-
Go to Test Explorer from the left panel
-
Click the + icon to create a Test Suite
-
Inside the suite, click Add Test Case
-
Fill in the required details:
- Name: TC-001
- Type: Functional / Regression
- Description: Purpose of the test
- Status: Active or Draft
- Assignee: Team member
- Expected Outcome: Expected behavior
- Browser: Execution browser
- Target URL:
[https://opensource-demo.orangehrmlive.com/web/index.php/auth/login](https://opensource-demo.orangehrmlive.com/web/index.php/auth/login)
-
Click Create
Your test case is now ready for recording.
Step 2: Recording Actions on the Website
Recording tells Robonito what actions to repeat later.

- Open Test Case Details
- Click Record from the top-right corner
- You will be redirected to the Robonito Recorder
- Click Start Recording
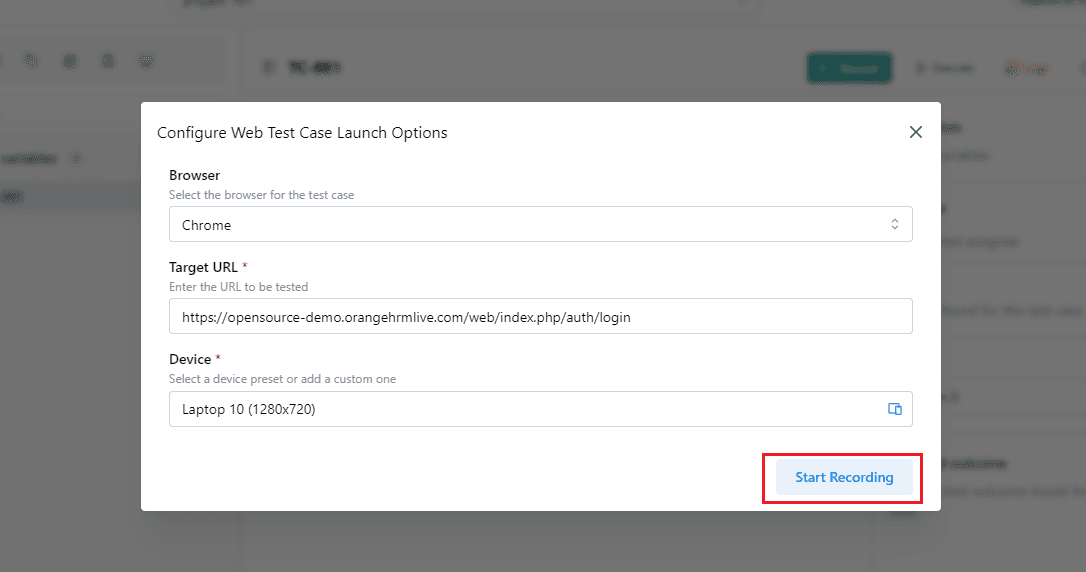
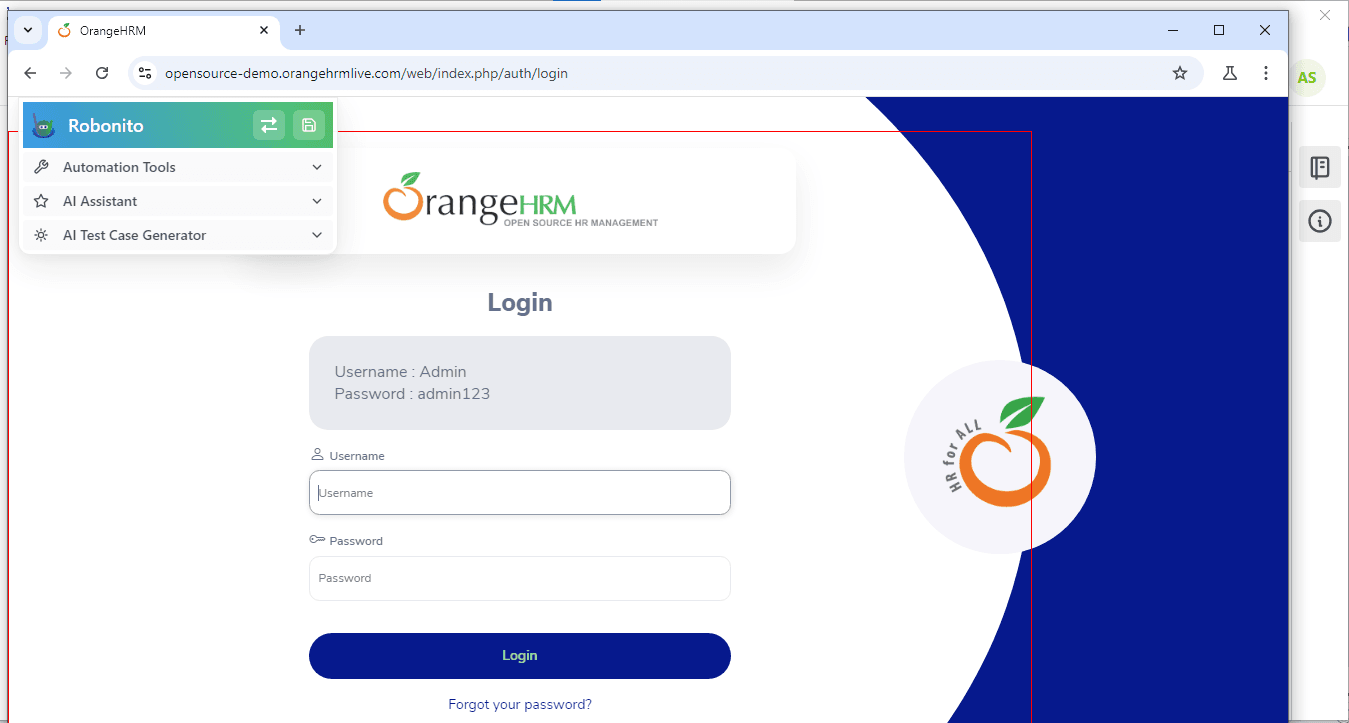
A new browser window opens with your target URL. Perform the actions normally—Robonito captures every click and input automatically.
Step 3: Capture Dynamic Data Using Record Variables
Some values change every time a test runs, such as Employee ID in Orange HRM. Robonito allows you to capture these values using Record Variables.
This eliminates manual typing and allows seamless reuse of dynamic data.
Example Scenario: Adding a New Employee
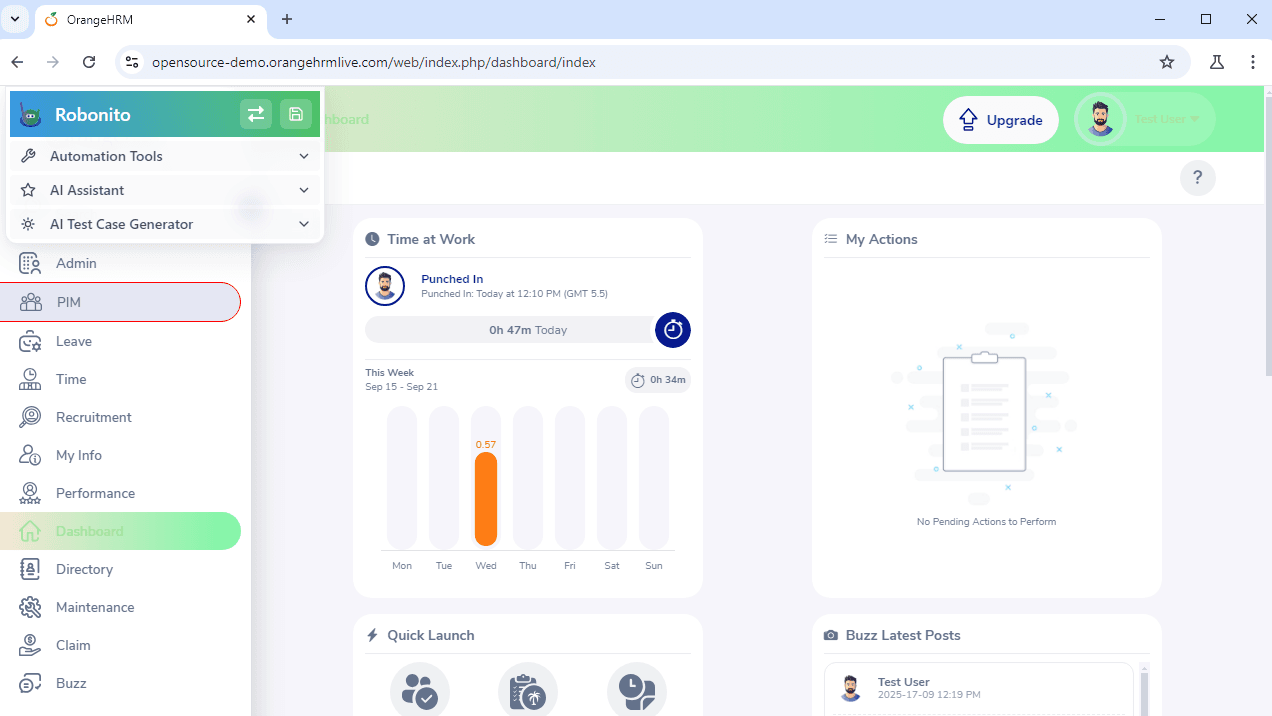
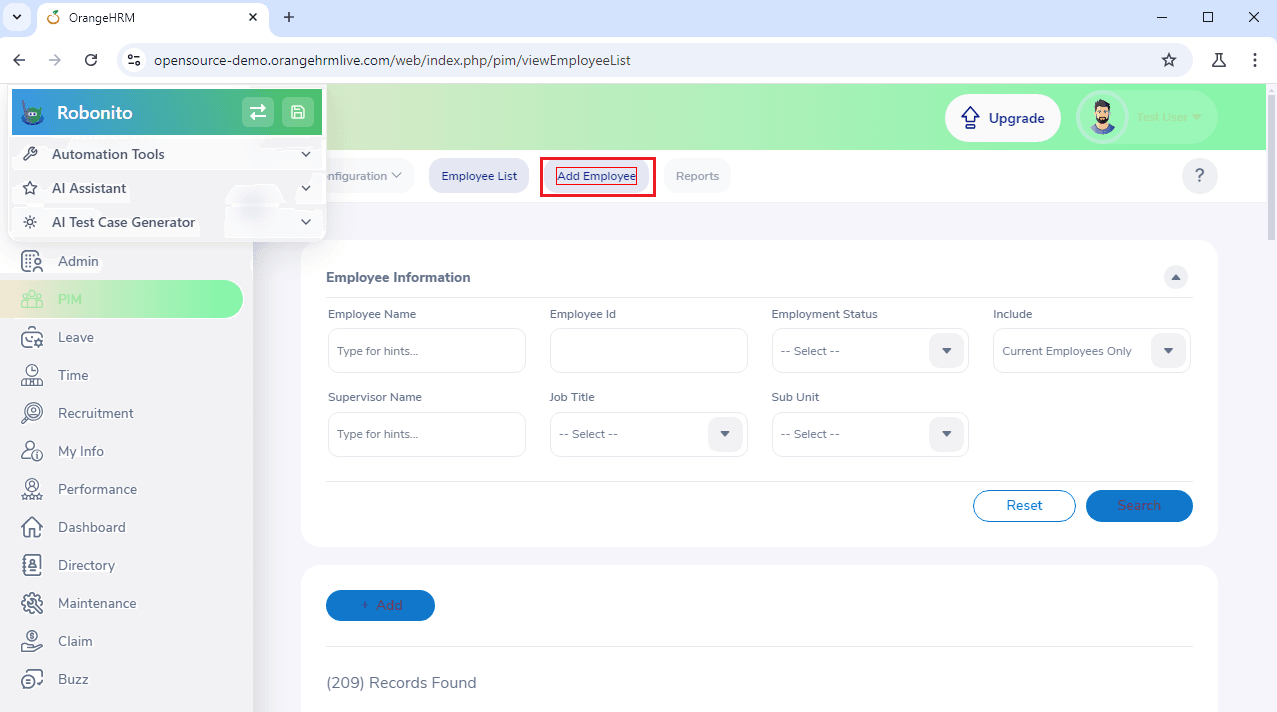
- Log in to the Orange HRM application
- Navigate to PIM from the sidebar
- Click Add Employee
- Enter details:
- Employee Name: John Clair
- Employee ID: System-generated or custom
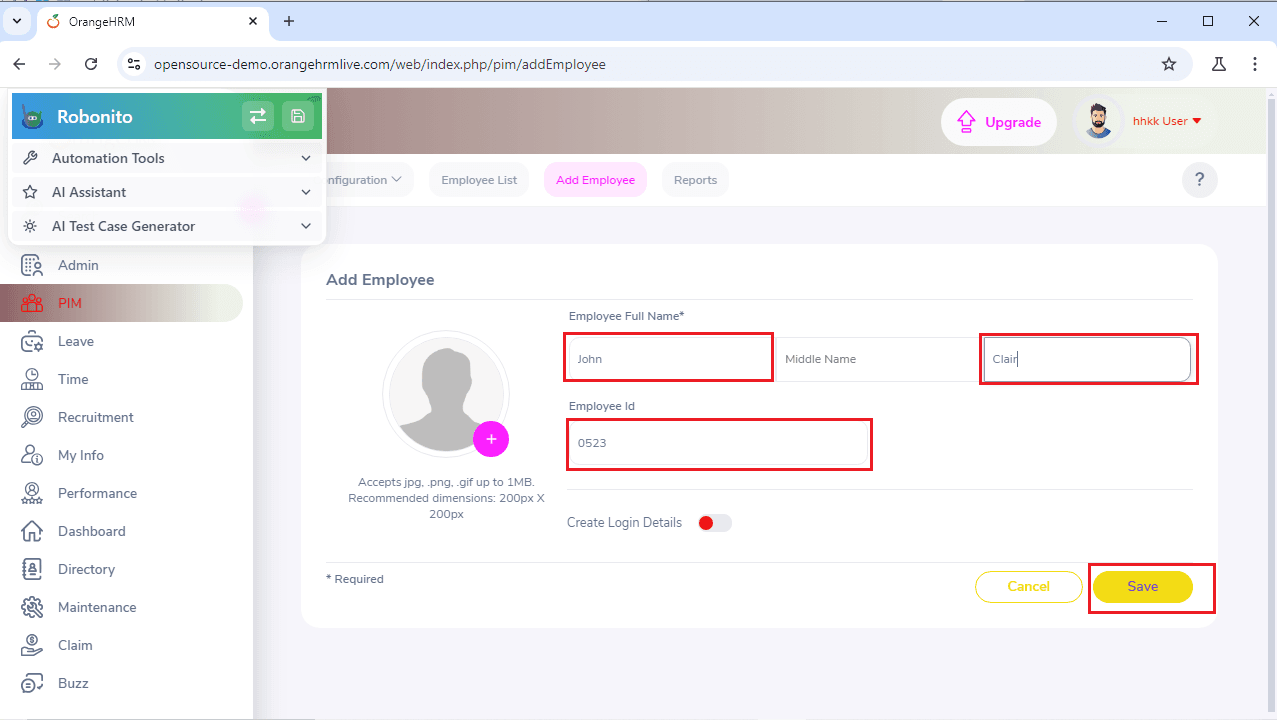
- Click Save
Step 3a: Recording the Employee ID
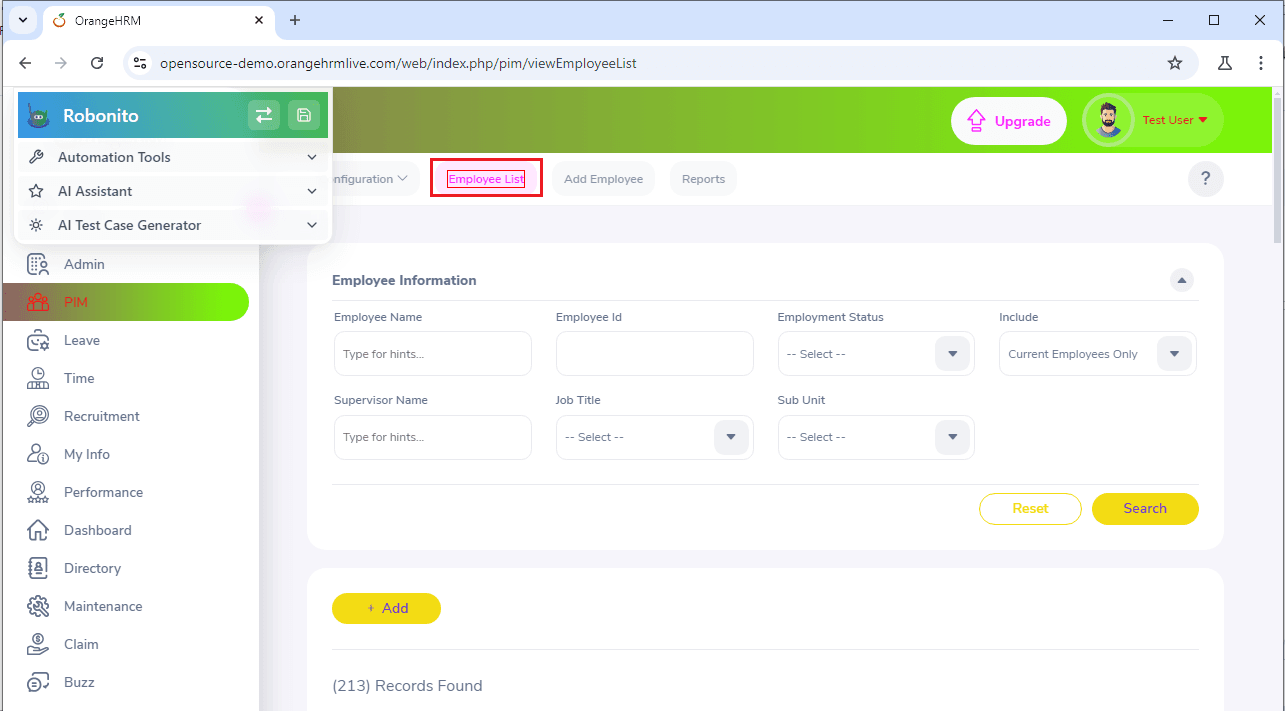
- Go to Employee List
- Click the Automation Tool icon (top-right)
- Select Record Variable
- Click on the Employee ID field
- A console appears showing the value
- Enter a Key Name (e.g.,
Employee-ID)
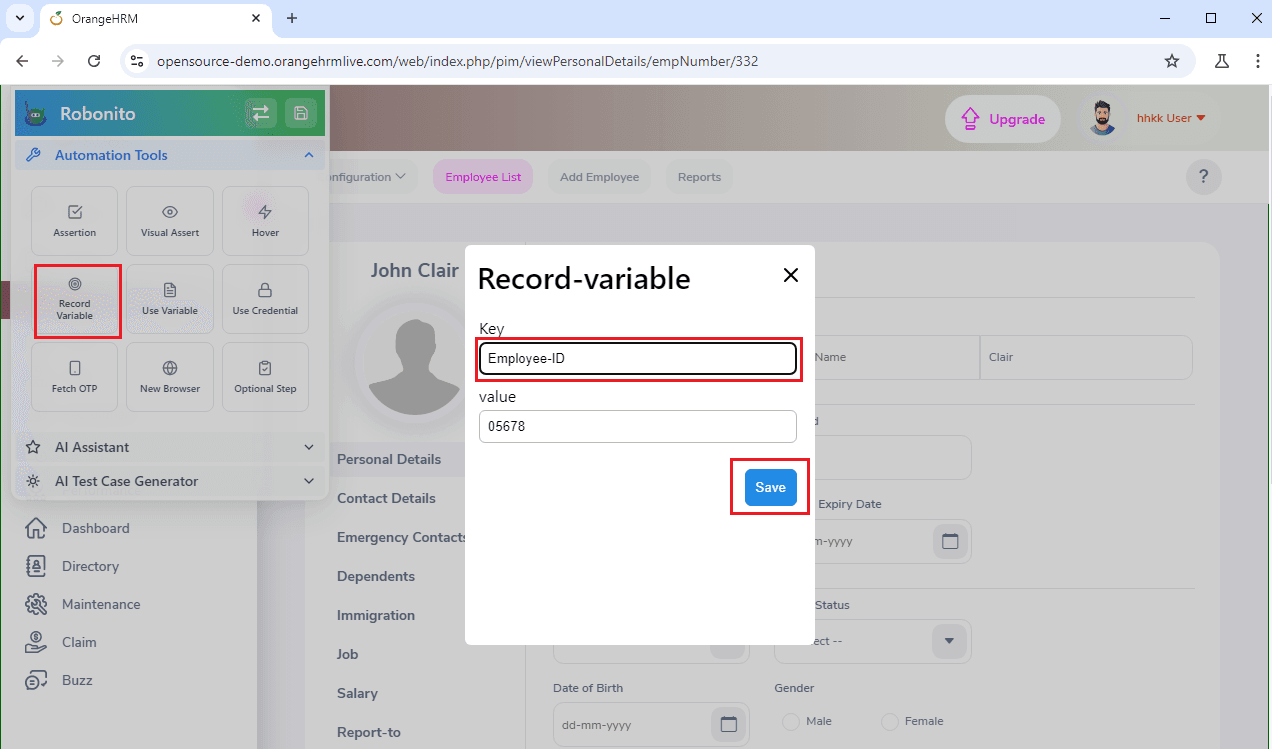
- Click Save
Robonito now stores the Employee ID automatically.
Step 3b: Recording the Employee Name
- Click Record Variable again
- Select the Employee Name field
- Enter a key name (e.g.,
Employee-Name) - Click Save
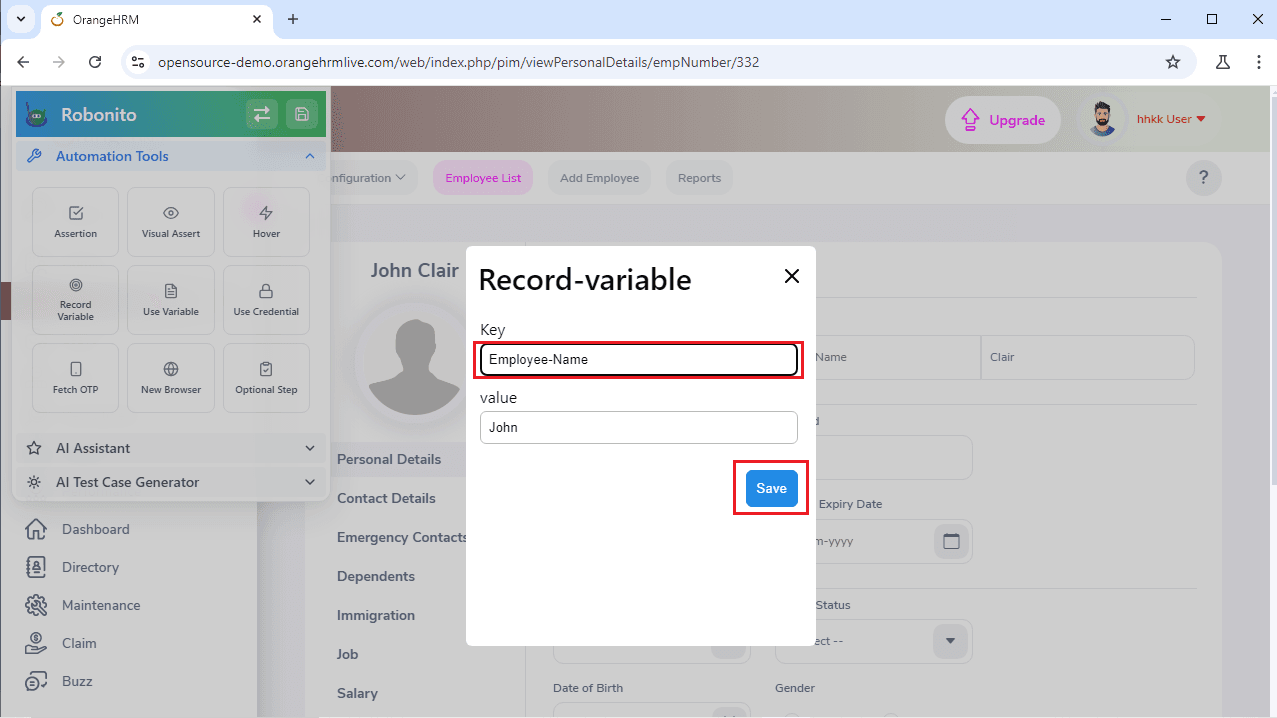 Both values are now stored as variables.
Step 3c: Using the Recorded Variables
- Go to Employee List
- Click the Automation Tool
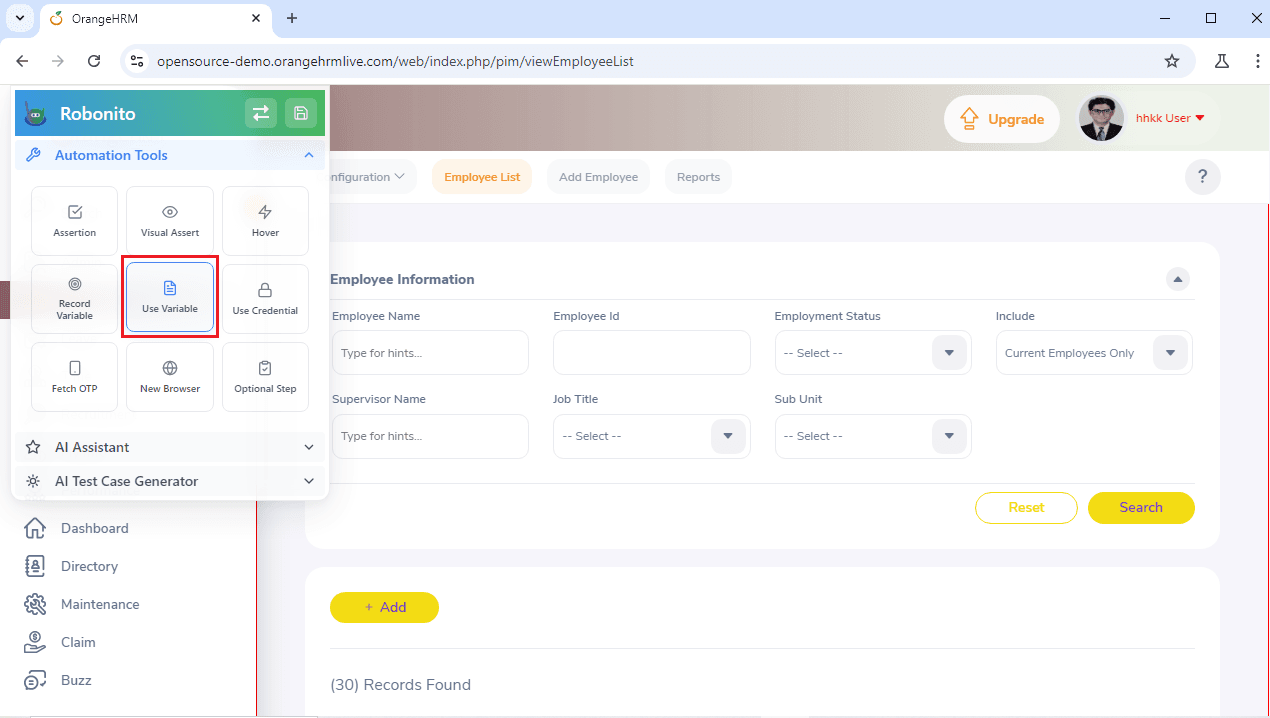
- Select Use Variable
- Choose
Employee-IDorEmployee-Name
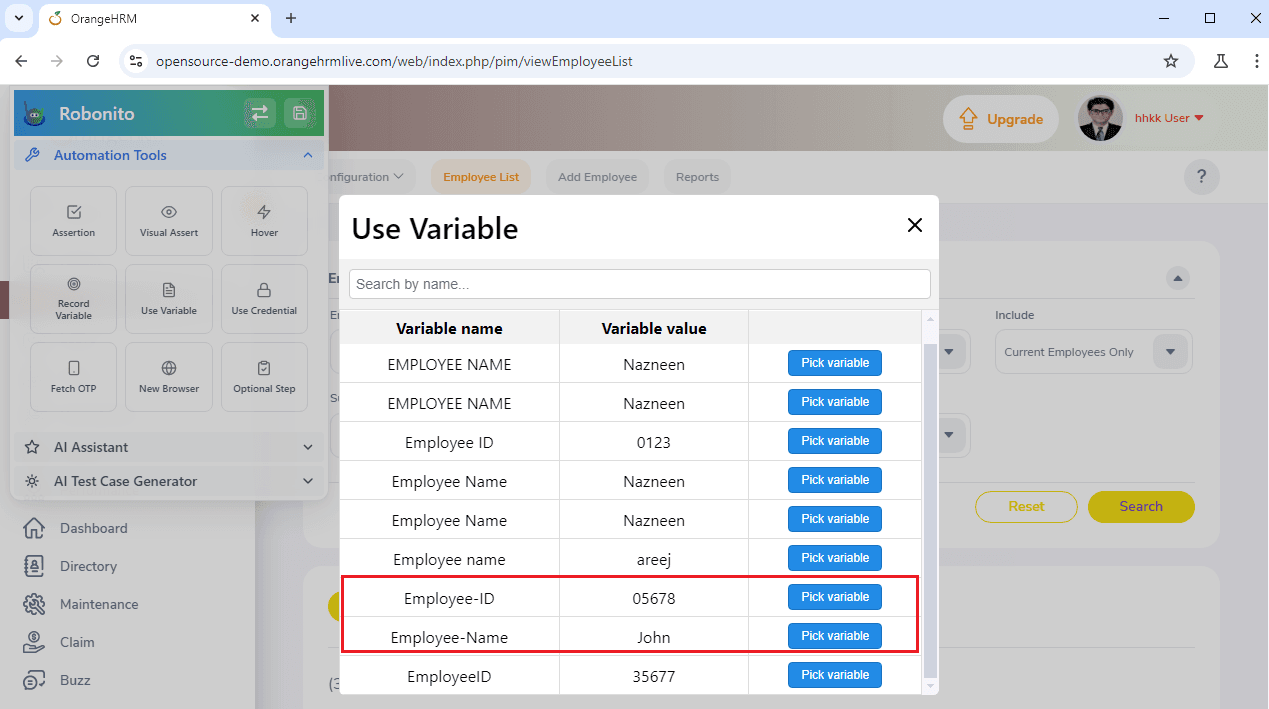
- Click Pick Variable

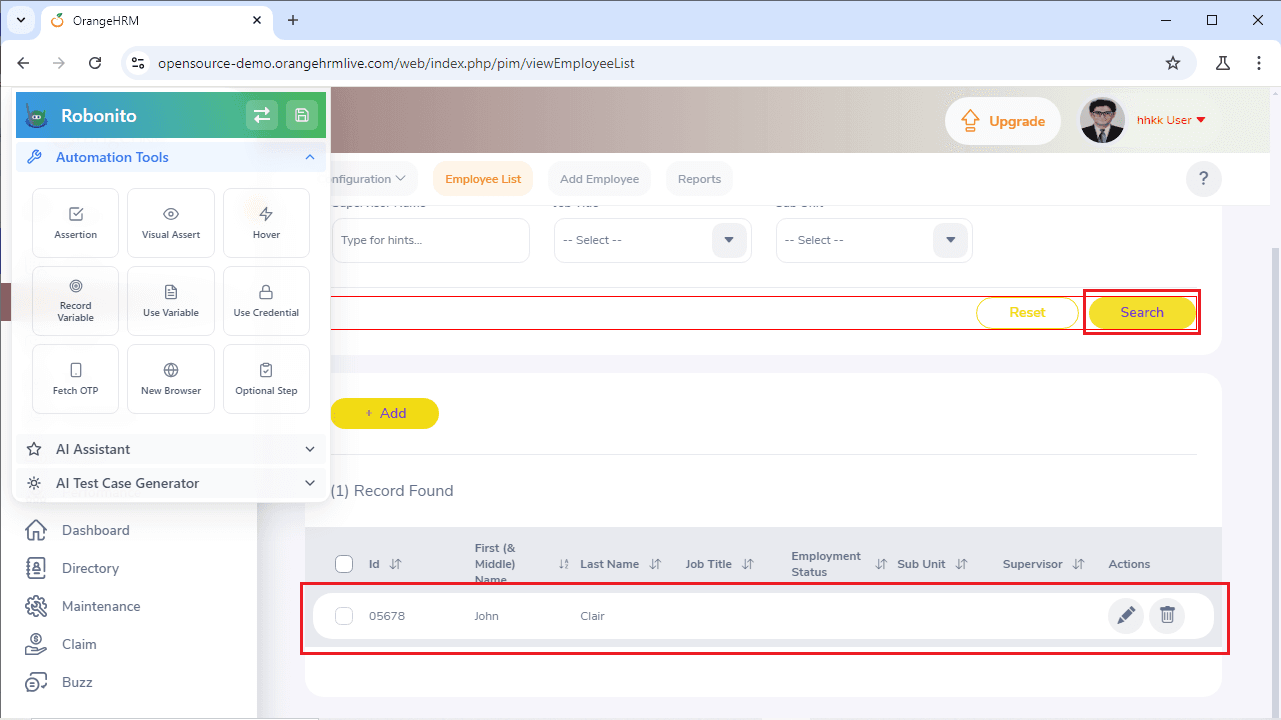
Robonito auto-fills the value in the search field.
Click Search to see the employee details instantly—no typing required.
Step 3d: Save Your Test
After completing all actions and variable usage, click Save.
This ensures Robonito remembers all steps and dynamic values.
Step 4: Add Random ID Generation
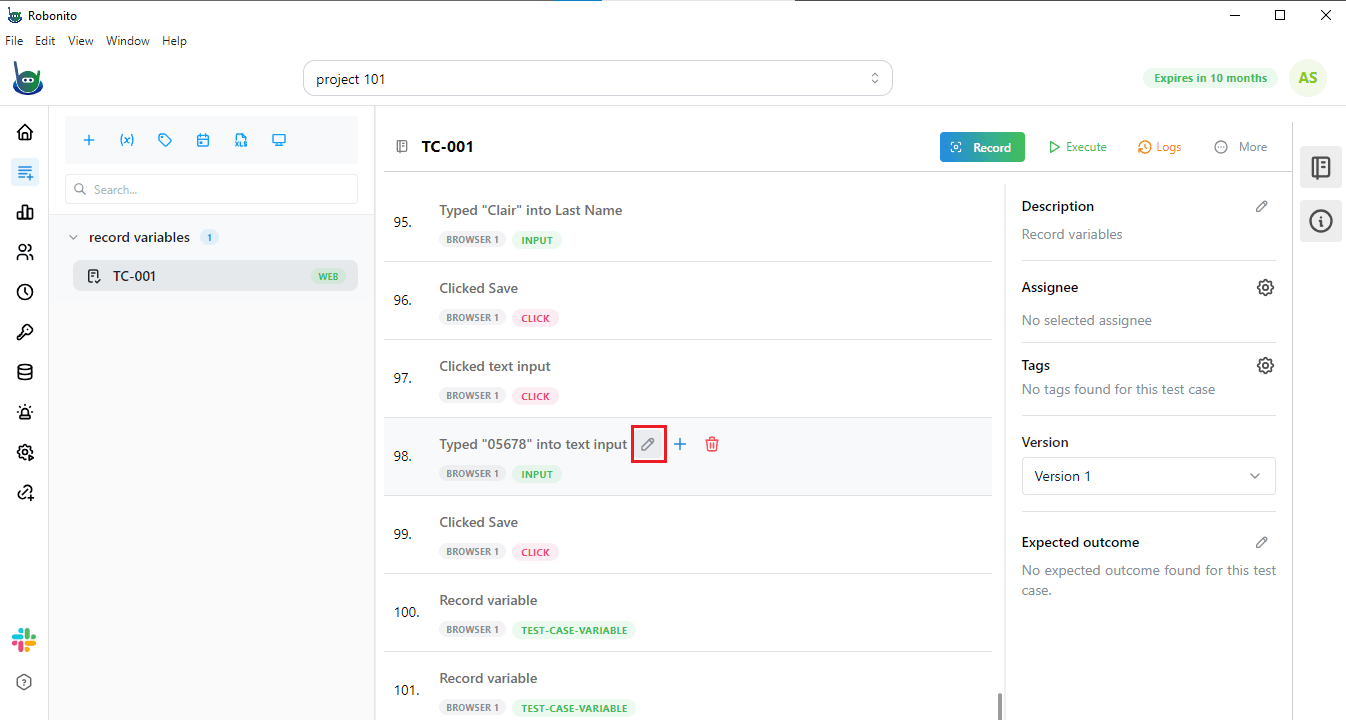
- Save the test and open the recorded steps console
- Find the step where Employee ID is entered
- Click Edit
- Open the Data section
- Enable Use Random Generation
- Select Number as generation mode
- Click Save Changes
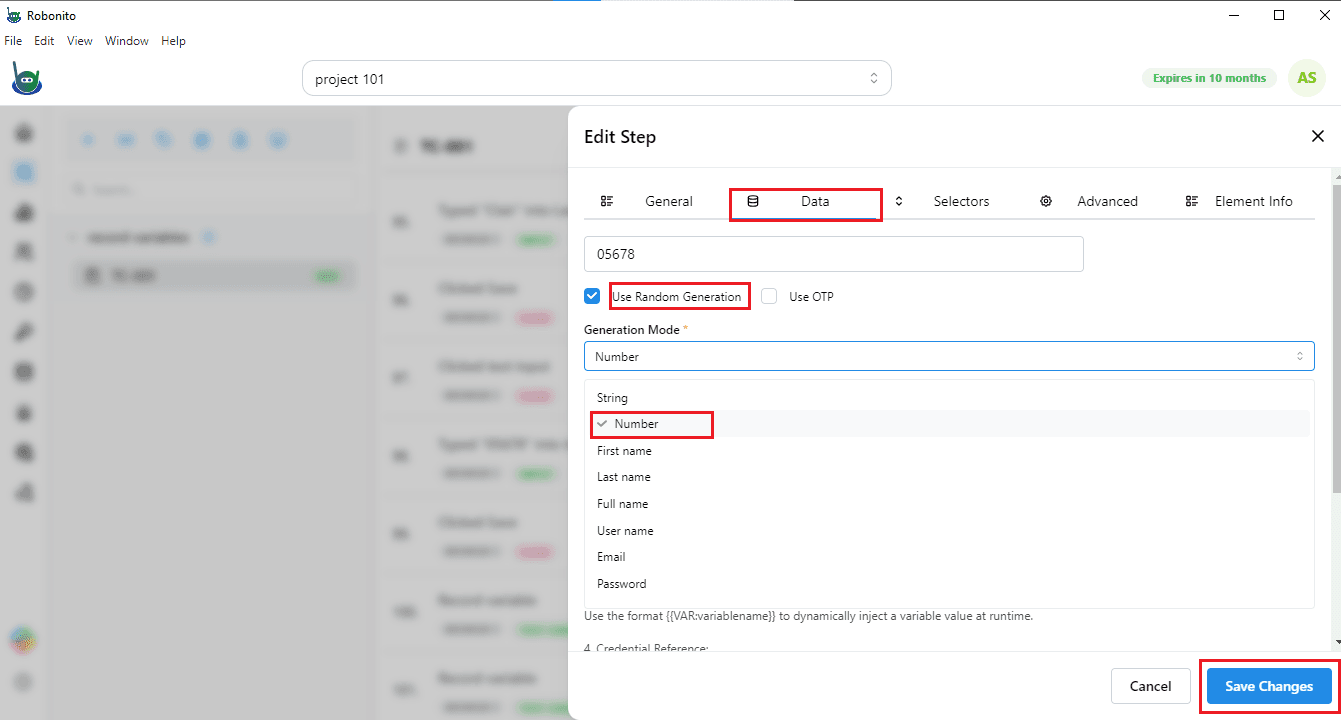
Robonito will now generate a new Employee ID every time the test runs.
Step 5: Running the Test
- Click Execute
- Choose Run in Local
- Click Execute again
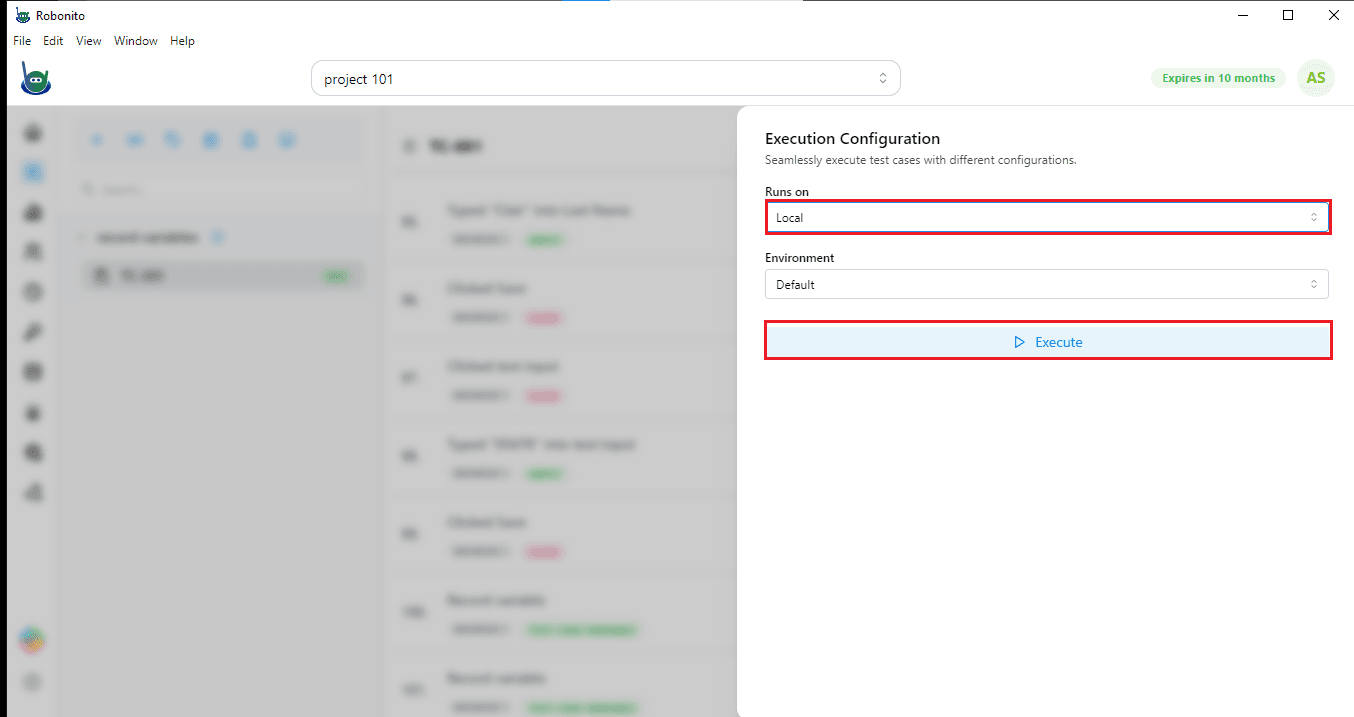
Robonito replays all recorded steps automatically.
Step 6: Test Report and Analytics
After execution, Robonito provides a detailed test report:
- Step-by-step execution status
- Pass/fail results
- Execution time
- Overall test summary
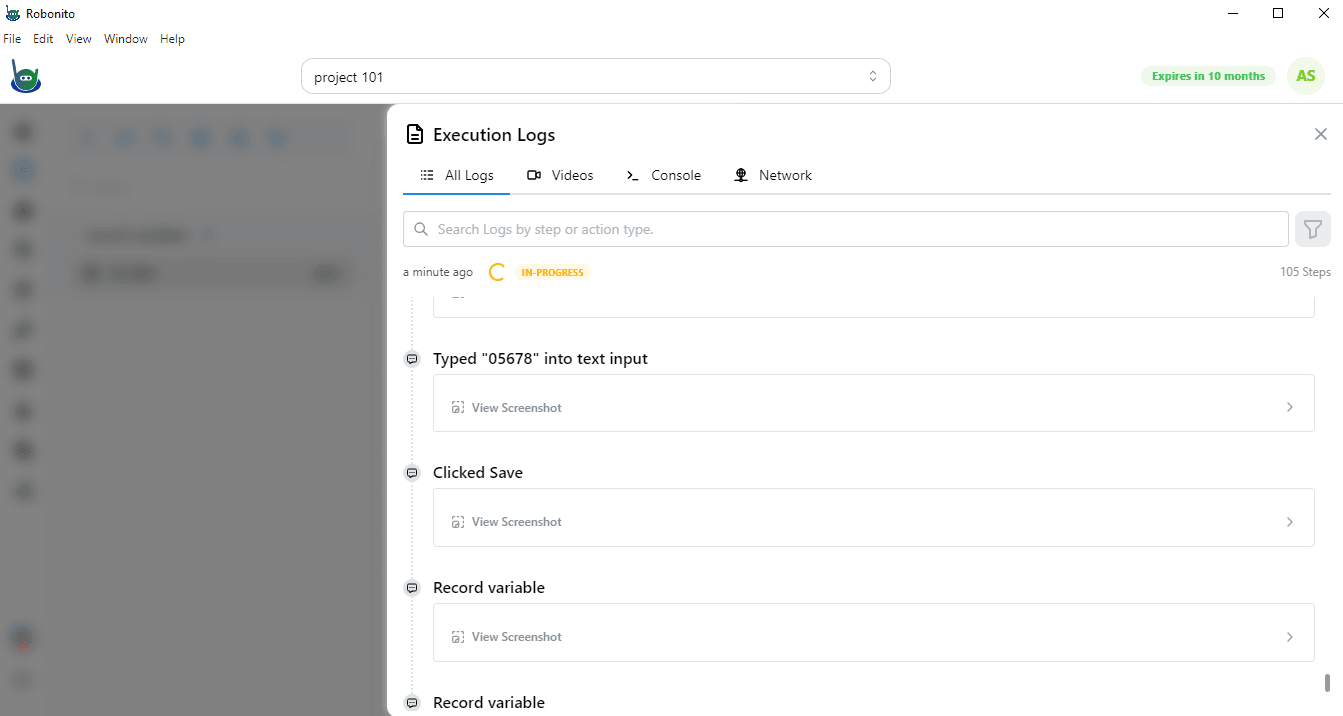
This makes debugging and optimization easy.
Try It Yourself on Robonito
Recording and using variables in Robonito saves time, improves accuracy, and simplifies automation. Sign up on Robonito today and make your test automation smarter and faster.