Plan and Schedule Your Test Runs in Robonito
In Robonito, you do not have to keep running your test plans manually every single time. You can schedule them to run on their own at a time you choose. It cou...

This is really useful because you can plan your regression tests to run at night or outside office hours. That way, your regular work does not get disturbed, and you still get the results ready when you need them.
In this tutorial, we will show you step by step how to schedule test cases in Robonito and make your testing much easier.
Prerequisites
Before you start scheduling in Robonito, there are a few things you should have ready:
-
Robonito should be installed on your system, and you must be logged in with your account.
-
Your test plan should already be created. In simple words, this means you should have a project, a workspace, and at least one test suite with test cases created and executed.
If you have not done these steps yet, do not worry. You can check our detailed setup guide and complete it first.
Once you are ready, you will be all set to automate test scheduling in Robonito and save yourself from running tests manually every time.
Schedule a Test Plan in Robonito
You have created your test cases and run them once successfully. Now, you might want to run them again later without doing it manually every time.
Scheduling a test plan lets Robonito run tests on schedule in Robonito at the time you choose. This is very useful for regression testing, which means checking again to make sure everything is still working after changes or updates to your app.
Instead of running the same tests over and over, you set it up once, and Robonito takes care of running them on time. This saves time and helps you make sure nothing breaks without being noticed.
Before Robonito scheduled execution, first check that your test cases are created are inside a test suite. Let us take an example:
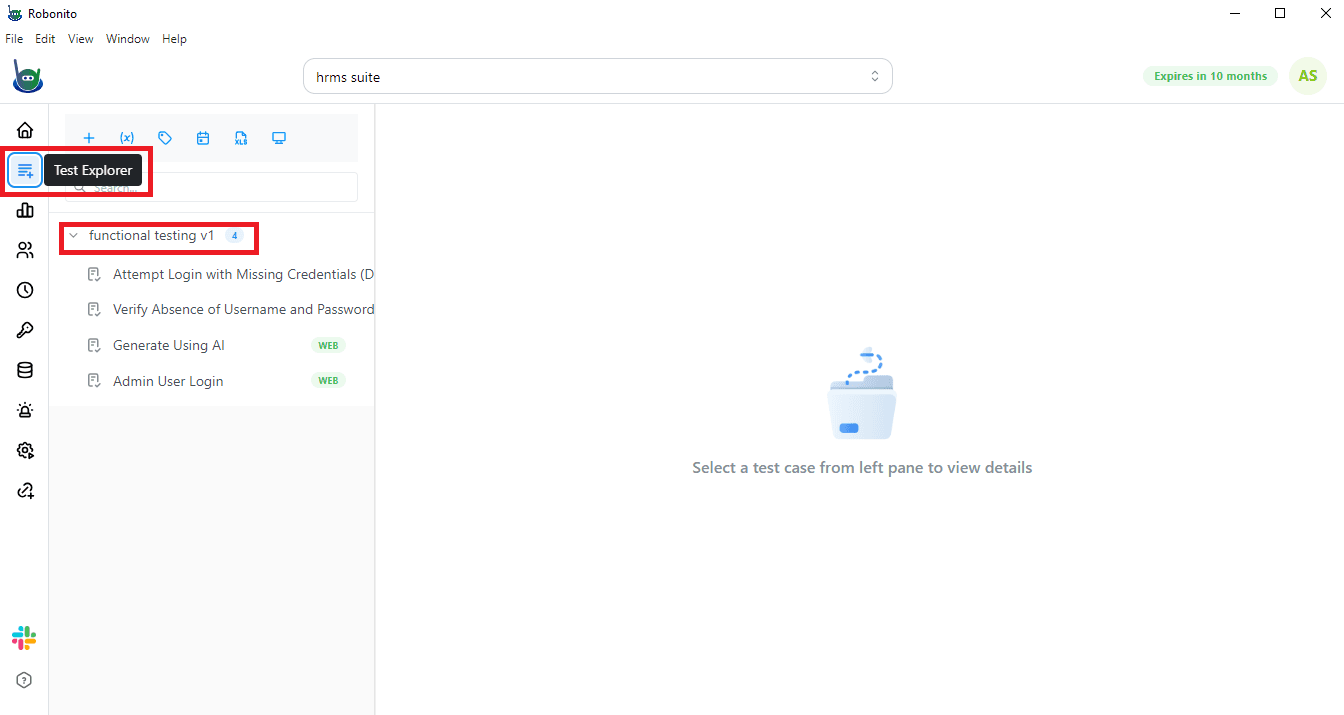
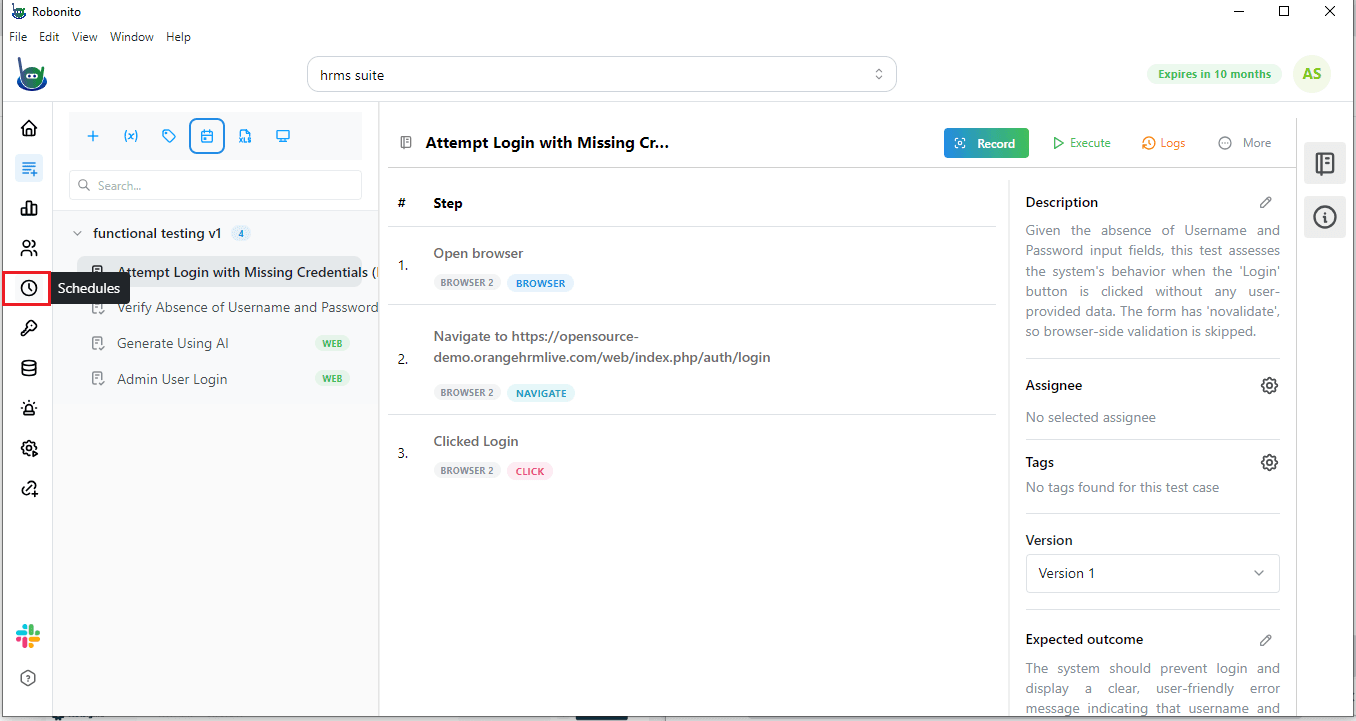
Example Test Suite: HRMS Suite
Inside this suite, we have four test cases:
- Attempt Login with Missing Credentials (Due to Absent Input Fields)
- Verify Absence of Username and Password Input Fields
- Generate Using AI
- Admin User Login
You can schedule all four test cases together, or just pick the ones you need.
Steps to Schedule Test Cases in Robonito
Step 1: Open the Test Explorer
First, go to the left sidebar on your Robonito dashboard and click on the Test Explorer tab. This will open a list of all your test suites so you can see what you have ready to schedule.
Step 2: Choose your test suite
Next, pick the test suite where your test cases are saved. For example, if you have a suite called Functionality Testing, click on that. This will show all the test cases under this suite.
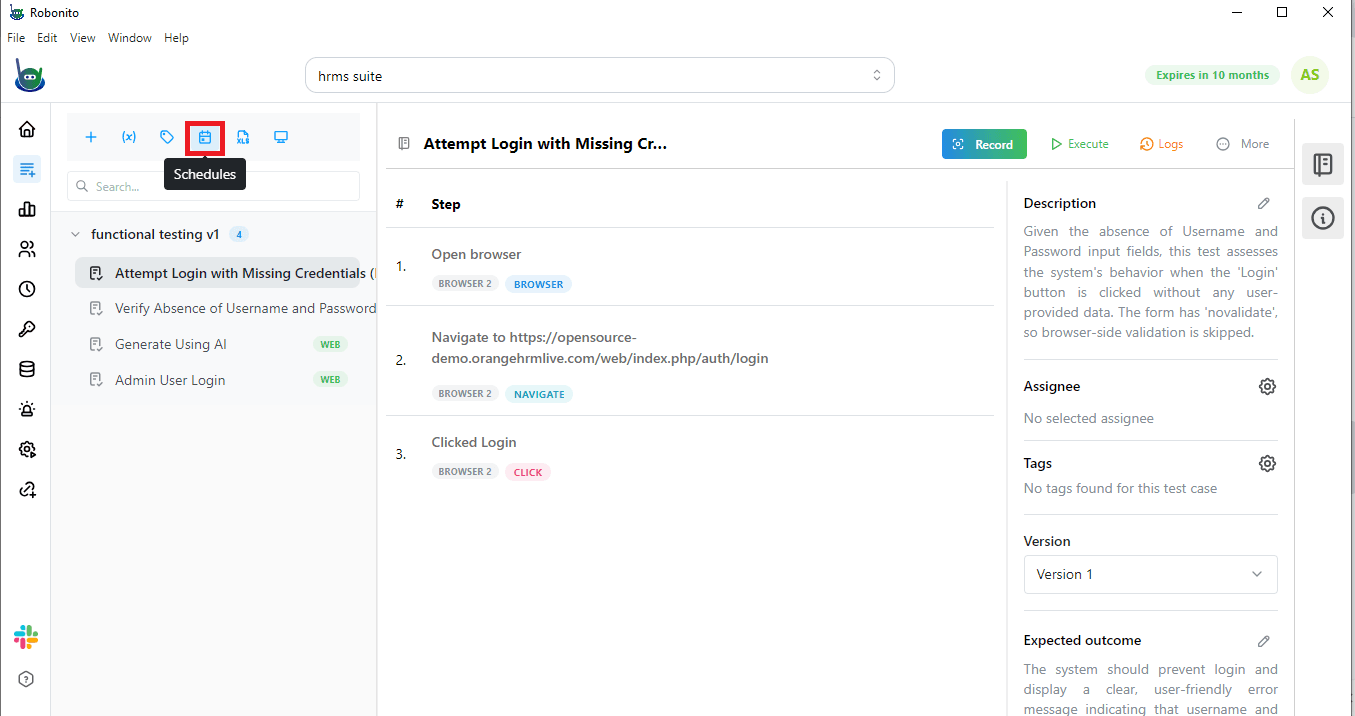
Step 3: Create a test schedule
3.1 Open the Schedule option
At the top of the page, you will see a Schedule button. It looks like a small calendar or clock icon. Move your mouse over it and click. A console will open where you can set up your test cases to run automatically at the time you want.
3.2 Fill in the schedule details
Now, you need to add a few details to your schedule:
-
Schedule Name – Give it a clear and simple name so you can easily recognize it later. For example: “Weekly Login Tests.”
-
Frequency – Decide how often the test should run. You can choose Daily or Weekly. If you pick weekly, you will also get to select the specific day of the week.
-
Timezone – Choose the timezone for your test run. This ensures the execution happens at the right time for your location or team.
-
Execution Time – Set the exact time for the test to run. By default, it shows the current time, but you can change it to whatever time works best.
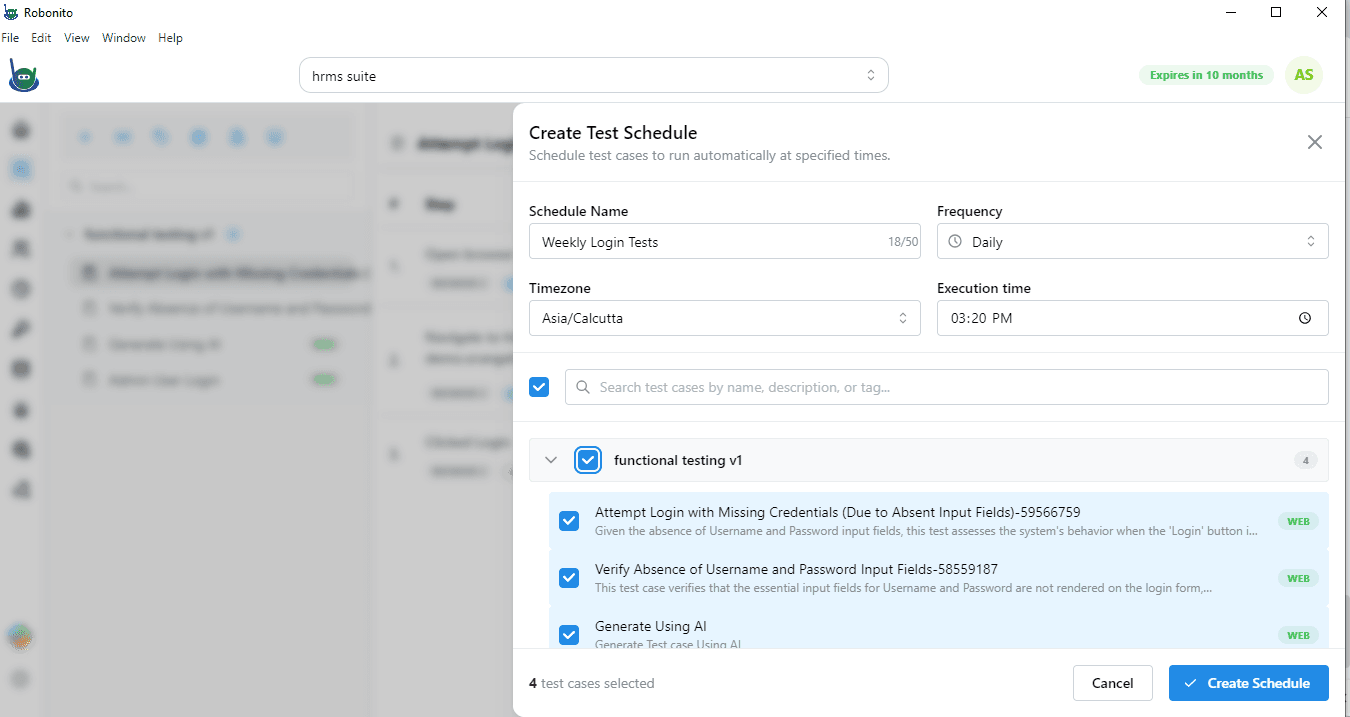
3.3 Select your test cases
Below these options, you will see all the test cases in the suite. Tick the ones you want to include in this schedule. You can select all of them or just a few, depending on your needs.
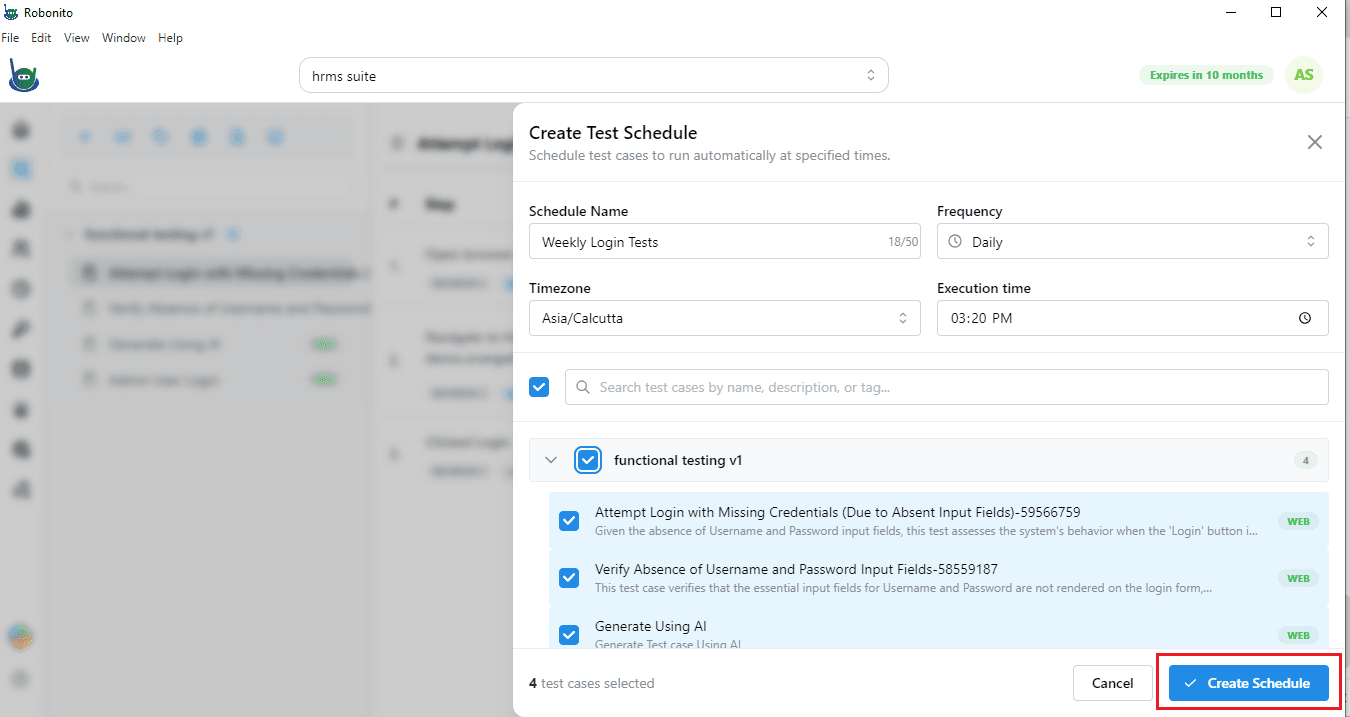
3.4 Save the schedule
Once you have added all the details and picked the test cases you want to run, just click the Create Schedule button. That’s it! Robonito will take care of running your tests automatically at the time you set. You don’t have to do anything else.
View Test Plan Schedules in Robonito
When you create a schedule by clicking the Create Schedule button, Robonito will add it to your list. To see that list, look at the left side menu and click on Schedules.
Here, you will see a list of all your scheduled test plans. The list will show details like:
- Serial number
- Name
- Suite
- Status
- Upcoming run
- Frequency
- Scheduled by
- Created date
- Actions
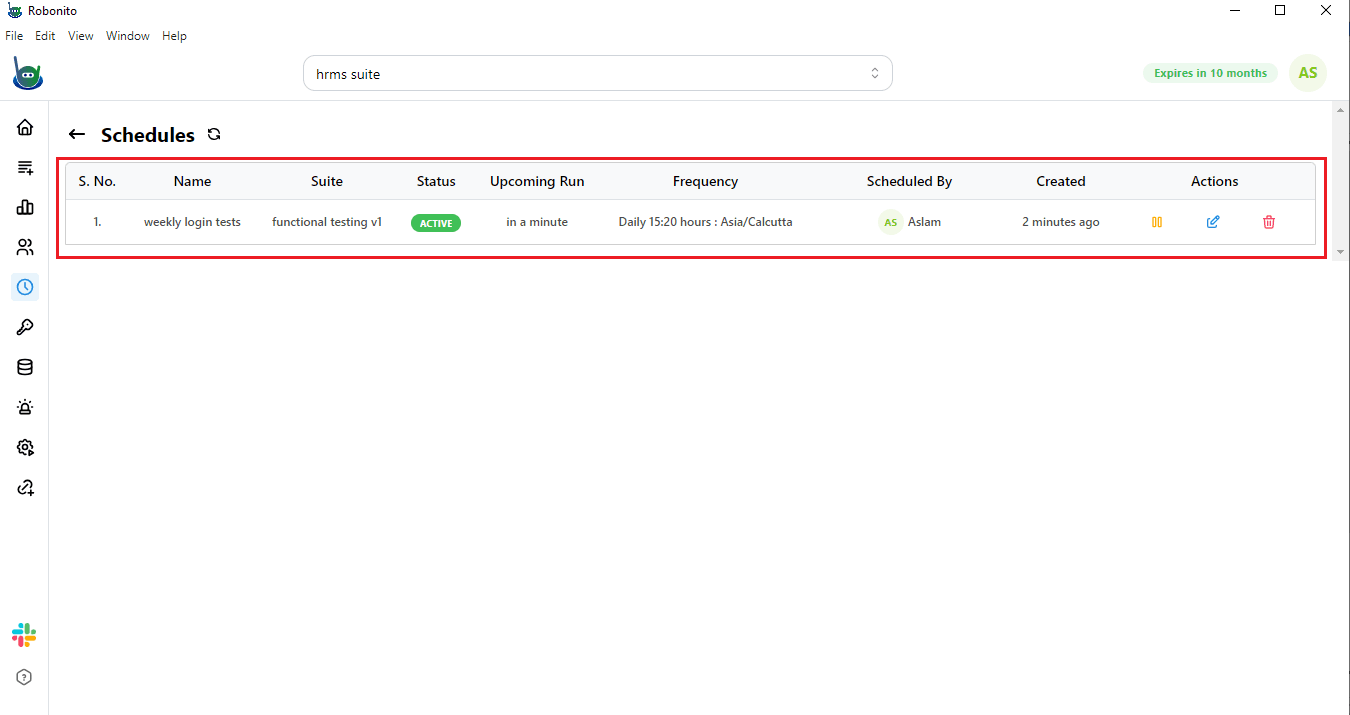
This page helps you easily manage your test case schedules.
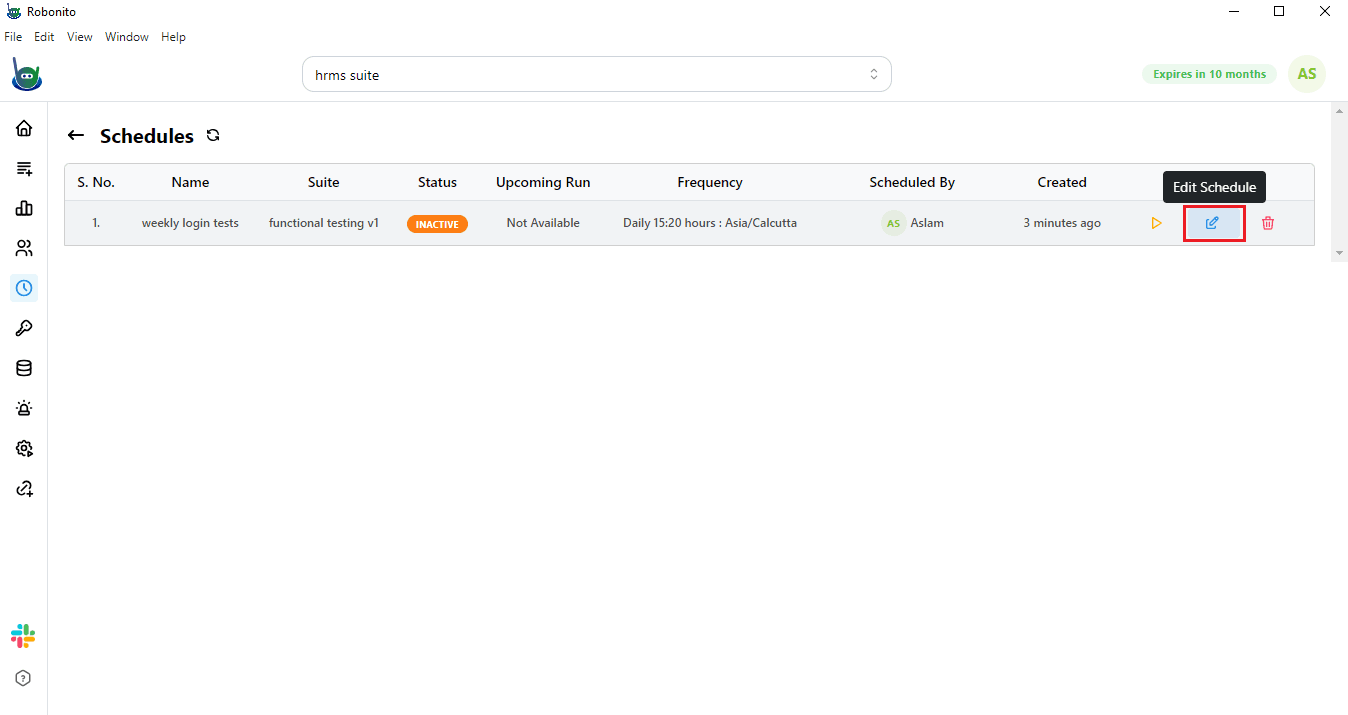
Manage Your Test Case Schedule
On this page, you can pause, edit, or delete any schedule. Let me explain:
Pause a schedule:
If you do not want a test to run for now, just click the pause icon. It will stop the schedule. Later, when you are ready, you can activate it again.

Edit a schedule:
If you need to change something, click the edit icon. An Edit Schedule window will open where you can update the details. Once you finish, click the Schedule button to save your changes.
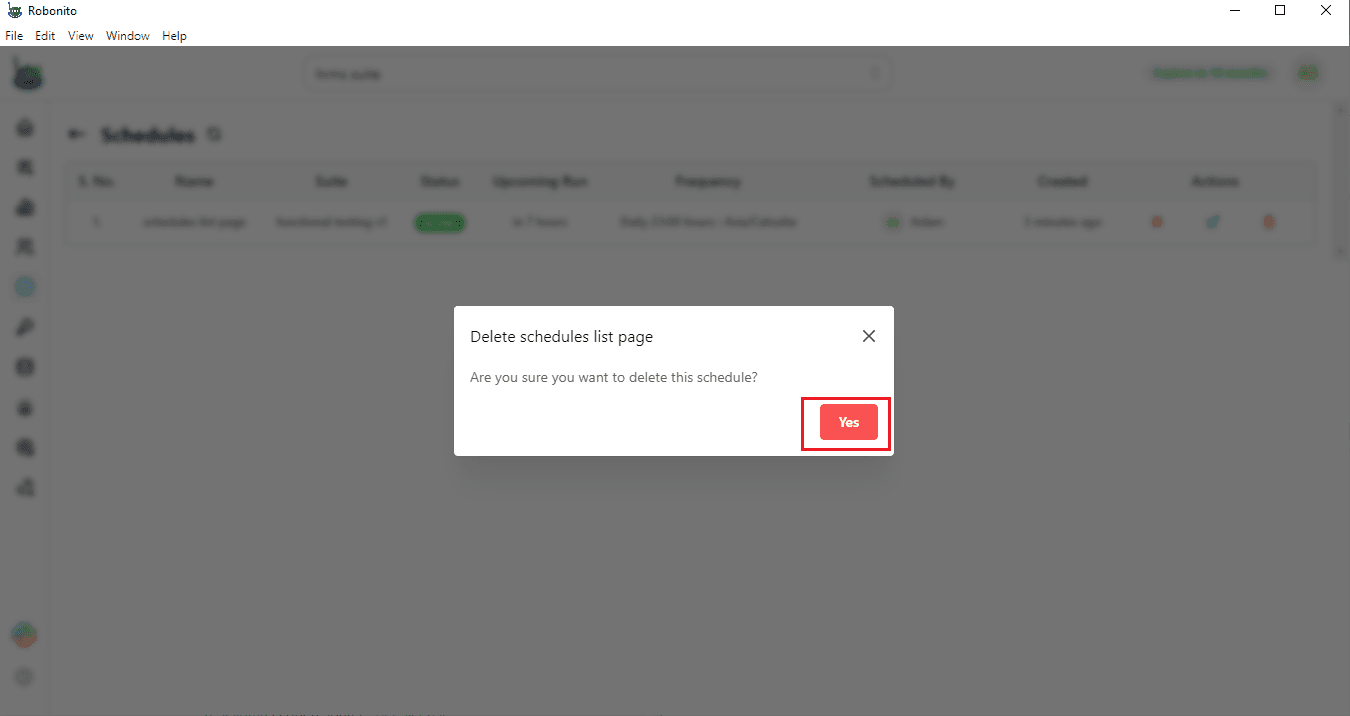
Delete a schedule:
To remove a schedule completely, click the delete icon.
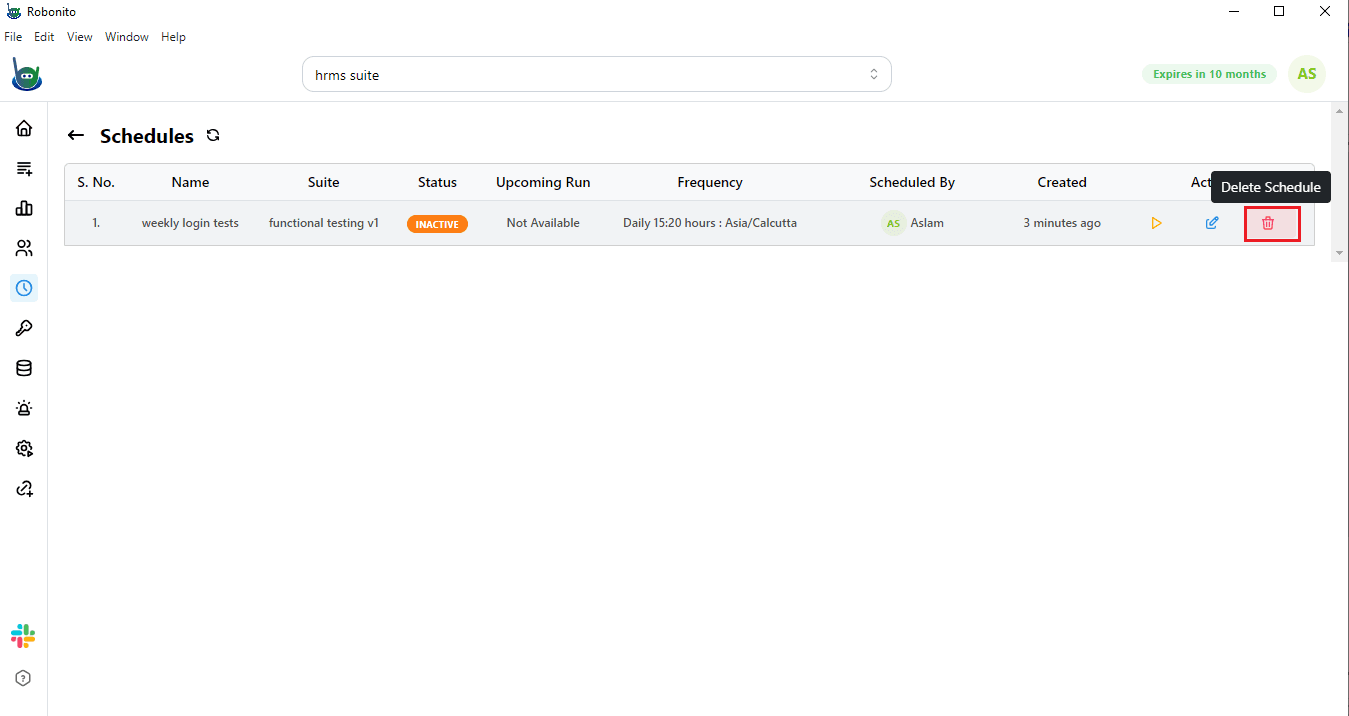
Robonito will ask for confirmation with a pop-up. Click Yes, and the schedule will be deleted.
That is it. This way, you can quickly view and manage all your test case schedules inside Robonito.
Ready to Try It Yourself?
That’s how easy it is to schedule and manage your test runs in Robonito. If you have not signed up yet, create your account today and start automating your test cases in just a few clicks.