Most manual-to-automation transitions fail not because automation does not work, but because teams try to automate everything at once, choose the wrong tool for their team's skill level, and build tests before building the pipeline. This guide covers the transition correctly — with the exact sequence, realistic timeline, real code examples, and an honest ROI calculation so you know what to expect and when.
By Robonito Engineering Team · Updated June 2026 · 20 min read
Quick stats
| Fact | Source |
|---|---|
| Teams that automate testing deploy 208× more frequently | DORA State of DevOps 2025 |
| Manual regression testing consumes 30–60% of QA team capacity | Capgemini World Quality Report 2025 |
| A production bug costs 10× more to fix than the same bug caught in testing | IBM Systems Sciences Institute |
| 68% of engineering teams have adopted at least one automated testing tool | World Quality Report 2025 |
| No-code test automation adoption grew 340% from 2023 to 2026 | Gartner |
| Teams completing the manual-to-automation transition report 2× fewer production defects | DORA 2025 |
Table of Contents
- Why manual testing cannot scale — the honest picture
- What to keep manual — always
- The ROI framework — calculate before you start
- Choosing the right automation tool for your team
- The 7-step transition — with timeline
- Real code examples — your first automated tests
- Building your CI/CD pipeline
- Onboarding non-technical QA to automation
- AI-powered automation — the 2026 approach
- Common transition mistakes and how to avoid them
- Measuring progress — metrics that matter
- Pre-transition readiness checklist
- Frequently Asked Questions
The fastest path from manual testing to automated coverage
Robonito lets any QA analyst — technical or not — record a user flow and have automated tests running in CI the same day. No scripting, no selectors, no configuration. Try Robonito free →
1. Why manual testing cannot scale — the honest picture
Manual testing is not bad — it is essential for the scenarios it does well (exploratory testing, first-pass feature validation, usability evaluation). The problem is that manual testing does not scale with modern release velocity.
The scaling math:
Release cadence: 2 weeks (26 sprints/year)
Manual regression suite: 200 test cases
Average manual execution time: 8 minutes per test case
Manual regression cycle: 200 × 8 min = 1,600 minutes = 26.7 hours per cycle
Annual manual regression time: 26.7 hours × 26 = 694 hours

At 1 FTE QA tester (1,760 working hours/year):
Manual regression consumes 39% of one tester's entire year.
For 50 tests/sprint of new feature testing: add another 20% of one FTE.
Combined: 59% of a QA tester's year is spent on regression and feature testing alone.
That leaves 41% for exploratory testing, bug investigation, and process improvement.
This math gets worse as the product grows. At 400 test cases, manual regression consumes 79% of a QA FTE's year. The team must hire a second tester to maintain the same exploratory testing capacity — or skip exploratory testing, which is where the most important bugs live.
The velocity compound: Teams releasing weekly or multiple times per week face regression cycles that physically cannot complete before the next release. The choice becomes "ship without full regression" or "slow down releases." Neither is acceptable.
Automation does not eliminate the manual testing that matters. It eliminates the mechanical repetition that scales poorly, freeing testers for the high-judgment work that automation cannot do.
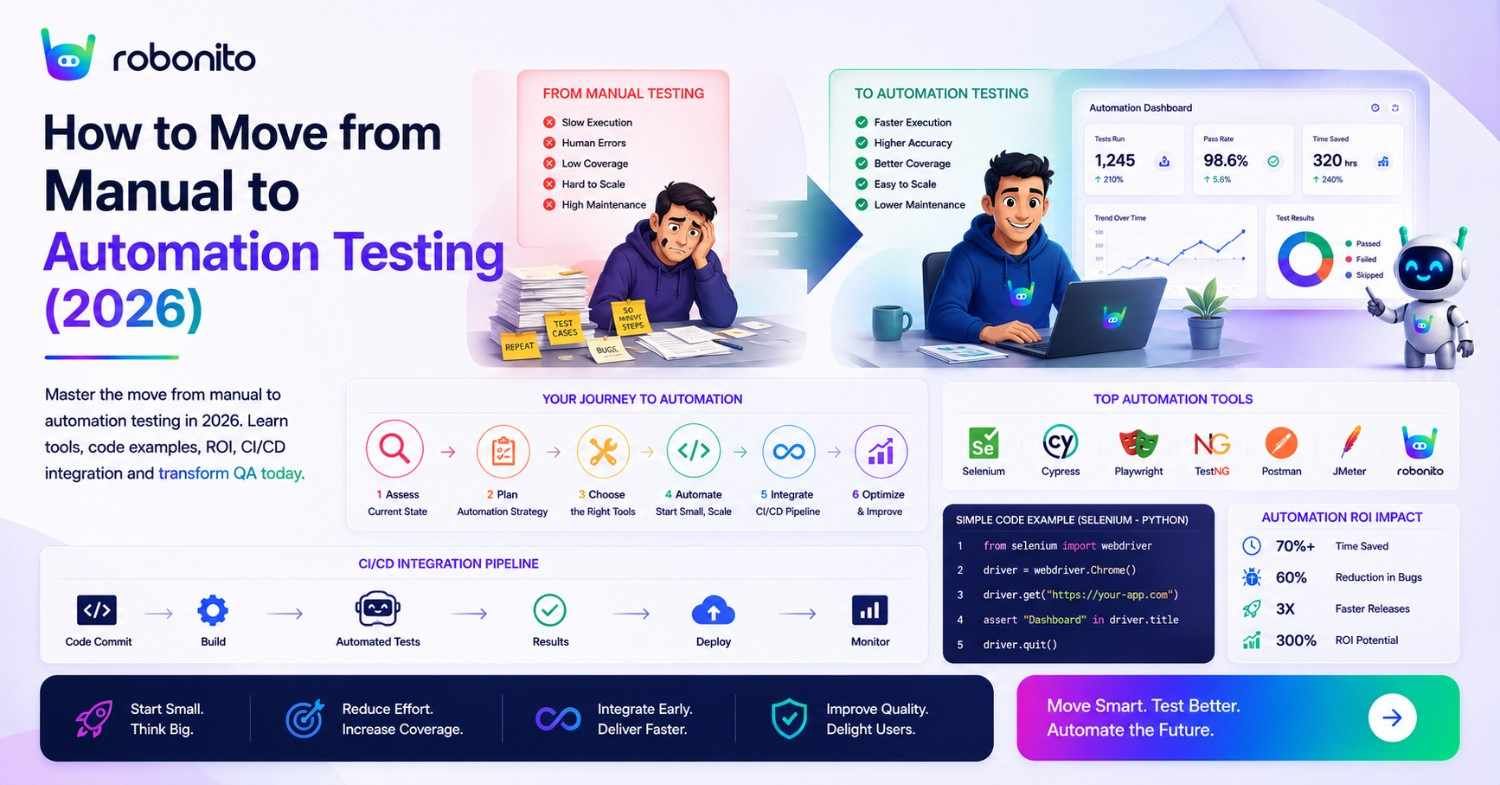
Manual Testing vs Automation Testing
| Factor | Manual Testing | Automation Testing |
|---|---|---|
| Speed | Slower | Faster |
| Scalability | Limited | High |
| Regression Testing | Time-consuming | Automated |
| Human Error | Higher | Lower |
| CI/CD Integration | Limited | Excellent |
| Long-Term Cost | Higher | Lower |
The best QA strategy combines both approaches. Manual testing remains essential for exploratory, usability, and first-pass validation, while automation handles repetitive regression testing at scale.
2. What to keep manual — always
The most common transition mistake is automating the wrong things. Some testing categories should permanently stay manual — automating them wastes time and produces brittle tests that break constantly.
Permanently manual: exploratory testing
Exploratory testing is the QA analyst who notices "this loading animation plays twice when you click quickly" or "the error message disappears before I've had time to read it." These observations are not scripted — they emerge from a human paying attention while testing. No automated assertion can replicate this.
Keep manual: All exploratory testing. Budget at least 25% of QA time here permanently.
Permanently manual: first-pass new feature testing
When a feature is new, the expected outcomes are being discovered, not confirmed. An automated test requires a defined expected outcome — you cannot write an assertion until you know what the correct behaviour is. Manual testing of new features defines what automated tests should later assert.
Keep manual: Every new feature's first test cycle. Automate after two stable sprints.
Permanently manual: usability and UX evaluation
Whether an error message is helpful, whether a checkout flow is confusing, whether a button label is clear — these are human judgment calls. Automated tests can verify an element exists and is clickable; they cannot judge whether using it is a good experience.
Keep manual: All usability testing, user journey cognitive walkthroughs, design review.
Permanently manual: accessibility with real assistive technology
axe-core and similar tools catch approximately 30–40% of WCAG violations automatically. Testing with a real screen reader (VoiceOver, NVDA), keyboard-only navigation, and actual users with disabilities catches the rest. Automated accessibility tools are a complement to, not a replacement for, manual accessibility testing.
Keep manual: Assistive technology testing, keyboard-only navigation, colour contrast perception.
3. The ROI framework — calculate before you start
Automation investment requires a business case. Here is the exact calculation to present to leadership or justify the tooling budget to yourself.
The ROI formula
Annual ROI = (Annual savings - Annual automation cost) / Annual automation cost × 100

Annual savings = Tests automated
               × Average manual execution time per test (minutes)
               × Annual run frequency
               × Tester hourly rate
               ÷ 60

Annual automation cost = Tool licensing
                       + Initial development (hours × hourly rate)
                       + Annual maintenance (hours × hourly rate)
Worked example — 10-person team, 200-test suite
Team context:
  QA testers: 3 (non-technical), 1 automation engineer
  Tester rate: £50/hour | Automation engineer: £65/hour
  Tests to automate: 200 test cases
  Average execution time: 8 minutes per test manually
  Run frequency: 26 times/year (every 2 weeks)

─────────────────────────────────────────────────────────
SCENARIO A: Scripted automation (Playwright)

Annual manual cost being replaced:
  200 tests × 8 min × 26 runs = 41,600 min = 693 hours × £50 = £34,650/year

Automation cost Year 1:
  Playwright (free): £0
  Initial development: 200 hours × £65 = £13,000
  Annual maintenance (20% of tests break per quarter × 30 min fix):
    40 tests × 30 min × 4 quarters = 80 hours × £65 = £5,200/year
  Year 1 total: £0 + £13,000 + £5,200 = £18,200

Year 1 ROI: (£34,650 - £18,200) / £18,200 × 100 = 90%
Payback period: ~6 months

─────────────────────────────────────────────────────────
SCENARIO B: No-code AI automation (Robonito)

Annual manual cost being replaced: £34,650/year (same)

Automation cost Year 1:
  Robonito subscription: £7,200/year (£600/mo)
  Initial setup (recording + reviewing AI-generated tests):
    40 hours × £50 = £2,000 (non-technical testers do this, not engineers)
  Annual maintenance (AI self-healing handles 80%):
    8 tests × 30 min × 4 quarters = 16 hours × £50 = £800/year
  Year 1 total: £7,200 + £2,000 + £800 = £10,000

Year 1 ROI: (£34,650 - £10,000) / £10,000 × 100 = 247%
Payback period: ~3.5 months

─────────────────────────────────────────────────────────
Key difference: Robonito's lower maintenance cost (AI self-healing)
and lower setup cost (non-technical testers can do the work)
produce 2.7× higher Year 1 ROI than scripted Playwright.

Year 2 comparison (no implementation cost):
  Playwright Year 2: ROI = (£34,650 - £5,200) / £5,200 = 565%
  Robonito Year 2:   ROI = (£34,650 - £8,000) / £8,000 = 333%

Note: Playwright Year 2 ROI appears higher because there is no
ongoing licensing cost. However, the maintenance hours assume
competent scripting to fix broken tests — factor in actual team
availability when comparing.
4. Choosing the right automation tool for your team
Tool selection determines whether your transition succeeds or fails. The most common mistake is choosing the tool with the most features rather than the tool that fits your team's actual skill level and testing scope.
Decision framework
Question 1: Do you have dedicated automation engineers who write code?
  YES → Consider Playwright, Cypress, or Selenium
  NO  → Consider Robonito, mabl, or ACCELQ (no-code platforms)

Question 2: What surfaces do you need to test?
  Web + API only → Playwright, Robonito, Cypress
  Web + Mobile + API + Desktop → Robonito, ACCELQ
  Native iOS/Android apps → XCUITest (iOS), Detox (React Native), Espresso (Android)

Question 3: What is your primary language?
  JavaScript/TypeScript → Playwright or Cypress
  Python → pytest + Playwright (Python binding)
  Java → Selenium + TestNG or REST Assured
  No preference / no-code → Robonito

Question 4: How fast does your UI change?
  Rapidly (every sprint) → [Self-healing](https://robonito.com/blog/post/self-healing-tests-eliminate-flaky-qa-without-code/) platform critical (Robonito, mabl)
  Moderately (monthly) → ARIA-first Playwright viable
  Slowly (quarterly) → Any tool works

Question 5: What is your budget?
  Zero / minimal → Playwright (free OSS), Cypress (free OSS core), Robonito (free tier)
  Team subscription → Robonito, Cypress Cloud, mabl
  Enterprise → ACCELQ, Katalon, mabl Enterprise
2026 tool comparison for teams starting automation
| Tool | Coding | Self-healing | Platforms | Free | Best starting scenario |
|---|---|---|---|---|---|
| Robonito | None | ✅ AI intent | Web + Mobile + API + Desktop | ✅ | Non-technical QA, fast-changing UI |
| Playwright | Yes (multi-lang) | ❌ | Web + Mobile web | ✅ OSS | Engineering-led, cross-browser needs |
| Cypress | JS/TS only | ❌ | Web | ✅ OSS | JavaScript-first team |
| pytest | Python | N/A | API | ✅ OSS | Python teams, API-first |
| Selenium | All langs | ❌ | Web | ✅ OSS | Legacy Java/C# teams |
The honest advice: If your QA team includes non-technical testers — and most do — start with Robonito. The reason most automation transitions fail is that only 1–2 engineers can contribute. With Robonito, every QA analyst can record flows and generate tests, making coverage scale with the whole team.
If your team is engineering-led and everyone writes code, Playwright is the best free choice and produces the highest long-term ROI for scripted automation.
5. The 7-step transition — with timeline
Step 1: Audit and prioritise (Week 1)
Before choosing tools or writing tests, understand your current state:
Manual test audit template:

| Test ID | Feature | Exec time | Runs/year | Stable? | Automation priority |
|---------|---------|-----------|-----------|---------|---------------------|
| MT-001  | Login   | 5 min     | 52        | Yes     | HIGH (ROI: 43h/yr)  |
| MT-002  | Checkout| 15 min    | 26        | Yes     | HIGH (ROI: 65h/yr)  |
| MT-003  | New feature X | 20 min | 4     | No      | LOW (too new)       |
| MT-004  | Compliance audit | 60 min | 1   | Yes     | LOW (1 run/yr)      |

Prioritise for automation:
  P1: Stable features, ≥10 runs/year, ≥5 min execution
  P2: Stable features, 4-9 runs/year
  P3: New features (automate after 2 stable sprints)
  Skip: <4 runs/year, exploratory, first-pass

Output: Ranked list of 20 highest-ROI automation candidates
Step 2: Select tool and complete evaluation (Week 2)
Use the framework from Section 4. Critically: do NOT evaluate tools on a demo application. Evaluate on your actual production application — the one with your actual UI complexity, your actual component library, and your actual test challenges.
Free trial checklist:
During tool evaluation (1 week free trial):
□ Can a non-technical tester create a test independently?
□ Does the tool handle your application's most complex interaction?
□ Does self-healing survive a minor UI change?
□ Does CI/CD integration work with your actual pipeline?
□ Is the failure report (screenshot, video) useful for debugging?
□ Can you see yourself maintaining this in 12 months?
Step 3: Build the CI/CD pipeline FIRST (Week 2-3)
The most important architectural decision in automation is: build the pipeline before writing tests.
A test that runs locally but not in CI delivers a fraction of the value. The pipeline is what makes tests run on every commit, block deployments, and notify the team. Build it empty if necessary:
## .github/workflows/automation.yml — build this BEFORE writing tests
name: Automation Pipeline

on:
  push:
    branches: [main, develop]
  pull_request:

jobs:
  smoke-tests:
    name: Smoke Tests
    runs-on: ubuntu-latest
    steps:
      - uses: actions/checkout@v4
      - uses: actions/setup-node@v4
        with: { node-version: '20', cache: 'npm' }
      - run: npm ci

      ## This runs even before tests exist — pipeline infrastructure ready
      - name: Robonito smoke tests
        uses: robonito/run-tests-action@v2
        with:
          api-key: ${{ secrets.ROBONITO_API_KEY }}
          suite: smoke
          environment: staging
          fail-on: critical

      ## Notify team — every pipeline result reported
      - name: Notify Slack
        if: always()
        uses: 8398a7/action-slack@v3
        with:
          status: ${{ job.status }}
          fields: repo,message,commit,author,took
        env:
          SLACK_WEBHOOK_URL: ${{ secrets.SLACK_QA_CHANNEL }}
Step 4: Build the smoke suite — first 10 tests (Week 3-4)
The smoke suite is your first output: 10 tests that verify the application is fundamentally working. If the smoke suite fails, the application is broken for all users — it should stop every deployment.
Smoke suite composition (10 tests):
1. Homepage loads and primary navigation works
2. Login succeeds with valid credentials
3. Login fails with invalid credentials (correct error shown)
4. Core feature ##1 — primary value proposition of the product
5. Core feature ##2 — second most important feature
6. Core feature ##3 — third most important feature
7. Account creation/registration
8. Primary data creation action (create order, create project, etc.)
9. API health check — critical endpoints return 200
10. Mobile viewport — core flow works on 375px

Target: All 10 tests pass in < 10 minutes
Integration: Runs on every deployment to every environment
Step 5: Expand to regression suite (Month 2)
With the smoke suite green and the pipeline proven, expand to 50–100 test cases covering all P0 and P1 features:
Month 2 regression suite targets:
  Week 5-6: Expand to 30 tests (add P0 features)
  Week 7-8: Expand to 60 tests (add P1 features)

For each module added to regression:
  □ Happy path test (valid inputs → correct outcome)
  □ Primary error path (invalid input → correct error)
  □ One boundary value test (minimum or maximum)

Run schedule:
  Smoke suite: every deployment
  Regression: every merge to main
  Target execution time: < 30 minutes
Step 6: Full regression and API coverage (Month 3)
Month 3 targets:
  Web UI regression: 100-200 tests
  API integration tests: 30-50 endpoints
  Cross-browser: Chrome + Safari minimum
  Mobile viewport: key flows at 375px

For API testing, add pytest alongside Robonito:
  pytest covers: API response validation, schema testing, boundary values
  Robonito covers: End-to-end flows that span UI + API
Step 7: Onboard non-technical QA and establish ongoing process (Month 3-4)
See Section 8 for the full non-technical QA onboarding process. The key milestone: every QA analyst can create and review automated tests without engineer involvement. Coverage now scales with the whole team.
6. Real code examples — your first automated tests
First automated test — Playwright (engineering teams)
// tests/smoke/login.spec.ts — your very first automated test
// Start here: simple, critical, unambiguous expected outcome

import { test, expect } from '@playwright/test';

test.describe('Login — smoke test', () => {

  test('valid credentials → dashboard', async ({ page }) => {
    await page.goto('/login');

    // Fill login form
    await page.getByLabel('Email address').fill('test@example.com');
    await page.getByLabel('Password').fill('TestPass2026!');
    await page.getByRole('button', { name: 'Sign in' }).click();

    // Verify successful login
    await expect(page).toHaveURL(/\/dashboard/, { timeout: 10000 });
    await expect(page.getByRole('navigation')).toBeVisible();
    await expect(page.getByTestId('user-menu')).toBeVisible();
  });

  test('invalid password → error message, no redirect', async ({ page }) => {
    await page.goto('/login');

    await page.getByLabel('Email address').fill('test@example.com');
    await page.getByLabel('Password').fill('wrong-password');
    await page.getByRole('button', { name: 'Sign in' }).click();

    // Verify error shown and user stays on login page
    await expect(page.getByRole('alert')).toContainText('Invalid');
    await expect(page).toHaveURL(/\/login/);
    // Verify password field cleared (security best practice)
    await expect(page.getByLabel('Password')).toHaveValue('');
  });

  test('blank form → inline validation errors', async ({ page }) => {
    await page.goto('/login');

    // Submit without filling anything
    await page.getByRole('button', { name: 'Sign in' }).click();

    // Both fields should show validation errors
    await expect(page.getByText('Email is required')).toBeVisible();
    await expect(page.getByText('Password is required')).toBeVisible();
    // User stays on login — no attempted authentication
    await expect(page).toHaveURL(/\/login/);
  });
});
First API test — pytest
## tests/api/test_auth_api.py — API complement to the UI login tests above
## Run alongside UI tests — covers what UI tests cannot (status codes, schemas)

import pytest
import httpx

BASE_URL = "https://staging.yourapp.com"

class TestAuthAPI:

    def test_login_returns_200_with_valid_token(self):
        """Happy path: valid credentials return access token."""
        response = httpx.post(f"{BASE_URL}/api/auth/login", json={
            "email": "test@example.com",
            "password": "TestPass2026!"
        })
        assert response.status_code == 200
        data = response.json()
        assert "access_token" in data
        assert data["token_type"] == "bearer"
        ## Token should be a JWT (3 parts separated by dots)
        assert len(data["access_token"].split(".")) == 3

    def test_login_returns_401_with_wrong_password(self):
        """Error path: wrong password returns 401, not 403 or 500."""
        response = httpx.post(f"{BASE_URL}/api/auth/login", json={
            "email": "test@example.com",
            "password": "wrong-password"
        })
        ## Must be 401 (unauthenticated), not 403 (forbidden) or 500 (error)
        assert response.status_code == 401
        ## Must not leak sensitive info in error response
        body = response.text.lower()
        assert "password" not in body
        assert "hash" not in body

    def test_login_returns_422_with_invalid_email_format(self):
        """Validation: malformed email returns 422 with field error."""
        response = httpx.post(f"{BASE_URL}/api/auth/login", json={
            "email": "not-an-email",
            "password": "TestPass2026!"
        })
        assert response.status_code == 422
        errors = str(response.json()).lower()
        assert "email" in errors  ## Error references the email field

    def test_login_rate_limited_after_10_attempts(self):
        """Security: brute force protection kicks in after repeated failures."""
        for attempt in range(10):
            httpx.post(f"{BASE_URL}/api/auth/login", json={
                "email": "victim@example.com",
                "password": f"wrong-{attempt}"
            })

        ## 11th attempt should be rate-limited
        response = httpx.post(f"{BASE_URL}/api/auth/login", json={
            "email": "victim@example.com",
            "password": "wrong-11"
        })
        assert response.status_code in [429, 423]  ## Too Many Requests or Locked
Playwright.config.ts — cross-browser from day one
// playwright.config.ts — configure cross-browser before writing a single test
// Cost of adding Safari later is high; cost of adding it from the start is zero

import { defineConfig, devices } from '@playwright/test';

export default defineConfig({
  testDir: './tests',
  timeout: 30000,
  retries: process.env.CI ? 1 : 0,
  workers: process.env.CI ? 4 : undefined,

  reporter: [
    ['html', { outputFolder: 'playwright-report' }],
    ['junit', { outputFile: 'test-results/results.xml' }],
  ],

  use: {
    baseURL: process.env.BASE_URL || 'http://localhost:3000',
    screenshot: 'only-on-failure',
    video: 'retain-on-failure',
    trace: 'on-first-retry',
  },

  projects: [
    // Minimum viable cross-browser matrix — add all four from day one
    { name: 'chromium', use: { ...devices['Desktop Chrome'] } },
    { name: 'webkit',   use: { ...devices['Desktop Safari'] } },
    { name: 'firefox',  use: { ...devices['Desktop Firefox'] } },
    { name: 'mobile',   use: { ...devices['iPhone 14'] } },
  ],

  webServer: {
    command: 'npm run start:test',
    url: 'http://localhost:3000',
    reuseExistingServer: !process.env.CI,
  },
});
7. Building your CI/CD pipeline
Complete transition pipeline — Robonito + pytest
## .github/workflows/full-automation-pipeline.yml
name: Full QA Automation Pipeline

on:
  push:
    branches: [main, develop]
  pull_request:

jobs:
  ## Tier 1: Unit tests — every commit, < 5 minutes
  unit-tests:
    name: Unit Tests
    runs-on: ubuntu-latest
    steps:
      - uses: actions/checkout@v4
      - uses: actions/setup-node@v4
        with: { node-version: '20', cache: 'npm' }
      - run: npm ci && npm test -- --coverage
      - name: Coverage gate (80% minimum)
        run: |
          COV=$(cat coverage/coverage-summary.json | python3 -c \
            "import sys,json; print(json.load(sys.stdin)['total']['lines']['pct'])")
          python3 -c "exit(0 if float('${COV}') >= 80 else 1)" || \
            (echo "❌ Coverage ${COV}% below 80%" && exit 1)

  ## Tier 2: API integration tests — every PR, 10-15 minutes
  api-tests:
    name: API Integration Tests
    runs-on: ubuntu-latest
    needs: unit-tests
    steps:
      - uses: actions/checkout@v4
      - uses: actions/setup-python@v5
        with: { python-version: '3.12' }
      - run: pip install pytest httpx --break-system-packages
      - run: pytest tests/api/ -v --tb=short
        env:
          BASE_URL: ${{ secrets.STAGING_URL }}

  ## Tier 3: E2E regression — merge to main, 30-45 minutes
  e2e-regression:
    name: E2E Regression (Robonito + Playwright)
    runs-on: ubuntu-latest
    needs: api-tests
    if: github.ref == 'refs/heads/main'
    steps:
      - uses: actions/checkout@v4
      - uses: actions/setup-node@v4
        with: { node-version: '20', cache: 'npm' }
      - run: npm ci
      - run: npx playwright install --with-deps

      - name: Deploy to staging
        run: ./scripts/deploy-staging.sh ${{ github.sha }}

      - name: Playwright cross-browser tests
        run: npx playwright test tests/

      - name: Robonito AI regression (no-code + self-healing)
        uses: robonito/run-tests-action@v2
        with:
          api-key: ${{ secrets.ROBONITO_API_KEY }}
          suite: full-regression
          environment: staging
          browsers: chrome,safari,firefox,edge
          fail-on: critical
          healing_mode: intent

      - uses: actions/upload-artifact@v4
        if: failure()
        with:
          name: test-failure-evidence
          path: playwright-report/
Pipeline stages at each transition phase
Week 1-2 (just started):
  ✅ Pipeline exists with empty test stage
  ✅ Notifications configured (Slack on failure)

Week 3-4 (smoke suite):
  ✅ 10 smoke tests blocking every deployment
  ✅ Runs in < 10 minutes

Month 2 (regression):
  ✅ 60+ tests blocking main merges
  ✅ Runs in < 30 minutes
  ✅ API tests running on every PR

Month 3 (full coverage):
  ✅ 150+ tests
  ✅ Cross-browser (Chrome + Safari + Firefox)
  ✅ Performance gate (k6)
  ✅ Accessibility scan (axe-core)
  ✅ Security scan (OWASP ZAP)
8. Onboarding non-technical QA to automation
One of the biggest benefits of no-code automation platforms is expanding who can contribute tests — from 1–2 automation engineers to your entire QA team. Here is the exact onboarding process with Robonito:
The non-technical QA onboarding session (2 hours)
Hour 1: Platform orientation
  □ Sign in to Robonito
  □ Install browser extension
  □ Walk through existing test suite (read-only)
  □ Understand test structure: suite → test case → steps

Hour 2: First test creation (hands-on)
  □ Identify one user flow the analyst tests manually every sprint
  □ Click "Record test" → perform the flow naturally
  □ Review AI-generated test steps
  □ Add one data variation (e.g., test with another user account)
  □ Click "Run" → watch tests execute
  □ Review pass/fail report

Output: Each QA analyst has created their first automated test
        from a workflow they know well
The review and merge process
Non-technical QA contribution workflow:

QA Analyst:
  1. Records user flow (5-10 minutes)
  2. Reviews AI-generated tests (15-20 minutes)
  3. Submits for review with notes

QA Lead / Automation Engineer:
  4. Reviews test quality and coverage
  5. Approves or requests clarification
  6. Merges to regression suite

CI/CD:
  7. New tests run in next pipeline execution
  8. Results visible to whole team

Result: QA team contributes automation without scripting expertise
        Coverage grows proportionally to QA team size
9. AI-powered automation — the 2026 approach
The manual-to-automation transition is dramatically faster in 2026 than it was in 2019, for one primary reason: AI self-healing eliminates the maintenance overhead that made traditional automation expensive to sustain.
Why previous automation transitions often failed
2019 transition failure pattern:
  Month 1: 50 tests written (Selenium, big effort)
  Month 2: UI redesign — 30 tests break
  Month 3: Engineers fix broken tests (3 weeks of effort)
  Month 4: Product sprint adds new features — 10 more tests break
  Month 5: Team morale tanks, automation investment questioned
  Month 6: Suite abandoned, back to manual

Root cause: Every UI change required human intervention
            Maintenance consumed the ROI the automation was supposed to deliver
Why the 2026 approach is different
2026 transition pattern with Robonito:
  Week 1: 20 tests recorded by QA analysts (no engineering time)
  Week 2: UI update — 12 tests impacted
  Week 2 (same day): AI self-heals 10 of 12 tests automatically
  Week 2: Engineers fix 2 remaining tests (30 minutes total)
  Month 2: 80 tests covering all P0/P1 flows
  Month 3: Non-technical QA adds 40 more tests independently
  Month 4: 150 tests, 95% pass rate, 30-minute CI execution

Root cause of success: AI handles maintenance automatically
                       Non-technical QA expands coverage continuously
Intent-based self-healing — what it means practically
Traditional automation (breaks):
  test step: page.locator('.checkout-btn-primary-v3').click()
  UI update: class renamed to 'ds-action-button--checkout'
  Result: NoSuchElementException — test fails — engineer required

Robonito intent-based healing (survives):
  test step: "Click the primary checkout action button"
  UI update: class renamed, ID removed, wrapper changed
  Robonito evaluates:
    ARIA role: still "button" ✅
    Accessible name: still "Place Order" ✅
    Visual position: still bottom of form ✅
    Context: still follows payment fields ✅
  Result: Auto-healed — test passes — zero engineer time
10. Common transition mistakes and how to avoid them
Mistake 1: Automating everything at once
The most common failure mode. Teams decide to automate all 300 manual tests simultaneously, spend 3 months building, deploy a fragile suite that breaks constantly, and abandon the project.
The fix: Start with 10 smoke tests. Prove the pipeline. Add 10 more. Build confidence iteratively.
Mistake 2: Building tests before the pipeline
Tests that run locally but not in CI provide a fraction of the value. The pipeline — the GitHub Actions workflow, the deployment gate, the Slack notification — is what makes automation deliver value. Build it before writing the first test.
Mistake 3: Fragile selectors from day one
// ❌ This test breaks the moment a designer refactors
await page.locator('.btn-primary-checkout-v2-final').click();

// ✅ This test survives CSS refactoring indefinitely
await page.getByRole('button', { name: 'Place order' }).click();
// ARIA role + accessible name reflect meaning, not implementation
Start with ARIA-first selectors. Every test written with CSS class selectors from the beginning creates future maintenance debt.
Mistake 4: No test data strategy
Tests that share state interfere with each other — one test's write operations break another test's read assumptions.
## ❌ Shared test user accumulates state across test runs
def test_order_count():
    user = get_user("shared@test.com")
    assert user.order_count == 5  ## Wrong if another test created an order

## ✅ Each test gets its own isolated data
@pytest.fixture
def fresh_user():
    user = create_user(email=f"test+{uuid.uuid4().hex[:8]}@test.com")
    yield user
    delete_user(user.id)  ## Cleanup after test
Mistake 5: Skipping cross-browser from the start
Adding Safari/WebKit compatibility to an existing 200-test suite is expensive — tests need to be reviewed and potentially fixed for WebKit-specific behaviours. Adding it to a 10-test smoke suite is free. Configure all four browsers (Chromium, WebKit, Firefox, mobile) in your Playwright config from day one.
Mistake 6: No measurement — no visibility
Without tracking metrics, the team cannot demonstrate progress, identify problems early, or justify continued investment. Track these from sprint one:
Weekly metrics:
  □ Total automated tests (should increase)
  □ Manual regression hours saved (should increase)
  □ Tests broken per sprint (should decrease with self-healing)
  □ Pipeline execution time (should stay < 30 minutes)
  □ Defects caught by automation before production (should increase)
11. Measuring progress — metrics that matter
The six metrics for a successful transition
Test coverage growth rate
Coverage = Automated tests / Total test inventory × 100

Week 1:  10/300 = 3%   (smoke suite)
Month 2: 60/300 = 20%  (P0 regression)
Month 3: 180/300 = 60% (P0/P1 regression)
Month 6: 270/300 = 90% (full coverage, manual only for exploratory)
Manual regression time saved per sprint
Weekly time saved = Tests automated × average manual time per test
Week 1:  10 × 8 min = 80 min saved per run
Month 2: 60 × 8 min = 480 min = 8 hours saved per regression run
Month 3: 150 × 8 min = 1,200 min = 20 hours saved per regression run
Defect Removal Efficiency (DRE)
DRE = Defects caught in testing / (Defects in testing + Production defects) × 100

Target trajectory:
  Before automation: ~70% DRE (30% reaching production)
  Month 3: ~85% DRE
  Month 6: ~90%+ DRE (industry best practice)
Test maintenance hours per sprint
Target: Decreasing over time (self-healing doing its job)

Month 1: 8 hours/sprint (manual fixes for fragile selectors)
Month 2: 5 hours/sprint (better selector discipline + some self-healing)
Month 3: 3 hours/sprint (AI self-healing handling 80%)
Month 6: 1-2 hours/sprint (stable)
Mean Time to Detect (MTTD) regression
Before automation: 24-48 hours (test cycle runs weekly or manually triggered)
After automation with CI: 1-2 hours (tests run on every commit)
Pass rate
< 80%: Something wrong — environment, data, or genuinely broken features
80-90%: Normal during active transition
> 95%: Mature suite — target state
> 99%: Either excellent or under-tested — audit coverage
12. Pre-transition readiness checklist
Before selecting a tool
- Manual test inventory completed — total test count, execution times documented
- Top 20 automation candidates identified by ROI score
- Test categories confirmed: what stays manual, what gets automated
- Team skill assessment: who can write scripts? who cannot?
- Budget confirmed for tooling and implementation time
- QA manager / CTO sponsorship confirmed for the transition
Before writing the first test
- Tool evaluated on your real application (not vendor demo)
- Non-technical QA evaluated the tool independently
- CI/CD pipeline configured and running (even with no tests)
- Test environment verified (staging URL, test accounts, data seeding)
- Version control set up for test assets
- Slack/Teams notifications configured for CI results
Before expanding beyond smoke suite
- Smoke suite (10 tests) green in CI for 2 consecutive sprints
- No flaky tests in smoke suite (retest on failure should not re-pass randomly)
- Pipeline execution time < 10 minutes for smoke suite
- Team trained on reviewing AI-generated tests or writing stable selectors
- Test data isolation strategy confirmed
Monthly review checklist
- Coverage percentage reported to team
- DRE calculated and trended
- Maintenance hours per sprint tracked
- Flaky tests identified and addressed
- New automation candidates identified from sprint's manual tests
- ROI calculation updated with actual data
Example: Transitioning a SaaS Team from Manual to Automation
A SaaS company running a 200-test manual regression suite spent nearly 27 hours per release cycle executing tests.
After adopting automation:
- 80% of regression tests automated
- Regression execution reduced from 27 hours to 40 minutes
- Production defects reduced by 42%
- Release frequency doubled
The transition took approximately three months using a phased rollout strategy similar to the one described in this guide.
Frequently Asked Questions
How do you transition from manual to automation testing?
Seven steps: audit and prioritise tests by ROI, choose the right tool for your team's skill level, build the CI/CD pipeline before writing tests, start with a 10-test smoke suite, expand to full regression (50-200 tests), onboard non-technical QA with no-code tools, and track metrics monthly. The critical success factor is starting small and proving the pipeline before scaling coverage.
Which tests should you automate first?
Prioritise: tests run more than 4 times per year (high ROI), stable features with defined expected outcomes, regression tests for revenue-critical flows. Do not automate first: new features still changing, one-time compliance tests, exploratory testing, or any test requiring human judgment.
How long does the transition take?
Realistic timeline: Week 1-2 (audit + tool selection), Week 3-4 (CI pipeline + 10 smoke tests), Month 2 (50-test regression suite), Month 3 (150-200 test full suite). With no-code platforms like Robonito, this compresses significantly — first tests in CI within 1-2 days.
What is the best tool for transitioning from manual to automation?
For teams with non-technical QA: Robonito — no-code, AI-powered, self-healing, free tier. For engineering-led teams: Playwright — free, open source, cross-browser. For JavaScript-first: Cypress. The most important selection criterion is team fit — the tool must be usable by everyone who will maintain it.
What is the ROI of automation testing?
Most teams reach payback in 3-6 months. The formula: annual manual cost saved = (tests automated × average execution time × run frequency × tester hourly rate). Subtract annual automation cost (licensing + maintenance). Divide by automation cost. A 200-test suite run weekly saves approximately 690 tester-hours per year — significant positive ROI even with tool subscription costs.
What should never be automated?
Exploratory testing (requires human judgment), first-pass new feature testing (expected outcomes not yet defined), usability evaluation (subjective), accessibility testing with real assistive technology, and any test run fewer than 4 times per year (insufficient ROI).
External references
- Playwright Documentation — Web automation getting started
- pytest Documentation — Python API testing
- DORA State of DevOps 2025 — Automation deployment performance
- Capgemini World Quality Report 2025 — Manual testing benchmarks
- GitHub Actions Documentation — CI/CD pipeline setup
- OWASP ZAP — Security testing complement
- axe-core GitHub — Accessibility testing
Start your manual-to-automation transition today — free, no scripting required
Robonito is the fastest path from manual testing to automated CI/CD coverage — any QA analyst can record a user flow and have tests running in CI the same day. No scripting, no configuration, no automation engineers required. Most teams complete their first automated regression suite within the first sprint. Start free at Robonito.com →
Automate your QA — no code required
Stop writing test scripts.
Start shipping with confidence.
Join thousands of QA teams using Robonito to automate testing in minutes — not months.