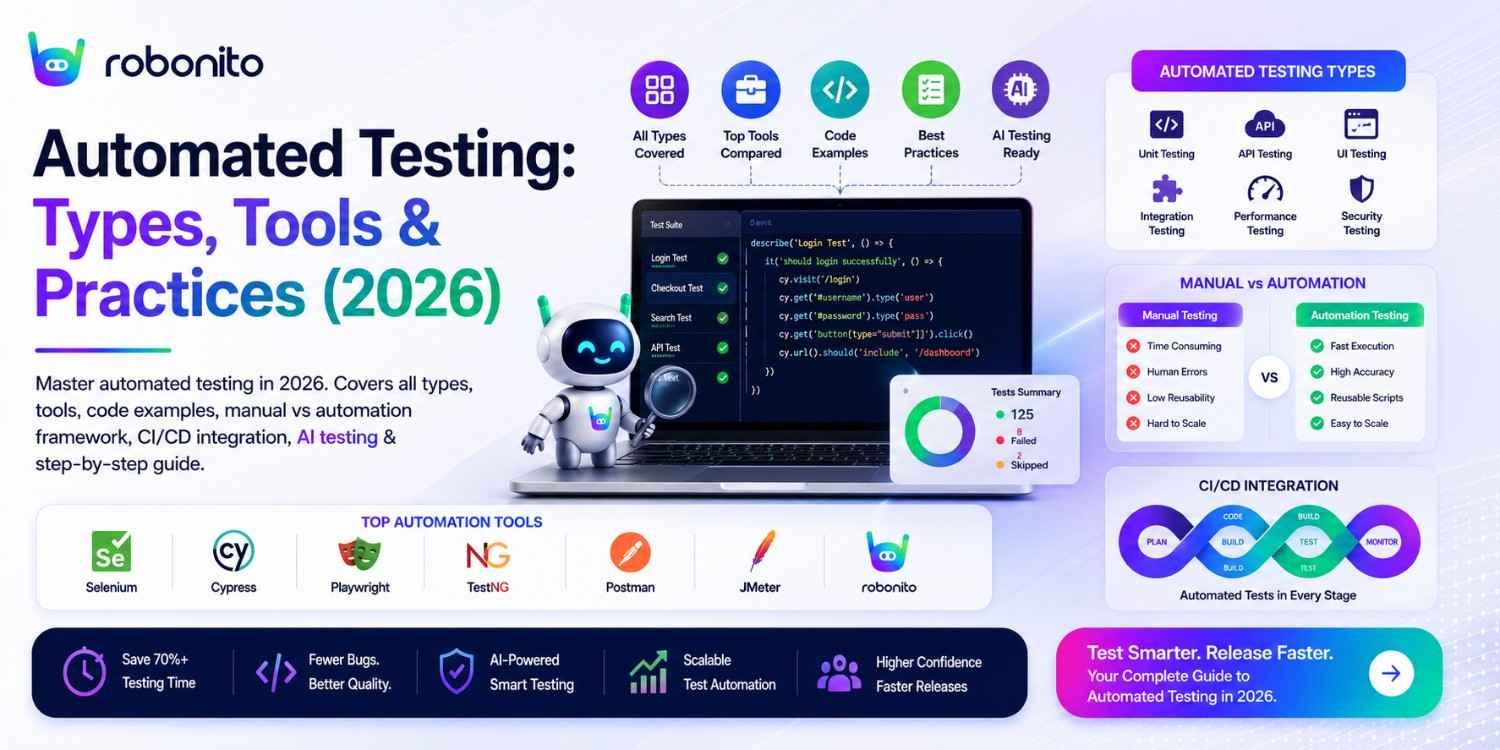
One automated test that runs on every code commit catches the same regression 52 times a year. One manual test that runs every two weeks catches it 26 times — and costs a tester's time each time. That arithmetic is why automated testing is not optional for teams that ship regularly. This guide covers everything: what it is, which types matter, the best tools with real code, and how to get your first automated test running in CI today.
By Robonito Engineering Team · Updated June 2026 · 20 min read
Quick stats
| Fact | Source |
|---|---|
| Automated testing reduces time-to-market by up to 40% | World Quality Report 2025 |
| A bug caught in testing costs 10× less to fix than the same bug in production | IBM Systems Sciences Institute |
| Teams with automated testing deploy 208× more frequently with 2,604× faster recovery | DORA State of DevOps 2025 |
| 74% of QA teams report test maintenance is their biggest challenge | Capgemini World Quality Report 2025 |
| AI self-healing reduces automated test maintenance time by up to 80% | DORA 2025 |
| The automated testing market reaches $78 billion by 2030 | Allied Market Research |
Table of Contents
- What is automated testing?
- Automated testing vs manual testing — the honest framework
- The six types of automated testing
- Best automated testing tools in 2026 — complete comparison
- Real code examples — five testing types
- The automated testing pyramid — getting the ratio right
- Automated testing in CI/CD pipelines
- AI-powered automated testing in 2026
- How to get started — step by step
- Five automated testing mistakes to avoid
- Common misconceptions — corrected
- Pre-launch automated testing checklist
- Frequently Asked Questions
Automated testing that generates and maintains itself
Robonito auto-generates tests from your user flows, runs them across all browsers in CI, and self-heals when your UI changes — covering web, mobile, API, and desktop with zero scripting. Try Robonito free →
1. What is automated testing?
One-sentence definition for featured snippets: Automated testing is the practice of using tools and scripts to execute software tests without human intervention — automatically performing interactions, comparing actual results against expected outcomes, and reporting pass or fail.
Here is what that means in concrete terms. A manual tester checking that the checkout flow works visits the product page, adds an item to the cart, fills the checkout form, enters payment details, submits the order, and verifies the confirmation appears. This takes 8–15 minutes and requires a human's full attention.
An automated test does the same thing in 45 seconds, every time a developer pushes code, across Chrome, Safari, Firefox, and Edge simultaneously, without anyone watching. When the confirmation does not appear, the test fails, the CI pipeline stops, the deployment is blocked, and the developer receives a Slack notification with a screenshot of exactly what went wrong — within two minutes of the bad code being pushed.
That is the actual value proposition of automated testing: not that it replaces humans, but that it makes the machine check for you so humans can focus on testing that requires judgment.
The 2026 shift that changes the economics:
Three years ago, the primary cost barrier to automated testing was maintenance — tests broke constantly when UIs changed, requiring engineers to update selectors manually. This consumed 40–60% of automation effort and significantly eroded ROI.
In 2026, AI self-healing has largely solved this problem. Platforms like Robonito use intent-based multi-signal element recognition — capturing what an element does in context rather than what CSS class it happens to have — producing tests that survive UI changes automatically. The maintenance cost barrier that historically prevented many teams from achieving positive automation ROI has been reduced by up to 80%.
2. Automated testing vs manual testing — the honest framework
The question is not "automate or manual?" — it is "which specific tests belong in each category?" Getting the balance wrong produces either a fragile maintenance burden (too much automation) or a scaling bottleneck (too little).
When to automate vs when to keep manual
| Scenario | Automate | Keep manual |
|---|---|---|
| Run frequency | > 4 runs per year | ≤ 4 runs per year |
| Expected outcome | Deterministic | Requires human judgment |
| Test type | Regression, smoke, data-driven | Exploratory, usability, first-pass |
| Feature stability | Stable for ≥ 2 sprints | Changes every sprint |
| Execution time | > 10 minutes manually | < 5 minutes manually |
| Cross-browser/device | Required across multiple | Spot-check only |
The definitive side-by-side comparison
| Dimension | Automated testing | Manual testing |
|---|---|---|
| Execution speed | Seconds to minutes | Minutes to hours |
| Run frequency | Every commit, 24/7 | As fast as humans allow |
| Consistency | Identical every run | Variable (human fatigue) |
| Cross-browser | Parallel on all browsers | Sequential, time-intensive |
| Initial cost | Higher (setup) | Lower (start immediately) |
| Long-term cost | Lower (scales freely) | Higher (scales with headcount) |
| Exploratory coverage | ❌ Cannot explore | ✅ Discovers unknown bugs |
| Usability evaluation | ❌ Cannot judge UX | ✅ Essential for UX quality |
| First-pass new feature | ❌ No expected outcome yet | ✅ Defines expected behaviour |
| Regression testing | ✅ Ideal | ❌ Bottleneck at scale |
| Performance testing | ✅ Cannot do manually | ❌ |
| API contract testing | ✅ Fastest approach | ⚠️ Slow, error-prone |
| Maintenance overhead | Varies (high without AI) | N/A |
The ROI threshold test
Before automating any test:
Automate if:
Annual manual cost > Annual automation cost

Annual manual cost = (Run frequency × manual time) × tester hourly rate
Annual automation cost = Tool licensing + (Build hours × rate) + (Maintenance × rate)

Example: Weekly checkout regression test
  Manual: 52 runs × 15 min = 780 min/year = 13 hours × £50 = £650/year
  Playwright automation: 0 + (4h × £65) + (2h maintenance × £65) = £390/year
  ROI: Positive from year 1 ✅

Example: Annual compliance test run once per year
  Manual: 1 run × 30 min = 30 min = £25/year
  Automation: 0 + (6h × £65) + (1h × £65) = £455/year
  ROI: Negative ❌ — keep manual
3. The six types of automated testing
Type 1: Unit testing
What it tests: Individual functions, methods, and components in isolation — completely independent of the rest of the application.
Why it matters: The cheapest and fastest way to catch logic errors. Unit tests run in milliseconds, require no deployed application, and pinpoint exactly which function broke.
Tools: Jest (JavaScript), pytest (Python), JUnit (Java), NUnit (.NET), GoogleTest (C++).
Coverage target: 70–80% of all automated tests should be unit tests.
Type 2: Integration testing
What it tests: How modules work together — database queries combined with business logic, API endpoints with authentication, third-party service integrations, message queues.
Why it matters: Unit tests prove individual components work. Integration tests prove they work together. An application where every unit test passes but the API and database disagree on data formats fails in production.
Tools: pytest with httpx/requests (Python), Supertest (Node.js), REST Assured (Java), Postman.
Coverage target: 20% of all automated tests.
Type 3: End-to-end (E2E) / UI testing
What it tests: Complete user journeys through the deployed application — login → browse → add to cart → checkout → confirmation.
Why it matters: Validates that all system components work correctly together from the user's perspective. The highest-value test type per test case — catches the bugs that matter most to users.
Tools: Playwright, Cypress, Selenium, Robonito (no-code).
Coverage target: 10% of all automated tests — but covering 100% of critical P0/P1 user flows.
Type 4: Performance testing
What it tests: Application speed, scalability, and stability under different load conditions.
Sub-types:
| Type | What it measures | Tool |
|---|---|---|
| Load testing | Behaviour under expected traffic | k6, JMeter |
| Stress testing | Breaking point under extreme load | k6, Gatling |
| Spike testing | Sudden traffic surges | k6 |
| Soak testing | Performance over extended periods | k6 |
| Core Web Vitals | Google's page quality metrics (LCP, INP, CLS) | Lighthouse CI |
Tools: k6 (modern, JavaScript), JMeter (enterprise, GUI), Gatling (Scala), Lighthouse CI (Core Web Vitals).
Type 5: Security testing
What it tests: Vulnerabilities, attack vectors, and security misconfigurations in the application.
Automated security testing covers:
- OWASP Top 10 vulnerabilities (SQL injection, XSS, CSRF)
- Authentication and authorization weaknesses
- Insecure headers and certificate configuration
- Known dependency vulnerabilities
Tools: OWASP ZAP (dynamic analysis), Snyk (dependency scanning), Trivy (container scanning).
Important caveat: Automated security tools catch common patterns. Sophisticated security testing — threat modelling, business logic vulnerabilities, authentication bypass chains — requires security engineering expertise.
Type 6: Accessibility testing
What it tests: WCAG 2.2 compliance — whether users with disabilities can use the application effectively.
Automated coverage: Approximately 30–40% of WCAG violations are detectable automatically. Missing alt text, insufficient colour contrast, missing form labels, keyboard navigation failures. The remaining 60–70% require manual testing with real assistive technology.
Tools: axe-core (integrates with Playwright, Cypress, Jest), Pa11y, Lighthouse CI.
Legal context: WCAG 2.2 AA compliance is a legal requirement in the EU (EN 301 549), UK (Equality Act), US (ADA Section 508), and most developed markets. Accessibility is not optional.
4. Best automated testing tools in 2026 — complete comparison
Web UI and E2E automation
| Tool | Coding | Self-healing | Safari/WebKit | Languages | Free | Best for |
|---|---|---|---|---|---|---|
| Robonito | None | ✅ AI intent | ✅ | None needed | ✅ Free tier | No-code, all browsers, self-healing |
| Playwright | Yes | ❌ Manual | ✅ Native | TS/JS/Python/Java/C# | ✅ OSS | Engineering, cross-browser |
| Cypress | Yes | ❌ | ⚠️ Experimental | JS/TS only | ✅ OSS | JS teams, debugging |
| Selenium | Yes | ❌ | ❌ Official | All major | ✅ OSS | Legacy, flexibility |
| mabl | None | ✅ Visual AI | ✅ | None | ❌ | Visual regression |
API automation
| Tool | Coding level | Best for | Free |
|---|---|---|---|
| Robonito | None | No-code API + UI combined | ✅ |
| pytest + httpx | Python | CI API regression | ✅ OSS |
| Postman + Newman | Low (JS) | Exploration + CI | ✅ Free tier |
| REST Assured | Java | Java teams | ✅ OSS |
| Supertest | Node.js | Express/Fastify APIs | ✅ OSS |
Performance, security, and accessibility
| Category | Tool | Type | Free |
|---|---|---|---|
| Performance | k6 | Load/stress/spike | ✅ OSS |
| Performance | Lighthouse CI | Core Web Vitals | ✅ OSS |
| Security | OWASP ZAP | Dynamic DAST scan | ✅ OSS |
| Security | Snyk | Dependency scanning | ✅ Free tier |
| Accessibility | axe-core | WCAG automated | ✅ OSS |
Why Teams Choose Robonito Over Traditional Automation Frameworks
| Feature | Selenium | Playwright | Robonito |
|---|---|---|---|
| Coding Required | Yes | Yes | No |
| Self-Healing | Limited | No | Yes |
| Cross-Browser | Yes | Yes | Yes |
| API Testing | Separate setup | Separate setup | Built-in |
| Maintenance | High | Medium | Low |
| Setup Time | Days | Hours | Minutes |
How to Choose an Automated Testing Tool
Selecting the right automated testing tool depends on your application architecture, team skills, testing goals, and long-term maintenance requirements. While some tools prioritize flexibility through code, others focus on speed, collaboration, and AI-powered automation.
Before choosing a platform, evaluate the following factors:
| Criteria | What to Consider |
|---|---|
| Application Type | Do you need to test web, mobile, desktop, APIs, or all of them? |
| Ease of Use | Can testers create and maintain tests without extensive programming knowledge? |
| Automation Approach | Does the tool support no-code, low-code, or code-first automation? |
| Cross-Platform Support | Can it run tests across different browsers, operating systems, and devices? |
| CI/CD Integration | Does it integrate with GitHub Actions, Jenkins, GitLab CI, or Azure DevOps? |
| Self-Healing Capabilities | Can tests automatically adapt when UI elements change? |
| Reporting & Analytics | Does the platform provide actionable insights and failure diagnostics? |
| Scalability | Can it support growing test suites and multiple teams? |
| Maintenance Effort | How much time will be required to update and maintain tests over time? |
Which Automated Testing Tool Is Right for You?
- Choose Robonito if you want AI-powered, no-code automation across web, mobile, desktop, and API testing with self-healing capabilities.
- Choose Playwright if your engineering team prefers code-first automation and advanced browser control.
- Choose Cypress if you're focused primarily on modern JavaScript web applications.
- Choose Selenium if you need an open-source framework with maximum flexibility and ecosystem support.
- Choose Postman if API testing is your primary requirement.
Questions to Ask Before Making a Decision
Before investing in an automation platform, ask:
- Will this tool reduce maintenance effort or simply automate test execution?
- Can it handle frequent UI changes without breaking tests?
- Does it support all the platforms we need to test?
- How easily can it integrate into our existing development workflow?
- Will it scale as our application and team grow?
The best automated testing tool is not necessarily the most feature-rich—it is the one that improves software quality, reduces maintenance costs, and helps your team deliver faster releases with confidence.
5. Real code examples — five testing types
Unit testing — Jest (JavaScript)
// tests/unit/order-calculator.test.js
// Tests the order total calculation function in isolation

import { calculateOrderTotal } from '../../src/utils/order-calculator';

describe('calculateOrderTotal', () => {

  test('calculates total correctly with single item', () => {
    const items = [{ price: 29.99, quantity: 2, vatRate: 0.20 }];
    const result = calculateOrderTotal(items);

    expect(result.subtotal).toBeCloseTo(59.98, 2);
    expect(result.vat).toBeCloseTo(11.996, 2);
    expect(result.total).toBeCloseTo(71.976, 2);
  });

  test('applies discount code correctly', () => {
    const items = [{ price: 100.00, quantity: 1, vatRate: 0.20 }];
    const discountCode = { type: 'percentage', value: 10 };  // 10% off
    const result = calculateOrderTotal(items, discountCode);

    expect(result.discountAmount).toBeCloseTo(10.00, 2);
    expect(result.subtotal).toBeCloseTo(90.00, 2);
  });

  test('returns zero total for empty cart', () => {
    const result = calculateOrderTotal([]);
    expect(result.total).toBe(0);
    expect(result.subtotal).toBe(0);
    expect(result.vat).toBe(0);
  });

  // Boundary values — always test edges
  test.each([
    [0,      0,    'zero quantity'],
    [1,      1,    'minimum valid'],
    [100,    100,  'maximum valid'],
    [101,    null, 'over maximum — should throw'],
  ])('quantity %i produces total %s (%s)', (quantity, expectedTotal, _desc) => {
    const item = { price: 1.00, quantity, vatRate: 0 };
    if (expectedTotal === null) {
      expect(() => calculateOrderTotal([item])).toThrow('Quantity exceeds maximum');
    } else {
      expect(calculateOrderTotal([item]).subtotal).toBe(expectedTotal);
    }
  });
});
Integration testing — pytest + httpx
## tests/integration/test_orders_api.py
## Tests the orders API endpoint with real database interaction

import pytest
import httpx

@pytest.fixture(scope="module")
def client():
    """Authenticated API client — created once per test module."""
    auth = httpx.post(
        "https://staging.yourapp.com/api/auth/login",
        json={"email": "test@example.com", "password": "TestPass2026!"}
    )
    token = auth.json()["access_token"]
    return httpx.Client(
        base_url="https://staging.yourapp.com",
        headers={"Authorization": f"Bearer {token}"},
        timeout=10.0
    )

class TestOrdersIntegration:

    def test_create_and_retrieve_order(self, client):
        """Verifies the full create → retrieve cycle works correctly."""
        ## Create order
        create_res = client.post("/api/v1/orders", json={
            "product_id": "prod-widget-pro",
            "quantity": 2
        })
        assert create_res.status_code == 201
        order_id = create_res.json()["order_id"]
        assert order_id.startswith("ORD-")

        ## Retrieve and verify data consistency
        get_res = client.get(f"/api/v1/orders/{order_id}")
        assert get_res.status_code == 200
        order = get_res.json()
        assert order["order_id"] == order_id
        assert order["status"] == "pending"
        assert order["quantity"] == 2

    def test_order_appears_in_orders_list(self, client):
        """Verifies new orders appear in paginated list correctly."""
        ## Create unique order for this test
        import uuid
        product_id = f"prod-test-{uuid.uuid4().hex[:8]}"

        create_res = client.post("/api/v1/orders", json={
            "product_id": "prod-widget-pro",
            "quantity": 1
        })
        new_order_id = create_res.json()["order_id"]

        ## Check list includes this order
        list_res = client.get("/api/v1/orders?limit=10&sort=created_desc")
        assert list_res.status_code == 200
        order_ids = [o["order_id"] for o in list_res.json()["items"]]
        assert new_order_id in order_ids, "New order not in recent orders list"

    @pytest.mark.parametrize("quantity,expected_status,expected_error", [
        (1,   201, None),
        (100, 201, None),
        (0,   422, "quantity"),
        (-5,  422, "quantity"),
        (101, 422, "quantity"),
    ])
    def test_quantity_validation(self, client, quantity, expected_status, expected_error):
        res = client.post("/api/v1/orders", json={
            "product_id": "prod-widget-pro",
            "quantity": quantity
        })
        assert res.status_code == expected_status
        if expected_error:
            errors = str(res.json())
            assert expected_error in errors.lower()
E2E / UI testing — Playwright
// tests/e2e/checkout.spec.ts
// End-to-end checkout flow — critical regression test

import { test, expect } from '@playwright/test';

test.describe('Checkout — critical path', () => {

  test('completes purchase across all browsers', async ({ page, browserName }) => {
    // Navigate to product
    await page.goto('/products/widget-pro');
    await expect(page.getByRole('heading', { name: 'Widget Pro' })).toBeVisible();

    // Add to cart
    await page.getByRole('button', { name: 'Add to cart' }).click();
    await expect(page.getByTestId('cart-count')).toHaveText('1');

    // Proceed to checkout
    await page.getByRole('link', { name: 'Checkout' }).click();
    await expect(page).toHaveURL(/\/checkout/);

    // Fill shipping
    await page.getByLabel('Full name').fill('Jane Smith');
    await page.getByLabel('Email address').fill('jane@test.example.com');
    await page.getByLabel('Street address').fill('123 Test Street');
    await page.getByLabel('City').fill('London');
    await page.getByLabel('Postcode').fill('EC1A 1BB');

    // Fill payment (Stripe test card)
    await page.getByLabel('Card number').fill('4242424242424242');
    await page.getByLabel('Expiry').fill('12/28');
    await page.getByLabel('CVC').fill('123');

    // Place order
    await page.getByRole('button', { name: 'Place order' }).click();

    // Verify confirmation
    await expect(
      page.getByRole('heading', { name: 'Order confirmed' })
    ).toBeVisible({ timeout: 15000 });

    await expect(page.getByTestId('order-number'))
      .toHaveText(/^ORD-\d{8}$/);

    console.log(`✅ Checkout passed on ${browserName}`);
  });

  test('shows error and preserves cart on declined card', async ({ page }) => {
    await page.goto('/products/widget-pro');
    await page.getByRole('button', { name: 'Add to cart' }).click();
    await page.getByRole('link', { name: 'Checkout' }).click();

    await page.getByLabel('Full name').fill('Jane Smith');
    await page.getByLabel('Email address').fill('jane@test.example.com');
    await page.getByLabel('Card number').fill('4000000000000002'); // Decline card
    await page.getByLabel('Expiry').fill('12/28');
    await page.getByLabel('CVC').fill('123');
    await page.getByRole('button', { name: 'Place order' }).click();

    // Error shown, still on checkout, cart intact
    await expect(page.getByRole('alert')).toContainText('declined');
    await expect(page).toHaveURL(/\/checkout/);
    await expect(page.getByTestId('cart-count')).toHaveText('1');
  });
});
Performance testing — k6
// load-tests/smoke-performance.js
// Performance acceptance gate — runs in CI on every merge to main

import http from 'k6/http';
import { check, sleep } from 'k6';
import { Rate } from 'k6/metrics';

const errorRate = new Rate('error_rate');

export const options = {
  // Performance acceptance thresholds — fail the CI gate if not met
  thresholds: {
    'http_req_duration{name:homepage}':   ['p(95)<2000'],  // Homepage < 2s
    'http_req_duration{name:product}':    ['p(95)<1500'],  // Product page < 1.5s
    'http_req_duration{name:api_orders}': ['p(95)<1000'],  // API < 1s
    'http_req_failed':                     ['rate<0.01'],  // < 1% failures
    'error_rate':                          ['rate<0.02'],  // < 2% business errors
  },
  scenarios: {
    // Smoke test: small load, just verify thresholds are not wildly exceeded
    smoke: {
      executor: 'constant-vus',
      vus: 10,
      duration: '60s',
    },
  },
};

const BASE_URL = __ENV.BASE_URL || 'https://staging.yourapp.com';

export default function () {
  // Homepage
  const home = http.get(BASE_URL, { tags: { name: 'homepage' } });
  check(home, { 'homepage 200': r => r.status === 200 });
  errorRate.add(home.status !== 200);

  sleep(0.5);

  // Product page
  const product = http.get(`${BASE_URL}/products/widget-pro`, {
    tags: { name: 'product' }
  });
  check(product, { 'product page 200': r => r.status === 200 });

  sleep(0.5);

  // API order creation
  const order = http.post(
    `${BASE_URL}/api/v1/orders`,
    JSON.stringify({ product_id: 'prod-widget-pro', quantity: 1 }),
    {
      headers: { 'Content-Type': 'application/json' },
      tags: { name: 'api_orders' }
    }
  );
  check(order, { 'order created': r => r.status === 201 });
  errorRate.add(order.status !== 201);

  sleep(1);
}
Accessibility testing — axe-core with Playwright
// tests/accessibility/pages.spec.ts
// Automated WCAG 2.2 AA scan on all critical pages

import { test, expect } from '@playwright/test';
import AxeBuilder from '@axe-core/playwright';

const criticalPages = [
  { path: '/',          name: 'Homepage' },
  { path: '/login',     name: 'Login page' },
  { path: '/checkout',  name: 'Checkout page' },
  { path: '/products',  name: 'Product listing' },
];

for (const { path, name } of criticalPages) {
  test(`${name} — zero WCAG 2.2 AA violations`, async ({ page }) => {
    await page.goto(path);

    const results = await new AxeBuilder({ page })
      .withTags(['wcag2a', 'wcag2aa', 'wcag21aa', 'wcag22aa'])
      .analyze();

    // Human-readable failure message
    if (results.violations.length > 0) {
      const summary = results.violations.map(v =>
        `[${v.impact?.toUpperCase()}] ${v.id}: ${v.description}\n` +
        `  Affected: ${v.nodes.map(n => n.target.join(', ')).join(' | ')}`
      ).join('\n\n');
      throw new Error(`WCAG violations on ${name}:\n\n${summary}`);
    }

    expect(results.violations).toHaveLength(0);
  });
}
6. The automated testing pyramid — getting the ratio right
The test pyramid defines how to distribute automated tests across layers. The wrong ratio produces either a slow, fragile suite (too many E2E tests) or inadequate regression coverage (too few).
                    ┌──────────────────────────────┐
                    │    E2E / UI Tests (10%)        │
                    │  Slow, valuable, expensive    │
                 ┌──┴────────────────────────────┴──┐
                 │  Integration / API Tests (20%)    │
                 │   Moderate speed and cost         │
             ┌───┴───────────────────────────────────┴───┐
             │          Unit Tests (70%)                  │
             │    Fast, cheap, numerous                   │
         ────┴───────────────────────────────────────────┴────
                  Static Analysis (always on — zero cost)
Why the pyramid ratio matters
A 500-test suite with the pyramid inverted (400 E2E, 50 integration, 50 unit) has these characteristics:
- Full suite takes 3–4 hours to run (E2E tests take 30–60 seconds each)
- Any UI change breaks 20–40 tests simultaneously
- Teams run it less often because it is slow
- The feedback loop is hours, not minutes
A 500-test suite with correct pyramid ratio (350 unit, 100 integration, 50 E2E):
- Full suite takes 20–30 minutes
- UI changes only break the 50 E2E tests, not 400
- Teams run it on every PR
- The feedback loop is minutes
7. Automated testing in CI/CD pipelines
Automated tests integrated into CI/CD provide the feedback loop that makes continuous delivery possible — catching regressions within minutes of introduction rather than days.
## .github/workflows/automated-testing-pipeline.yml
## Complete automated testing CI/CD pipeline

name: Automated Testing Pipeline

on:
  push:
    branches: [main, develop]
  pull_request:

jobs:
  ## Layer 1: Fast gate on every commit — 2-5 minutes
  unit-tests:
    name: "Unit Tests + Coverage"
    runs-on: ubuntu-latest
    steps:
      - uses: actions/checkout@v4
      - uses: actions/setup-node@v4
        with: { node-version: '20', cache: 'npm' }
      - run: npm ci
      - run: npm test -- --coverage
      - name: Coverage gate (80% minimum)
        run: |
          LINES=$(cat coverage/coverage-summary.json | \
            python3 -c "import sys,json; print(json.load(sys.stdin)['total']['lines']['pct'])")
          echo "Line coverage: ${LINES}%"
          python3 -c "assert float('${LINES}') >= 80, f'Coverage {${LINES}}% below 80%'"

  ## Layer 2: Integration gate on every PR — 10-15 minutes
  api-integration:
    name: "API Integration Tests"
    runs-on: ubuntu-latest
    needs: unit-tests
    services:
      postgres:
        image: postgres:16
        env: { POSTGRES_DB: testdb, POSTGRES_USER: test, POSTGRES_PASSWORD: test }
        options: --health-cmd pg_isready --health-interval 5s
    steps:
      - uses: actions/checkout@v4
      - uses: actions/setup-python@v5
        with: { python-version: '3.12' }
      - run: pip install -r requirements-test.txt --break-system-packages
      - run: pytest tests/integration/ -v --tb=short --timeout=30
        env:
          DATABASE_URL: postgresql://test:test@localhost/testdb
          API_BASE_URL: http://localhost:8000

  ## Layer 3: E2E regression on merge to main — 30-45 minutes
  e2e-regression:
    name: "E2E Regression — All Browsers"
    runs-on: ubuntu-latest
    needs: api-integration
    if: github.ref == 'refs/heads/main'
    steps:
      - uses: actions/checkout@v4
      - uses: actions/setup-node@v4
        with: { node-version: '20', cache: 'npm' }
      - run: npm ci
      - run: npx playwright install --with-deps

      - name: Deploy to staging
        run: ./scripts/deploy-staging.sh ${{ github.sha }}

      - name: Run E2E on Chromium + WebKit + Firefox
        run: npx playwright test --project=chromium --project=webkit --project=firefox

      - name: Run Robonito regression (no-code layer)
        uses: robonito/run-tests-action@v2
        with:
          api-key: ${{ secrets.ROBONITO_API_KEY }}
          suite: critical-regression
          environment: staging
          browsers: chrome,safari,firefox,edge
          fail-on: critical

      - uses: actions/upload-artifact@v4
        if: failure()
        with:
          name: playwright-report
          path: playwright-report/

  ## Layer 3b: Performance gate on merge to main
  performance-gate:
    name: "Performance Acceptance (k6)"
    runs-on: ubuntu-latest
    needs: api-integration
    if: github.ref == 'refs/heads/main'
    steps:
      - uses: actions/checkout@v4
      - run: |
          curl -sL https://github.com/grafana/k6/releases/latest/download/k6-linux-amd64.tar.gz \
            | tar xz && sudo mv k6*/k6 /usr/local/bin/
      - run: k6 run load-tests/smoke-performance.js
        env: { BASE_URL: ${{ secrets.STAGING_URL }} }

  ## Layer 3c: Accessibility on merge to main
  accessibility:
    name: "WCAG 2.2 AA Scan"
    runs-on: ubuntu-latest
    needs: e2e-regression
    if: github.ref == 'refs/heads/main'
    steps:
      - uses: actions/checkout@v4
      - run: npm ci
      - run: npx playwright install --with-deps chromium
      - run: npx playwright test tests/accessibility/ --project=chromium
8. AI-powered automated testing in 2026
AI has transformed automated testing from a scripting exercise into an intelligence-driven process. Three capabilities are delivering measurable ROI right now:
Self-healing tests — eliminating the maintenance crisis
The single biggest problem with automated testing historically was that tests broke every time a developer changed a UI element. An engineer would rename a button's CSS class, and 15 automated tests would fail the next morning — requiring manual selector updates before anyone could trust the CI results again.
Self-healing AI detects element changes and updates test references automatically:
Traditional automated test breaking pattern:
  Developer renames button class from "btn-checkout" to "ds-action-primary"
  → 12 tests using this class fail at 2am
  → Team wakes up to red CI
  → Engineer spends 2 hours finding and updating selectors
  → Release delayed

Robonito self-healing pattern:
  Developer renames button class from "btn-checkout" to "ds-action-primary"
  → Robonito evaluates multi-signal recognition:
     ARIA role: still "button" ✅
     Accessible name: still "Complete Purchase" ✅
     Visual position: still bottom of checkout form ✅
     Surrounding context: still follows payment section ✅
  → Test auto-heals, continues running
  → Zero engineer time spent on this change
  → Release proceeds on schedule
AI test generation — from flows to test cases
Robonito generates complete test cases from recorded user interactions. A QA analyst records a checkout flow once — the AI generates the happy path test, error path variations (declined card, invalid address, out-of-stock), and boundary value scenarios automatically. What would take 2–3 hours of manual test case writing takes 15 minutes of review.
AI risk-based prioritisation
AI analyses code changes and historical failure patterns to rank tests by regression risk. High-risk tests (recently changed code, historically unstable areas, revenue-critical flows) run first. CI pipelines give meaningful feedback in 20 minutes because the most likely failures are checked first.
9. How to get started — step by step
Step 1: Measure your current state (Week 1)
Before choosing tools, establish your baseline:
Current state audit:
□ Total test cases (manual + automated)
□ Current automation percentage
□ Manual regression cycle time (hours)
□ Tests broken per sprint from UI changes
□ Current release cadence
□ Mean time to detect a regression (hours)
□ Defect removal efficiency (bugs caught before vs after production)
Step 2: Choose your automation candidates (Week 1)
Apply the ROI formula to identify where to start. Always start with:
- Your most critical user flow (highest business impact)
- Your most frequently run regression test
- Your most time-consuming manual test
Not with the easiest test to automate — with the highest value.
Step 3: Choose your tool (Week 2)
| Your team profile | Recommended starting point |
|---|---|
| No-code/non-technical QA | Robonito — free tier, under 1 hour to first test |
| Engineering-led, multi-language | Playwright — free, best cross-browser |
| JavaScript-first team | Cypress — best debugging experience |
| Python-heavy team | pytest + Playwright-Python |
| Need web + native mobile | WebdriverIO |
Step 4: Write and run your first test (Week 2)
Start with the smoke suite — the 5–10 tests that, if failing, mean the application is broken for all users. Get these running in CI with a deployment gate before expanding.
With Robonito (no-code):
1. Sign up free at robonito.com
2. Install the browser extension
3. Click "Record test"
4. Perform your most critical user flow once
5. Review the AI-generated test cases
6. Click "Run" — tests execute across browsers
7. Add the Robonito GitHub Action to your CI pipeline
Time to first test in CI: under 1 hour
With Playwright (code-first):
## Terminal: set up Playwright in under 5 minutes
npm init playwright@latest
## Choose: TypeScript, tests/ directory, add GitHub Actions workflow

## Write your first test:
cat > tests/smoke.spec.ts << 'EOF'
import { test, expect } from '@playwright/test';

test('homepage loads', async ({ page }) => {
  await page.goto('/');
  await expect(page).toHaveTitle(/Your App/);
  await expect(page.getByRole('navigation')).toBeVisible();
});
EOF

## Run locally first
npx playwright test

## Push to GitHub — the generated workflow runs automatically
Step 5: Expand coverage incrementally
Month 1: Smoke suite (10 tests, critical flows)
          → Every deployment gate
          → Target: 100% critical paths covered

Month 2: Regression suite (50 tests)
          → Every PR gate
          → Target: All P1 features covered

Month 3: Full regression (200 tests)
          → Nightly + pre-release
          → Target: All P2 features covered

Month 4+: Performance, accessibility, security layers
           → Add to CI pipeline systematically
10. Five automated testing mistakes to avoid
Mistake 1: Fragile selectors
// ❌ CSS class selector — breaks with every UI redesign
await page.locator('.checkout-btn-primary-v2-new').click();

// ✅ ARIA role + accessible name — stable across redesigns
await page.getByRole('button', { name: 'Place order' }).click();

// Why this matters:
// CSS classes change every time a design system is updated
// ARIA roles and accessible names reflect meaning, not implementation
// Tests using ARIA selectors survive redesigns that break CSS selectors
Mistake 2: The inverted pyramid
Mostly E2E tests = slow CI, high maintenance, inverted ROI. Build unit tests first, integration tests second, E2E last. Your 200-test suite should have 140 unit tests, 40 integration tests, and 20 E2E tests — not the reverse.
Mistake 3: Tests that do not block deployment
## ❌ Tests that run but never block anything are decorative
- run: npx playwright test
  continue-on-error: true  # This line defeats the entire purpose

## ✅ Tests that block deployment are the point
- run: npx playwright test
  ## If this fails: exit code 1 → pipeline fails → deployment blocked ✅
Mistake 4: No test data isolation
## ❌ Shared test data causes test interference
def test_a():
    user = get_user("shared@test.com")  ## Modified by test_b last run
    assert user.order_count == 5  ## Fails if test_b ran first

## ✅ Independent test data per test
@pytest.fixture
def fresh_user():
    user = create_user(email=f"test+{uuid.uuid4().hex[:8]}@test.com")
    yield user
    delete_user(user.id)  ## Cleanup after test
Mistake 5: Automating before the feature is stable
First-pass testing of new features should always be manual — the expected outcomes are not defined yet. Automate only after a feature has been stable for at least two sprints. Automating unstable features produces a maintenance treadmill, not a safety net.
11. Common misconceptions — corrected
"Automated testing replaces manual testing"
False. Automated testing replaces the execution of repetitive, deterministic tests. It cannot replace exploratory testing (discovering unknown bugs), usability evaluation (judging UX quality), first-pass feature testing (defining expected outcomes), or accessibility testing with real assistive technology. The best teams use automated testing to free testers from repetitive execution so they can focus on the testing that requires human intelligence.
"Automated tests are always faster to implement than manual tests"
False for individual test cases. Writing a robust automated test — with stable selectors, proper waits, data isolation, and CI integration — takes significantly longer than manually executing the same test once. Automated tests are faster over time, across multiple runs. The break-even point is typically 4–8 runs.
"More automated tests = better quality"
Not necessarily. A large suite of fragile, poorly-maintained tests with high false-positive rates reduces confidence in CI results and trains developers to ignore failures. Test quality matters more than test quantity. 50 reliable, well-maintained tests provide more value than 500 flaky ones.
"Automated testing is too expensive for small teams"
The opposite is often true. Small teams have fewer testers and cannot sustain a large manual regression cycle across frequent releases. No-code platforms like Robonito and free frameworks like Playwright have made automated testing accessible at zero to minimal cost. The ROI for a 5-person team running weekly releases is often stronger than for a large enterprise with an established QA team.
12. Pre-launch automated testing checklist
Coverage
- All P0/P1 critical user flows covered with automated E2E tests
- All API critical endpoints covered with integration tests
- Unit test coverage ≥ 80% for business logic layer
- Cross-browser tests run on Chrome + Safari minimum
- Performance acceptance criteria automated (LCP < 2.5s, API p95 < 1s)
- axe-core accessibility scan showing zero WCAG 2.2 AA violations
Quality
- All tests use ARIA-first selectors (not CSS classes or XPath)
- All tests are independent — no shared state between tests
- All tests have isolated test data with teardown
- Zero
sleep()calls — replaced with explicit element waits - Flakiness rate < 2% across all tests
CI/CD
- Tests are deployment gates — failures block the pipeline
- Unit tests complete in < 5 minutes
- Integration tests complete in < 20 minutes
- E2E regression completes in < 60 minutes
- Test failures notify the team via Slack/Teams with screenshot
Metrics tracked
- Pass/fail rate visible to whole team
- Defect removal efficiency (DRE) tracked per sprint
- Mean time to detect regression tracked
- Test maintenance hours per sprint tracked (should decrease over time)
Frequently Asked Questions
What is automated testing?
Automated testing is the practice of using tools and scripts to execute software tests without human intervention — automatically performing interactions, comparing actual results against expected outcomes, and reporting pass or fail. It replaces manual test execution for repeatable, deterministic scenarios like regression testing, API contract testing, and cross-browser compatibility.
What is the difference between automated testing and manual testing?
Automated testing uses tools to execute predefined tests without a human. Manual testing uses a human tester who brings judgment, creativity, and contextual observation. Automated testing is superior for regression, performance, and cross-browser testing. Manual testing is superior for exploratory testing, usability evaluation, and first-pass feature validation.
What are the main types of automated testing?
Unit testing (individual functions), integration testing (module interactions and APIs), E2E/UI testing (complete user journeys), performance testing (speed and scalability), security testing (vulnerability scanning), and accessibility testing (WCAG compliance). Most teams run all six types across a tiered CI/CD pipeline.
What is the best automated testing tool for beginners in 2026?
For no-code beginners: Robonito — free tier, under 1 hour to first test running in CI, no programming knowledge required. For developers: Playwright — free, well-documented, supports all major languages and browsers, generates test scaffolding automatically. Both have strong communities and extensive documentation.
How long does it take to get started with automated testing?
No-code platforms (Robonito): under 1 hour to first test in CI. Playwright: 2–4 hours for initial setup and first working test. First meaningful coverage (10–20 critical flow tests running in CI): 1–2 weeks. A full regression suite (100–200 tests): 4–8 weeks, building incrementally.
Will AI replace automated testing engineers?
No — AI is changing what automated testing engineers spend their time on. Repetitive script writing, selector maintenance, and test data setup are being automated. Testing engineers spend more time on test strategy, framework architecture, exploratory testing, and quality advocacy. The role is shifting from test execution to test intelligence.
External references
- Playwright Documentation — Web automation framework
- pytest Documentation — Python testing framework
- k6 Documentation — Performance testing
- axe-core GitHub — WCAG accessibility testing
- DORA State of DevOps 2025 — Automation performance data
- OWASP ZAP — Security testing
- Capgemini World Quality Report 2025 — Industry benchmarks
Automated testing that writes itself, heals itself, and runs itself
Robonito generates tests from your real user flows, runs them across Chrome, Safari, Firefox, and Edge in CI, and self-heals when your UI changes — covering web, mobile web, API, and desktop with zero scripting overhead. Start completely free and have your first automated tests running in CI today. Start free at Robonito.com →
Automate your QA — no code required
Stop writing test scripts.
Start shipping with confidence.
Join thousands of QA teams using Robonito to automate testing in minutes — not months.