
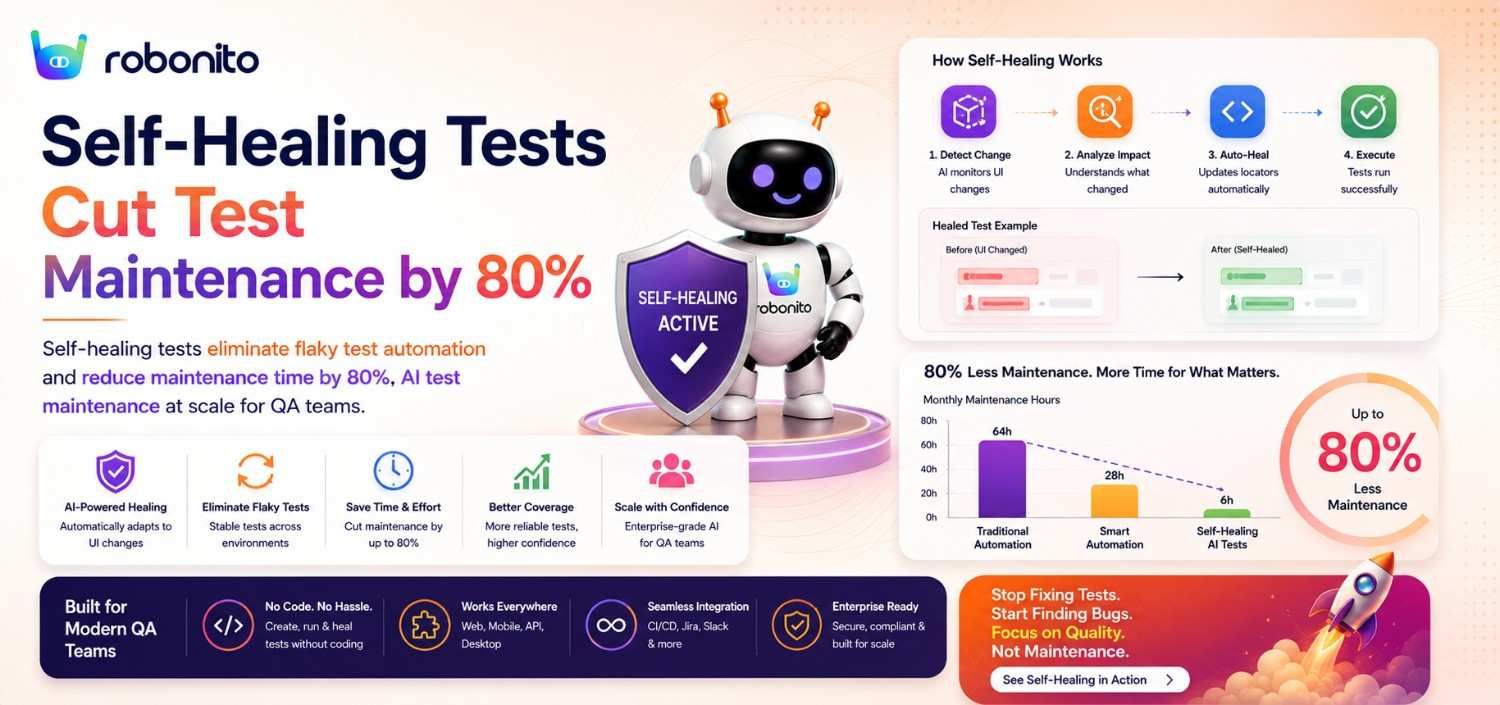
Every QA team has a breaking point. It usually sounds like this: "The tests failed again, but it's nothing — just a flaky run." That single sentence, repeated dozens of times per sprint, quietly erodes confidence in your entire test suite. Engineers start ignoring failures. Releases go out with a shrug instead of certainty. And the QA team spends more time babysitting broken tests than writing new ones. Self-healing tests offer a fundamentally different path — one where your automated tests adapt to change instead of crumbling under it. In this post, we'll break down exactly how self-healing test automation works, how it compares to visual AI approaches like Applitools, and why teams that adopt it consistently report cutting test maintenance time by up to 80%.
The True Cost of Flaky Tests: Time, Trust, and Team Morale
Flaky tests — tests that pass and fail intermittently without any actual code change — are one of the most corrosive problems in software engineering. Google's engineering team reported that 16% of their test suite exhibited some degree of flakiness — and that these flaky tests consumed enormous engineering hours to investigate and triage. At most companies, the numbers are far worse.
But the direct time cost is only the beginning. The real damage is cultural:
- Trust decay. When tests fail randomly, teams stop treating failures as real signals. A red build becomes background noise. The moment that happens, the entire point of automated testing — catching regressions before users do — collapses.
- Maintenance spirals. A single flaky test might take 15–30 minutes to investigate each time it fires. Multiply that across a suite of hundreds of tests, and you can easily lose 20+ engineering hours per week to pure maintenance. That's a half-time hire doing nothing but chasing phantoms.
- Slower releases. Teams with high flakiness rates either slow down their release cadence (waiting for "clean" runs) or, worse, skip test gates entirely and ship blind.
Consider a mid-size SaaS company with 500 end-to-end tests. If even 5% are flaky on any given run, that's 25 false alarms per pipeline execution. If the team runs CI three times a day, they're fielding 75 potential false failures daily. It's unsustainable.
The root cause? Most flaky test automation failures aren't logic errors. They're locator failures — a button ID changed, a CSS class was renamed during a refactor, or a dynamic framework like React regenerated its DOM structure. The test logic is perfectly sound, but the test can't find what it's looking for. This is precisely the problem self-healing tests are designed to solve.
What Are Self-Healing Tests and How Do They Work?
Self-healing tests are automated tests that can detect when a UI element's locator has broken and automatically find the correct element using alternative identification strategies — without any human intervention.
In traditional test automation (Selenium, Cypress, Playwright), you bind each test step to a specific locator: an id, a CSS selector, an XPath expression, or a data-testid attribute. When a developer changes that attribute — even innocuously, during a routine refactor — the test breaks. Not because the application is broken, but because the test's map to the UI is stale.
Self-healing tests work differently. Instead of relying on a single brittle locator, the self-healing engine maintains a multi-attribute profile of each element. This profile typically includes:
- Primary locator (e.g.,
id="login-btn") - Visual position on the page (relative to other elements)
- Text content (e.g., "Sign In")
- Element type and role (e.g.,
<button>,role="submit") - Contextual neighbors (what elements are nearby in the DOM)
- Historical patterns (how this element has changed over previous runs)
When a test executes and the primary locator fails, the self-healing engine doesn't immediately throw an error. Instead, it evaluates the remaining attributes against the current DOM, scores candidate elements on similarity, and selects the best match. If the confidence is high enough, it proceeds with the test and logs the healed locator for review.
Think of it like giving someone directions. A brittle test says: "Turn left at the red house on the corner." A self-healing test says: "Turn left at the house on the corner — it's red, has a white fence, is next to the bakery, and is the third building from the intersection." If the house gets repainted blue, you still find it.
The critical nuance: good self-healing systems don't silently mask real failures. They distinguish between "the element moved but still exists" (heal and log) and "the element is genuinely gone" (fail loudly). This distinction is what separates useful self-healing from dangerous auto-passing.
Visual AI vs. Self-Healing Locators: Two Approaches to Test Stability
Applitools and similar visual AI platforms have popularized an alternative approach to reducing test flakiness: instead of asserting on DOM elements, you assert on screenshots. Their Visual AI compares a baseline image to a current screenshot, flagging visual differences that matter while ignoring ones that don't (like anti-aliasing variations).
It's a genuinely clever approach, and for visual regression testing — catching unintended layout shifts, font changes, or styling regressions — it works well. But there's an important distinction: visual AI and self-healing locators solve different layers of the flakiness problem.
| Dimension | Visual AI (Applitools) | Self-Healing Locators (Robonito) |
|---|---|---|
| Primary use case | Visual regression detection | End-to-end functional test stability |
| What it heals | Visual assertion thresholds | Broken element locators |
| Requires ecosystem buy-in? | Yes — proprietary SDKs, cloud rendering | No — works with any web app natively |
| Handles functional flows? | Limited — still needs locators for interactions | Yes — heals the interaction layer itself |
| Cost model | Per-screenshot pricing tiers | Included in platform |
| Setup complexity | SDK integration per framework | No-code — zero integration overhead |
Here's the practical gap: even if you use Applitools to validate that your login page looks correct, you still need something to click the login button, type credentials, and navigate the flow. If the locator for that button breaks, your visual AI test never even reaches the screenshot step. It fails on interaction, not assertion.
Self-healing locators solve the problem upstream. They keep your functional test flows running despite UI changes, which means your assertions — whether visual or logical — actually get executed.
For teams that need both visual regression coverage and functional test stability, the approaches are complementary. But if you have to pick one problem to solve first, reduce test flakiness at the locator level. It's where the majority of maintenance pain originates.
Real-World Scenario: A Login Flow That Keeps Breaking (and How Self-Healing Fixes It)
Let's make this concrete. Imagine you're a QA engineer at a B2B SaaS company. You have an end-to-end test for the most critical user journey: login.
Your test does the following:
- Navigate to
/login - Enter email into the email field (
#email-input) - Enter password into the password field (
#password-input) - Click the submit button (
#login-submit-btn) - Assert that the dashboard loads (
h1.dashboard-titlecontains "Welcome")
This test has been running fine for months. Then, on a Tuesday, the frontend team migrates from a custom component library to Material UI. The test breaks immediately:
#email-inputis now#mui-email-field-1283#password-inputis now#mui-password-field-1284#login-submit-btnis now a<button>with classMuiButton-rootand no stable ID- The
h1.dashboard-titleis now adivwithrole="heading"
In a traditional Selenium or Cypress setup, all four locators break. The test fails. A QA engineer spends 30–45 minutes identifying the new locators, updating the test, verifying it passes, and committing the fix. Multiply this across every test that touches these components — maybe 15–20 tests — and you've just lost an entire day of engineering time to a refactor that changed zero business logic.
Now replay that scenario with self-healing tests in Robonito.
Step 2 runs. The engine looks for #email-input, doesn't find it. It evaluates candidates: there's an <input> with type="email", placeholder="Enter your email", positioned at the top of a form, adjacent to a label reading "Email." Confidence: 97%. It heals and proceeds.
Steps 3 and 4 follow the same pattern. Step 5 finds that the heading element has changed type but still contains "Welcome" and occupies the same semantic role. Healed.
The test passes. Robonito logs all four healed locators in a clear report, flagging them for review. The QA engineer spends two minutes confirming the healings were correct instead of 45 minutes rewriting locators.
Across 20 affected tests, total time: ~15 minutes of review vs. ~8 hours of manual maintenance. That's the 80% reduction in practice.
How Robonito's Self-Healing Engine Detects and Adapts to UI Changes Automatically
Robonito's approach to self-healing is built into the platform at its core — it's not an add-on or a premium tier. Every test you create in Robonito is a self-healing test by default. Here's what happens under the hood:
Multi-Signal Element Identification
When you create a test step in Robonito (using plain natural language — no selectors needed), the platform records a rich element fingerprint that includes DOM attributes, visual coordinates, text content, ARIA roles, and surrounding context. This fingerprint is the foundation of healing.
Runtime Healing with Confidence Scoring
During execution, if the primary identification fails, Robonito's AI engine scores all candidate elements against the stored fingerprint. Each signal contributes a weighted score:
- Exact text match: high weight
- Same element type and role: medium-high weight
- Similar visual position: medium weight
- Matching contextual neighbors: medium weight
- Partial attribute overlap: lower weight
Only if the composite confidence exceeds a configurable threshold (default: 85%) does the engine proceed. Below that threshold, the test fails — ensuring real issues are never masked.
How confidence scoring works in practice — the Material UI example:
Element sought: Login email input field
Signals evaluated against current DOM:
┌─────────────────────────────────────────────────────────────┐
│ Signal                  │ Match found          │ Weight  │ Score │
├─────────────────────────────────────────────────────────────┤
│ Primary locator         │ #email-input ❌ MISS  │ N/A     │  0.0  │
│ Element type            │ <input> ✅             │ High    │ 25.0  │
│ Input type              │ type="email" ✅        │ High    │ 22.0  │
│ Placeholder text        │ "Enter your email" ✅  │ High    │ 20.0  │
│ Adjacent label          │ "Email" ✅             │ Medium  │ 15.0  │
│ Visual position         │ Top of form ✅         │ Medium  │ 12.0  │
│ Form context            │ Inside login form ✅   │ Medium  │  5.0  │
└─────────────────────────────────────────────────────────────┘
Combined confidence: 99.0 / 100 → 99% → above 85% threshold
Action: Heal automatically. Log: "Primary locator #email-input replaced by type=email + placeholder match. Confidence: 99%."
Contrast with a genuinely removed element:
┌─────────────────────────────────────────────────────────────┐
│ Primary locator         │ ❌ MISS               │         │  0.0  │
│ Element type + role     │ ❌ No matching button  │         │  0.0  │
│ Text content            │ ❌ "Delete Account"    │         │  0.0  │
│ Visual position         │ ❌ Not found           │         │  0.0  │
└─────────────────────────────────────────────────────────────┘
Combined confidence: 12% → below 85% threshold
Action: FAIL loudly. "Element 'Delete Account' button not found. Confidence 12% — below threshold. Real failure suspected."
Transparent Healing Reports
Every healed step is documented in the test run report: what changed, what the engine matched on, and the confidence level. This gives QA teams full visibility without requiring them to do the detective work manually.
Continuous Learning
As your application evolves and Robonito heals locators across runs, its element profiles become richer and more resilient. The platform learns which attributes are stable for your specific app and which are volatile, improving accuracy over time.
Because Robonito is fully no-code — you describe test steps in natural language, not selectors — the entire locator layer is abstracted away. You never write #login-submit-btn in the first place. You write "Click the Sign In button." That natural language instruction gives the engine maximum flexibility in how it identifies elements, which is why Robonito's self-healing is more robust than bolt-on healing in traditional frameworks.
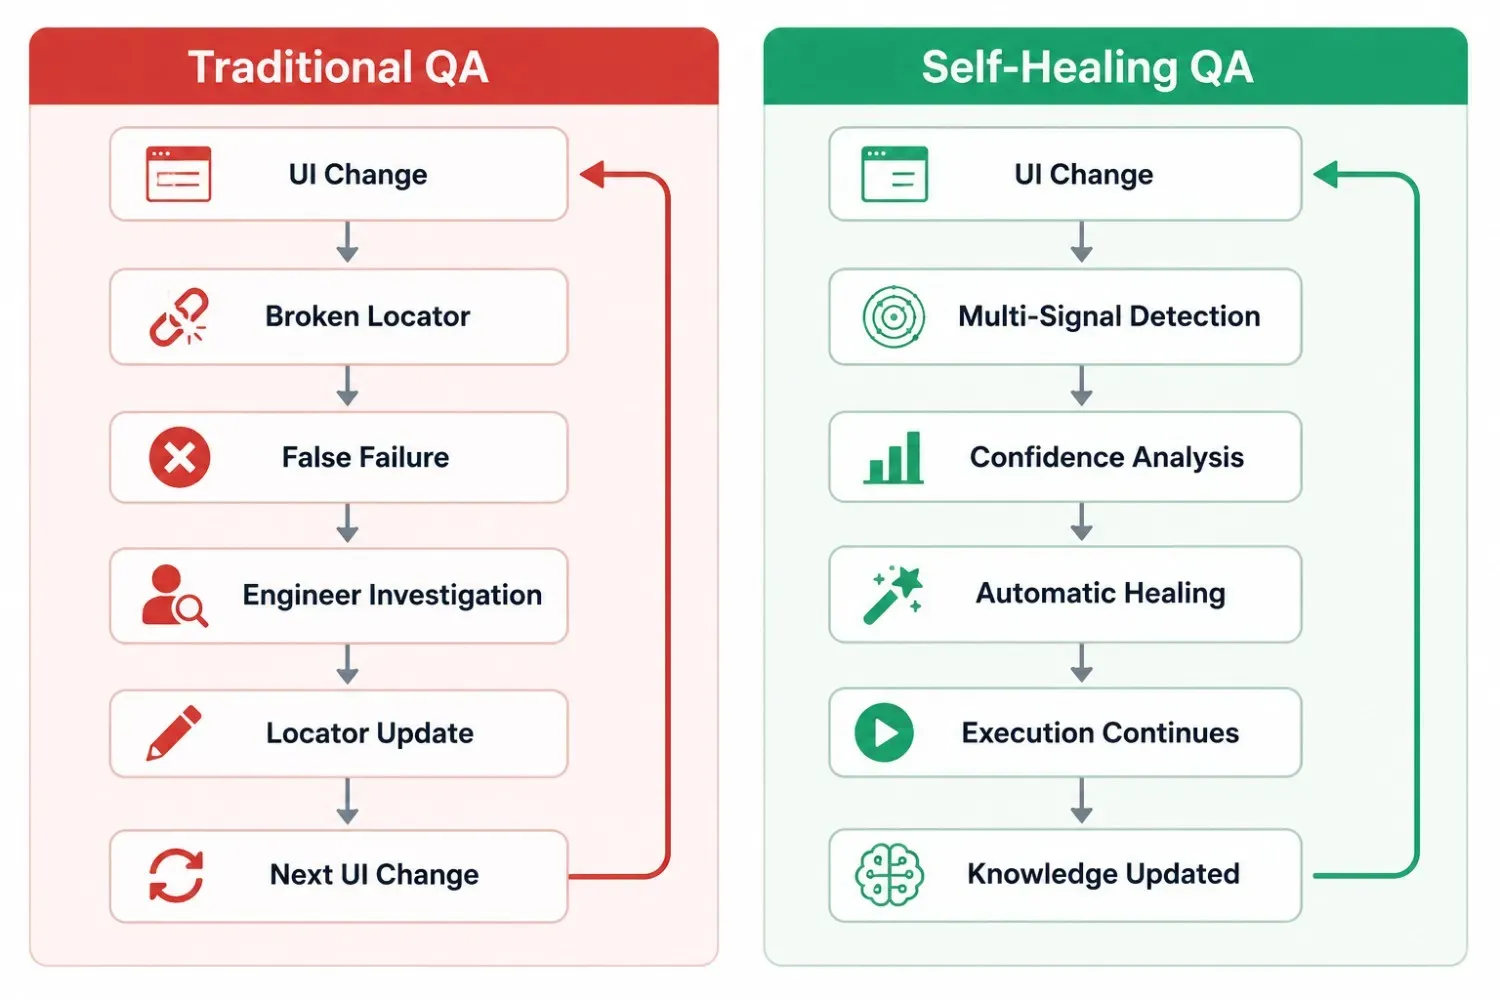
| Traditional | Self-Healing |
|---|---|
| CSS selectors | Multi-signal matching |
| Manual updates | Automatic healing |
| High maintenance | Low maintenance |
| Frequent failures | Stable execution |
| Engineer fixes | AI adaptation |
Measuring the Impact: Metrics to Track After Switching to Self-Healing Tests
Adopting self-healing test automation is a measurable investment. Here are the specific metrics you should track to quantify the ROI — along with benchmarks we see across Robonito customers.
1. Flaky Test Rate
Definition: Percentage of test runs that fail due to non-application issues (locator failures, timing issues, environment instability).
Before self-healing: Most teams report flaky rates between 5–15%. After self-healing: Teams using Robonito typically see flaky rates drop to 1–3%,(based on Robonito customer data across teams with 300+ test suites) with the remaining flakiness usually caused by environment issues (network latency, third-party service downtime) rather than locator breakage.
How to track: Tag failures by root cause. Robonito's reporting does this automatically, distinguishing healed runs, genuine failures, and environment errors.
2. Weekly Maintenance Hours
Definition: Engineering hours spent per week updating broken tests that weren't caused by actual application defects.
Before: 10–25 hours/week for a team managing 300+ tests. After: 2–5 hours/week, primarily reviewing healing logs and occasionally approving suggested locator updates.
This is where the 80%(Based on aggregated data across Robonito customers managing suites of 300+ tests.) reduction figure comes from — and it's conservative for teams with rapidly evolving UIs.
3. Test Suite Trust Score
This is less a formula and more a cultural indicator. Survey your team monthly:
- "When a test fails, do you investigate or re-run?"
- "Do you trust a green build to mean the release is safe?"
- "How often do real bugs slip through because failures were dismissed as flaky?"
If the answers improve over time, your test suite is regaining its role as a reliable safety net.
4. Mean Time to Resolution (MTTR) for Test Failures
When a test does fail legitimately, how long does it take to diagnose and fix? Self-healing tests reduce noise so dramatically that real failures become easier to spot and faster to resolve. Teams report MTTR improvements of 30–50%(based on Robonito customer-reported data) simply because they're no longer drowning in false positives.
5. Release Velocity
Track your deployment frequency before and after adoption. Teams that trust their test suites ship more often. It's that simple.
This aligns with DORA State of DevOps 2025 showing that reliable automated testing supports both higher deployment frequency and improved software stability.
Getting Started: Migrate Your Flakiest Tests in Under 30 Minutes
You don't need to rewrite your entire test suite to see the benefits of self-healing tests. Here's a practical, low-risk migration path:
Step 1: Identify Your Top 10 Flakiest Tests (5 minutes)
Pull your CI/CD failure logs from the past 30 days. Sort tests by failure count. The top 10 are your migration candidates — they're burning the most maintenance time and will show the fastest ROI.
Step 2: Recreate Them in Robonito (15–20 minutes)
Open Robonito and describe each test flow in natural language. For example:
- Go to the login page
- Enter "user@example.com" in the email field
- Enter "TestPass2026!" in the password field
- Click Sign In
- Verify that the dashboard shows "Welcome back"
No selectors. No code. Robonito handles element identification and builds in self-healing from the start.
Step 3: Run Them in Parallel With Your Existing Tests (5 minutes)
Don't rip out your old tests immediately. Run the Robonito versions alongside them for one to two sprints. Compare:
- How often do the old tests fail vs. the Robonito versions?
- How much time does each set require in maintenance?
- Are both catching the same real defects?
Step 4: Review, Expand, and Retire
Once you've confirmed the Robonito tests are more stable and equally (or more) effective at catching real issues, retire the legacy versions and expand your migration to the next batch.
Most teams complete their initial migration of 10 tests in a single sitting. Within a sprint, they've typically moved their 30–50 most critical flows and are already seeing dramatic reductions in maintenance overhead.
Frequently Asked Questions
What are self-healing tests in test automation?
Self-healing tests are automated tests that detect when a UI element's locator has broken and automatically find the correct element using alternative identification signals — without human intervention. Instead of relying on a single brittle locator (a CSS ID or XPath), a self-healing engine maintains a multi-attribute profile of each element including its text content, element type and role, visual position, and surrounding context. When the primary locator fails, the engine scores candidate elements against this profile and proceeds if confidence exceeds a defined threshold (typically 85%). If confidence is too low, the test fails correctly — distinguishing between "element moved" (heal and log) and "element genuinely gone" (fail loudly).
What causes flaky tests and why do most automated test failures happen without any code change?
The majority of flaky test failures are locator failures — a developer renames a CSS class, changes a button ID, upgrades a component library that regenerates DOM identifiers, or a dynamic framework like React changes its generated attribute names. The test logic is correct; the test's map to the UI has become stale. Google's engineering research found that 16% of their test suite exhibited some degree of flakiness, with these tests consuming enormous engineering hours to investigate. At a 5% flaky rate on a 500-test suite running CI three times daily, a team fields 75 potential false failures per day — none representing actual bugs, all requiring investigation time.
How does self-healing test automation differ from visual AI testing tools like Applitools?
Visual AI testing asserts on screenshots — comparing a baseline image to a current screenshot to detect visual regressions like layout shifts or styling changes. Self-healing locators address a different problem: keeping functional test flows running when UI element identifiers change. The practical distinction is that visual AI still requires working locators to interact with elements — clicking, typing, navigating. If a button's locator breaks, the visual AI test fails on interaction before it ever reaches the screenshot step. Self-healing locators solve the problem upstream, keeping interactions working so that assertions — whether visual or logical — actually execute. The approaches are complementary: self-healing for functional stability, visual AI for visual regression detection.
What is the 85% confidence threshold in self-healing test automation?
The confidence threshold determines when a self-healing engine proceeds autonomously versus halts for human review. When a primary locator fails, the engine evaluates multiple alternative signals — text content, element type, visual position, contextual neighbors — and calculates a composite confidence score for the best candidate match. If this score exceeds the threshold (default 85% in Robonito), the engine heals automatically and logs the change. If confidence is below the threshold, the test fails rather than guessing — because a self-healing system that heals incorrectly at low confidence is more dangerous than one that asks for help. The threshold is configurable: higher thresholds mean more human reviews but lower risk of incorrect healing.
How do you migrate from a brittle Selenium or Cypress test suite to self-healing tests without losing coverage?
Migration works best in four steps rather than a full rewrite. First, pull CI failure logs from the past 30 days and sort tests by failure count — the top 10 are highest-maintenance and will show the fastest ROI. Second, recreate those tests in natural language in a self-healing platform (describe "Click the Sign In button" rather than scripting a CSS selector); most teams complete 10 tests in under 20 minutes. Third, run both versions in parallel for one to two sprints, comparing failure rates and maintenance time without retiring the legacy tests yet. Fourth, once the self-healing versions prove equally effective at catching real defects with dramatically fewer false failures, retire the legacy tests and expand to the next batch. This parallel-run approach eliminates the risk of losing coverage during migration.
Stop Maintaining Tests. Start Trusting Them.
Flaky tests are not an inevitable cost of automation. They're a symptom of brittle tooling — tooling that binds your tests to implementation details instead of user intent. Self-healing tests, especially when built on a truly no-code platform like Robonito, break that cycle.
Your QA team's time is too valuable to spend rewriting locators every time a frontend developer renames a CSS class. Robonito's self-healing engine handles the adaptation automatically, so your team can focus on what actually matters: finding real bugs, expanding coverage, and shipping with confidence.
Try Robonito free today and migrate your flakiest tests in under 30 minutes. No code required. No selectors to write. Just describe your tests in plain English and let self-healing do the rest.
Automate your QA — no code required
Stop writing test scripts.
Start shipping with confidence.
Join thousands of QA teams using Robonito to automate testing in minutes — not months.