
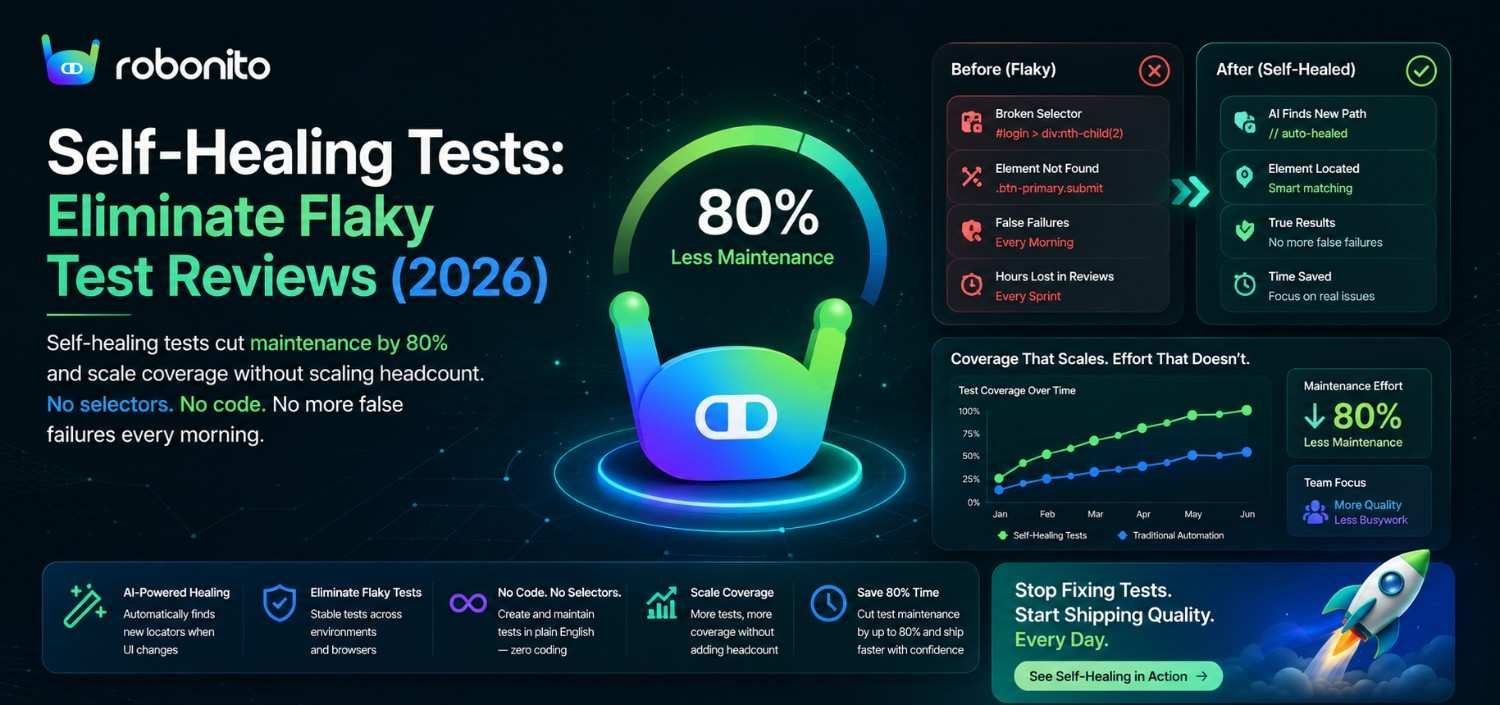
Every QA team hits the same wall eventually. Your test suite grows to hundreds — maybe thousands — of tests, and then one morning, a developer changes a button label from "Submit" to "Confirm." Suddenly, 47 tests fail. None of them found a real bug. Your team spends the next two days triaging, reviewing, and fixing brittle locators instead of testing anything meaningful. This is where self-healing tests change the equation entirely. Test maintenance is the silent killer of automation ROI, and as release cycles compress from weeks to days, the problem is compounding. Teams that once celebrated reaching 80% automation coverage now dread the maintenance burden that comes with it. In this post, we'll break down why test maintenance spirals out of control, how different approaches tackle the problem, and how self-healing QA automation lets teams — especially those without dedicated automation engineers — stay productive at scale.
The Hidden Cost of Test Maintenance for QA Teams
Ask most engineering managers how much time their QA team spends on test maintenance, and they'll guess somewhere around 20%. The real number is almost always worse.
A 2023 study by Sauce Labs found that QA engineers spend up to 40% of their time maintaining existing tests rather than creating new ones or doing exploratory testing. That's not a minor inefficiency — it's nearly half your team's capacity disappearing into busywork.
Here's what that looks like in practice:
- Triage time: A nightly regression suite finishes with 60 failures. Someone has to open each one, determine whether it's a real bug or a broken test, and route it accordingly.
- Locator rot: A front-end refactor changes CSS class names across 30 components. Every selector-based test touching those components breaks simultaneously.
- Context switching: Developers push a clean feature, but the CI pipeline goes red because three unrelated tests are flaky. The team stops what they're doing to investigate.
The hidden cost isn't just the hours — it's the trust erosion. When test failures are wrong more often than they're right, teams start ignoring them. They skip the review. They mute the Slack notifications. And then a real regression slips through to production because nobody believed the suite anymore.
Consider a mid-size SaaS team with 1,200 automated tests and bi-weekly releases. If even 5% of those tests require maintenance each sprint, that's 60 tests to fix every two weeks. At 20–30 minutes per fix (locate the issue, update the selector, rerun, verify), you're looking at 20–30 hours of pure maintenance per sprint — essentially one full-time engineer doing nothing but keeping existing tests alive.
That's the real cost: not just time, but opportunity cost. Every hour spent fixing a flaky locator is an hour not spent catching actual bugs. How to calculate the ROI of test automation
Why Flaky Tests Are Getting Worse as Apps Ship Faster
Flaky test automation isn't a new problem, but it's accelerating — and the reason is structural, not technical.
Modern development teams are shipping faster than ever — DORA's 2025 State of DevOps research shows that high-performing teams deploy multiple times per day. Daily deployments. Feature flags. Micro-frontends. A/B tests that swap entire UI components in production. Each of these practices is good for product velocity, but every one of them creates entropy in your test suite.
Here's the compounding dynamic:
- More frequent UI changes: When your team ships daily, the UI changes daily. Every CSS class rename, component restructure, or layout tweak is a potential test-breaker.
- Dynamic rendering: Single-page applications render elements asynchronously. A test that passed at 200ms network latency fails at 400ms — not because the app is broken, but because the wait condition was too optimistic.
- Shared environments: QA environments get polluted. Test data from one run bleeds into the next. A test that creates a user with a unique email fails because a parallel run already claimed that email.
A QA lead at a fintech startup, shared during a Robonito onboarding session, described their experience bluntly: "We went from monthly releases to weekly releases, and our test failure rate tripled within two months. We hadn't changed a single test — the app just evolved out from under them."
This is the core tension: the faster you ship, the faster your tests decay. And traditional test automation frameworks offer no built-in mechanism to handle that decay. They assume the test knows exactly what the UI looks like — and when it doesn't, they fail loudly and indiscriminately.
To reduce test flakiness at scale, you need a fundamentally different approach. You need tests that understand intent, not just element coordinates.
Visual AI vs. Self-Healing Tests: Two Approaches to the Same Problem
Tools like Applitools have popularized Visual AI as an answer to test maintenance. The approach is compelling: instead of asserting on individual elements, you take a screenshot of the entire page and use AI to detect visual differences between runs. If the page "looks right," the test passes.
This solves certain problems well. Visual regression testing catches layout shifts, font changes, and rendering bugs that traditional functional tests miss entirely. If your primary concern is "does this page look the same as it did yesterday," Visual AI is a strong choice.
But for most QA teams, the pain point isn't visual regression — it's functional test breakage caused by UI changes that don't affect behavior.
Here's where the approaches diverge:
| Concern | Visual AI | Self-Healing Tests |
|---|---|---|
| Button label changes from "Submit" to "Confirm" | Flags as a visual difference; requires human review | Recognizes the element by context and adapts automatically |
| CSS class refactor across components | May not detect (visual output unchanged) | Heals broken selectors without intervention |
| New element added above a form | Flags a layout shift for review | Adjusts to the new DOM structure seamlessly |
| Requires coding skills to set up | Often needs integration with existing coded frameworks | No-code setup, accessible to manual QA engineers |
The critical difference: Visual AI adds a review step, while self-healing tests remove a review step.
For teams with dedicated automation engineers and established frameworks, adding Applitools-style visual checkpoints into existing Selenium or Cypress suites makes sense. But for teams where QA engineers aren't writing code — which is the majority, according to the Capgemini World Quality Report 2025 — the more practical solution is tests that simply don't break when the UI changes in non-functional ways.
Self-healing QA automation doesn't replace visual testing. It solves a different, arguably more common problem: keeping functional tests alive without constant human babysitting.
How Self-Healing Tests Work (Without Requiring Code Changes)
The concept of self-healing tests sounds like magic, but the mechanism is straightforward once you understand it.
Traditional test automation identifies elements using a single locator strategy — typically a CSS selector, XPath expression, or element ID. When that one identifier changes, the test breaks. It's a single point of failure for every interaction in your test.
Self-healing tests use a multi-signal identification approach. Instead of relying on one locator, the system builds a composite profile of each element based on multiple attributes:
- Visual position: Where is the element on the page relative to other elements?
- Text content: What does the element say? ("Submit," "Confirm," "Save Changes")
- Semantic role: Is it a button? A text input? A dropdown?
- Surrounding context: What labels, headings, or other elements are nearby?
- Behavioral patterns: What happens when you interact with it? Does it submit a form? Open a modal?
When the test runs and the primary identifier fails, the healing engine evaluates these secondary signals to find the most likely matching element. If the confidence score exceeds a threshold, the test automatically adapts and continues execution.
If you're evaluating different approaches, our guide on Agentic QA Automation explains how intent-based testing extends beyond traditional self-healing techniques and enables autonomous test creation and execution.
Here's a concrete example:
Your test includes a step: "Click the 'Add to Cart' button on the product page." A developer refactors the component library. The button's data-testid changes from btn-add-cart to product-cta-primary, and it moves from below the price to beside it.
In a traditional framework, this test fails immediately. In a self-healing system:
- The original identifier fails.
- The healing engine scans the page for buttons with text matching or similar to "Add to Cart."
- It finds a button with the text "Add to Cart," with a semantic role of
button, near a price element. - Confidence score: 96%. The test heals, clicks the button, and continues.
- The healed locator is logged so your team can review the change later — but the test never stopped running.
Crucially, this entire process happens at runtime with zero code changes required from anyone on your team. There's no selector to update, no pull request to file, no merge conflict to resolve. How Robonito's no-code test automation works
Real-World Impact: Reducing Test Review Time by 80%
Numbers tell the story better than promises. Let's walk through what AI test maintenance looks like in practice for a team making the shift.
Scenario: E-commerce platform, 800 automated tests, weekly releases
Before self-healing:
- Average of 35–50 test failures per release cycle
- Of those, 70–80% were false failures (locator changes, timing issues, environment flakiness) — consistent with Robonito customer data showing that the majority of CI/CD test failures in actively developed UIs stem from locator drift rather than genuine bugs
- QA team of 4 spent ~15 hours per week triaging and fixing broken tests
- Mean time to resolve a flaky test: 25 minutes
- Developers lost trust in the suite and routinely merged code despite red pipelines
After implementing self-healing tests:
- Test failures per release dropped to 8–12
- 95% of locator-related failures were healed automatically
- Triage time dropped from 15 hours/week to ~3 hours/week — an 80% reduction
- Remaining failures were almost exclusively real bugs, which restored developer trust
- The QA team redirected recovered time to exploratory testing and expanding coverage
The 80% figure isn't hypothetical — it aligns with findings from Capgemini's World Quality Report 2025 documenting that teams spend 40-60% of automation effort on maintenance rather than new coverage. When the vast majority of test failures stem from UI changes rather than actual defects, eliminating those false positives transforms the economics of your test suite.
Another scenario worth considering: a team scaling up coverage. A B2B SaaS company wants to go from 200 tests to 1,000 tests over the next two quarters. Without self-healing, they know that 5x more tests means roughly 5x more maintenance. The math doesn't work — they'd need to hire another QA engineer just to keep the lights on.
With self-healing tests, the maintenance burden scales sub-linearly. More tests get created, but the healing engine absorbs the locator churn that would otherwise create proportional maintenance work. The team scales coverage without scaling headcount.
This is where self-healing QA automation isn't just a convenience — it's a strategic enabler for teams that need to grow test coverage without growing their team.
When Self-Healing Isn't Enough
Self-healing tests eliminate one of the biggest maintenance burdens in modern QA, but they are not designed to solve every type of software quality problem. Understanding these boundaries helps teams apply the technology effectively.
Self-healing is not a replacement for updating tests when business requirements fundamentally change.
For example:
| Scenario | Self-Healing Appropriate? | Why |
|---|---|---|
| CSS classes renamed | ✅ Yes | Element intent remains unchanged |
| Button moved within the page | ✅ Yes | Context remains the same |
| Material UI migration | ✅ Yes | Structure changes but workflow is identical |
| Checkout flow redesigned from 3 steps to 1 | ❌ No | User journey changed |
| Business rules updated | ❌ No | Expected assertions must change |
| API response contract modified | ❌ No | Functional behavior changed |
| Performance bottlenecks | ❌ No | Requires performance testing tools |
| Security vulnerabilities | ❌ No | Requires dedicated security testing |
A useful rule of thumb is simple:
If the user's goal hasn't changed, self-healing usually can adapt. If the application's behavior has changed, the test itself should evolve.
This distinction allows QA teams to focus maintenance only where genuine application changes occur instead of spending time repairing broken selectors after every UI update.
When to Use Self-Healing vs. When to Rewrite a Test
Self-healing tests are powerful, but they aren't a magic solution for every failure. Understanding their boundaries helps you use them effectively.
Self-healing works best when:
- Element identifiers change but behavior stays the same. Button renames, CSS refactors, DOM restructuring — these are the bread and butter of self-healing.
- Layout shifts move elements but don't change functionality. A form field moves from the left column to the right column. The test should still fill it in.
- Minor text changes occur. "Sign Up" becomes "Create Account." The intent is identical; only the label changed.
- Component libraries get upgraded. Material UI v4 to v5, Bootstrap version bumps — these cause widespread locator breakage with zero functional impact.
You should rewrite (not heal) a test when:
- The underlying workflow has fundamentally changed. If a three-step checkout becomes a single-page checkout, your existing test steps don't map to reality anymore. No amount of healing will fix a test whose logic is wrong.
- New features replace old ones. The "Edit Profile" page is replaced by a settings modal. The test needs to reflect the new interaction pattern.
- Business rules have changed. If the discount logic now applies differently, the test assertions need to be updated — that's not a locator problem.
- The confidence score is consistently low. If the healing engine is struggling to find matches and falling below confidence thresholds, that's a signal the page has changed enough that a fresh test is warranted.
A practical heuristic: if the test's intent is still valid, self-healing will handle it. If the intent itself has changed, rewrite the test.
In Robonito, healed tests are flagged in your dashboard with a confidence indicator. This gives your team a daily triage list that's short and meaningful — instead of reviewing 50 failures, you're reviewing 5 healed tests that fell below the confidence threshold and maybe 3 genuine bugs. That's a 10-minute standup item, not a half-day ordeal.
How to Set Up Self-Healing Tests in Robonito in Minutes
One of the biggest barriers to adopting self-healing QA automation is the assumption that it requires complex setup — model training, configuration tuning, or integration with existing coded frameworks. With Robonito, it doesn't.
Here's the actual setup process:
Step 1: Create Your Test in Plain Language
Open Robonito and describe your test steps naturally:
- Go to the login page
- Enter "testuser@example.com" in the email field
- Enter "securepassword" in the password field
- Click "Sign In"
- Verify that the dashboard page loads
- Check that the welcome message says "Hello, Test User"
No CSS selectors. No XPath. No element IDs. You describe what a human would do, and Robonito interprets it.
Step 2: Run the Test Once
Robonito executes the test against your application and builds its multi-signal element profile automatically. It learns the visual position, text, semantic role, and context of every element it interacts with — all from that single run.
Step 3: Self-Healing Is On by Default
There's no toggle to enable, no configuration file to edit. Every test you create in Robonito is self-healing from the start. When an element changes, the healing engine activates automatically on the next run.
Step 4: Review the Healing Log (When You Want To)
Your Robonito dashboard shows which tests healed, what changed, and the confidence score for each healed interaction. You can approve the healing (making it the new baseline) or flag it for manual review.
Step 5: Connect to Your CI/CD Pipeline
Robonito integrates with Jenkins, GitHub Actions, GitLab CI, CircleCI, and other major CI/CD tools. Once connected, your self-healing tests run on every push, every PR, or on a schedule — and they keep themselves healthy without your intervention.
The entire setup, from first test to CI/CD integration, typically takes less than an hour. Teams are productive the same day they start — not weeks later after training on a new framework.
Frequently Asked Questions
What causes flaky tests in automated test suites?
Flaky tests have three primary causes. The most common is locator rot: when a developer renames a CSS class, changes an element ID, or restructures a component, any test using that locator as its primary identifier fails — even though the application's functionality is unchanged. The second cause is dynamic rendering: single-page applications render elements asynchronously, so a test that passed at 200ms network latency fails at 400ms because the wait condition was too optimistic. The third cause is shared environment pollution: test data from one run bleeds into the next, causing failures based on prior state rather than actual bugs. Of these three, locator rot accounts for the majority of false failures in actively developed applications.
What is the difference between self-healing tests and visual AI testing?
Visual AI captures screenshots at test checkpoints and uses computer vision to detect visual differences between runs, flagging layout shifts, font changes, and rendering regressions. Self-healing tests keep functional tests running by adapting element references when DOM structure changes. The key difference is what each approach does when a button label changes from "Submit" to "Confirm": visual AI flags it as a visual difference requiring human review; a self-healing test recognises the element by context and adapts automatically without adding a review step. Visual AI adds oversight to the assertion layer; self-healing removes maintenance from the interaction layer. Both approaches solve different problems — for teams where the primary pain is locator breakage rather than visual regression, self-healing addresses the higher-volume failure category.
When should you let self-healing fix a test versus rewriting the test entirely?
Self-healing is the right response when the test's intent is still valid but the surface-level implementation has changed: button renames, CSS refactors, DOM restructuring, component library upgrades, or minor text changes. Rewriting is the right response when the intent itself has changed: a three-step checkout becoming a single-page checkout, a feature being replaced by a different interaction pattern, or business rules changing in a way that makes the existing assertions incorrect. A practical signal: if the self-healing engine's confidence score is consistently low for a particular test, that is a sign the page has changed enough that a fresh test is warranted rather than repeated healing attempts.
How do self-healing tests scale test coverage without scaling headcount?
Traditional test suites scale maintenance linearly with test count — five times more tests means roughly five times more maintenance work. Self-healing tests break this relationship by absorbing the locator churn that would otherwise create proportional maintenance overhead. When the healing engine automatically resolves the majority of locator-related failures, teams can grow test coverage from 200 tests to 1,000 tests without needing to hire additional QA engineers just to keep existing tests passing. The maintenance burden scales sub-linearly because the healing engine handles the category of work — selector updates, locator fixes, minor structural adaptations —that historically required human time proportional to suite size.
How long does it take to set up self-healing tests with a no-code platform?
Based on Robonito onboarding data, the full setup from first test to CI/CD integration typically takes less than an hour. The process has five steps: create a test in plain language describing user actions without any CSS selectors or code; run the test once so the platform builds its multi-signal element profile; self-healing activates automatically with no configuration required; review the healing log when you choose to see which elements adapted and at what confidence level; connect to your CI/CD pipeline through native integrations with Jenkins, GitHub Actions, GitLab CI, or CircleCI. Unlike framework-based approaches that require training and configuration, no-code self-healing platforms allow QA teams to be productive the same day they start.
Automation should scale with your application—not with your maintenance workload. The best automated test is the one your team never has to repair manually.
Start Eliminating Flaky Test Reviews Today
Test maintenance at scale doesn't have to consume your team. Flaky tests aren't inevitable — they're a symptom of brittle automation approaches that were designed for a slower era of software development.
Self-healing tests offer a fundamentally better model: tests that understand what they're supposed to do and adapt when the surface-level details change. No code to maintain. No selectors to update. No trust-eroding false failures clogging your pipeline every morning.
Robonito makes self-healing tests accessible to every QA team — not just those with dedicated automation engineers and custom frameworks. If your team can describe a test in plain language, they can build a self-healing test suite that scales with your application.
Try Robonito free → Set up your first self-healing test in minutes and see how much time your team gets back.
Automate your QA — no code required
Stop writing test scripts.
Start shipping with confidence.
Join thousands of QA teams using Robonito to automate testing in minutes — not months.